
JDP37GP, JDP39WR, JDP36GP specifications
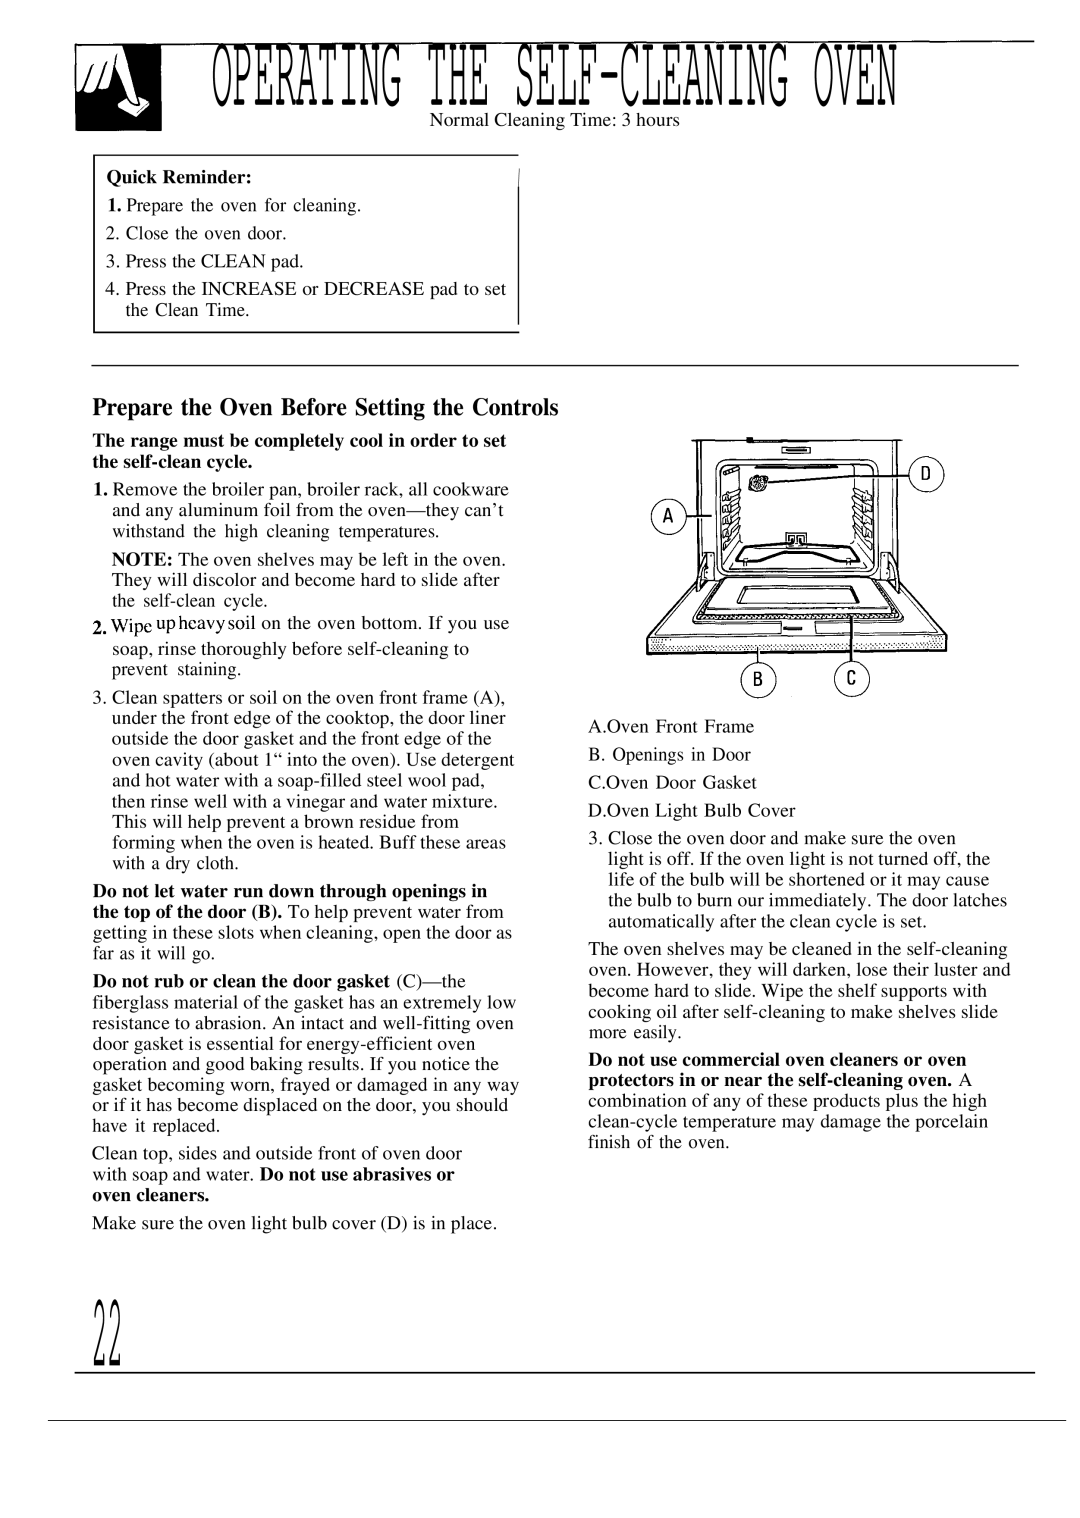
The GE JDP36GP, JDP39WR, and JDP37GP are advanced, high-performance kitchen appliances designed to elevate the culinary experience while ensuring convenience and efficiency. Each model boasts key features, innovative technologies, and unique characteristics that cater to diverse cooking needs.The GE JDP36GP is renowned for its sleek design and versatility. This model includes a powerful 5.3 cubic feet oven capacity, accommodating multiple dishes simultaneously. The oven features a True European Convection system that ensures even baking and roasting by circulating hot air throughout the oven cavity. This technology is complemented by a self-cleaning option, making maintenance hassle-free. The JDP36GP also integrates advanced temperature management with a built-in meat probe, allowing users to achieve perfect results every time.
The JDP39WR, on the other hand, stands out with its expansive 5.0 cubic feet capacity, particularly suited for large families or anyone who frequently entertains guests. This model includes an edge-to-edge cooktop that maximizes cooking space and provides a seamless cooking surface. The oven features a hidden bake element for easy cleaning and the unique GE Secure-Fit rack system that allows for flexible rack positioning to accommodate various dish sizes. Additionally, with its Precision Cooking mode, users can select specific cooking techniques, ensuring optimal results with minimal effort.
Lastly, the GE JDP37GP combines efficiency and innovation in a compact design. It features a 4.6 cubic feet oven and a versatile gas cooktop, which includes powerful burners for rapid boiling and simmering. This model includes an integrated griddle that enables users to create breakfast favorites like pancakes and bacon on the same surface. The JDP37GP also incorporates smart features, such as Wi-Fi connectivity that allows users to control oven functions remotely through a smartphone app, facilitating a modern, connected cooking experience.
Overall, all three models—JDP36GP, JDP39WR, and JDP37GP—are equipped with user-friendly controls and smart technologies that enhance safety and convenience in the kitchen. With various features designed for efficiency and ease of use, these appliances cater to both novice and experienced cooks looking to upgrade their kitchen setups. Each model combines functionality with style, making them excellent choices for any home chef.