Using the probe. (on some models)

www.GEAppliances.com

For many foods, especially roasts and poultry, internal food temperature is the best test for doneness. The temperature probe takes the guesswork out of cooking foods to the exact doneness you want.

Safety

The temperature probe has a skewer-like probe at one end and a plug at the other end that goes into the outlet in the oven.

Use of probes other than the one provided with this product may result in damage to the probe.

Use the handles of the probe and plug when inserting and removing them from the food and outlet.

To avoid damaging your probe, do not use tongs to pull on the cable when removing it.

To avoid breaking the probe, make sure food is completely defrosted before inserting.

To prevent possible burns, do not unplug the probe from the outlet until the oven has cooled.

Cable

Plug

Probe

Handles

Never leave your probe inside the oven during a self-cleaning cycle.

Do not store the probe in the oven.

Instructions Operating Instructions

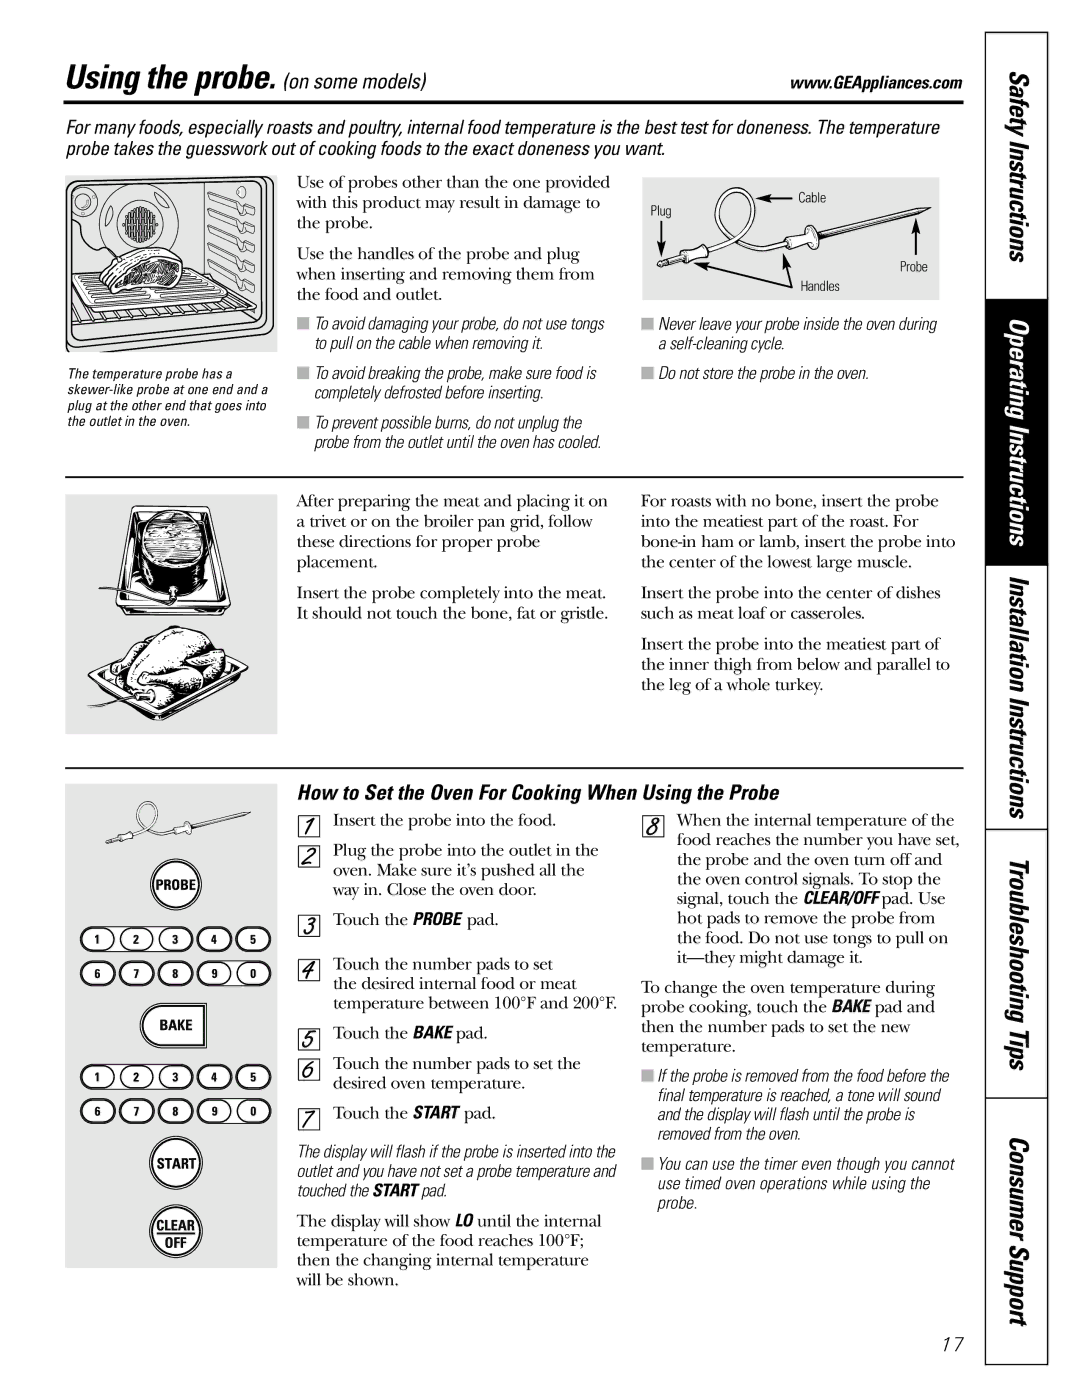
After preparing the meat and placing it on a trivet or on the broiler pan grid, follow these directions for proper probe placement.

Insert the probe completely into the meat. It should not touch the bone, fat or gristle.

For roasts with no bone, insert the probe into the meatiest part of the roast. For bone-in ham or lamb, insert the probe into the center of the lowest large muscle.

Insert the probe into the center of dishes such as meat loaf or casseroles.

Insert the probe into the meatiest part of the inner thigh from below and parallel to the leg of a whole turkey.

Installation Instructions

How to Set the Oven For Cooking When Using the Probe

Insert the probe into the food.

Plug the probe into the outlet in the oven. Make sure it’s pushed all the way in. Close the oven door.

Touch the PROBE pad.

Touch the number pads to set the desired internal food or meat temperature between 100°F and 200°F.

Touch the BAKE pad.

Touch the number pads to set the desired oven temperature.

Touch the START pad.

The display will flash if the probe is inserted into the outlet and you have not set a probe temperature and touched the START pad.

The display will show LO until the internal temperature of the food reaches 100°F; then the changing internal temperature will be shown.

When the internal temperature of the food reaches the number you have set, the probe and the oven turn off and the oven control signals. To stop the signal, touch the CLEAR/OFF pad. Use hot pads to remove the probe from the food. Do not use tongs to pull on it—they might damage it.

To change the oven temperature during probe cooking, touch the BAKE pad and then the number pads to set the new temperature.

If the probe is removed from the food before the final temperature is reached, a tone will sound and the display will flash until the probe is removed from the oven.

You can use the timer even though you cannot use timed oven operations while using the probe.

Troubleshooting Tips Consumer Support

17

Page 17
Image 17
GE JGB915 Using the probe. on some models, How to Set the Oven For Cooking When Using the Probe, Installation Instructions

JGB915, JGB905 specifications

The GE JGB905 and JGB915 are both standout models within GE's lineup of gas ranges, designed to provide a seamless cooking experience with a focus on modern technology and traditional cooking excellence. Both models feature a sleek, stainless steel design that not only enhances the kitchen's aesthetic but also ensures durability and ease of cleaning.

One of the main features of the JGB905 and JGB915 is their powerful gas burners. These ranges come equipped with multiple sealed burners, allowing for precise heat control. The variances in BTU output across the burners cater to different cooking needs, from simmering sauces to achieving high-heat sears on meats. The center oval burner, available in both models, is especially useful for accommodating larger pans or griddles.

Incorporated into these ranges is GE's advanced Edge-to-Edge cooktop, which maximizes the cooking surface. This design feature allows for the use of oversized pots and pans without sacrificing space or efficiency. Additionally, the continuous cast-iron grates provide a robust cooking surface, making it easy to slide pots from one burner to another.

When it comes to oven performance, both the JGB905 and JGB915 include an innovative convection oven. This technology circulates hot air throughout the oven cavity, promoting even cooking and browning. The ovens also feature self-cleaning options that save time and effort, allowing users to maintain a clean oven with minimal manual scrubbing.

Another characteristic of these models is the inclusion of smart technology. Equipped with built-in Wi-Fi, both ranges allow users to monitor their cooking from their smartphones. This feature adds convenience, enabling remote access to controls and notifications about the oven status, which is particularly helpful when multitasking in the kitchen.

The interior of the ovens is designed for efficiency and ample space, providing multiple rack positions to accommodate different dishes. Interior oven lighting ensures that users can easily check on their meals without opening the oven door, preserving heat and enhancing cooking precision.

In summary, the GE JGB905 and JGB915 gas ranges stand out with their sleek design, powerful burner capabilities, innovative convection technology, smart features, and user-friendly interfaces. These models cater to both novice cooks and culinary enthusiasts, making them excellent additions to any modern kitchen.