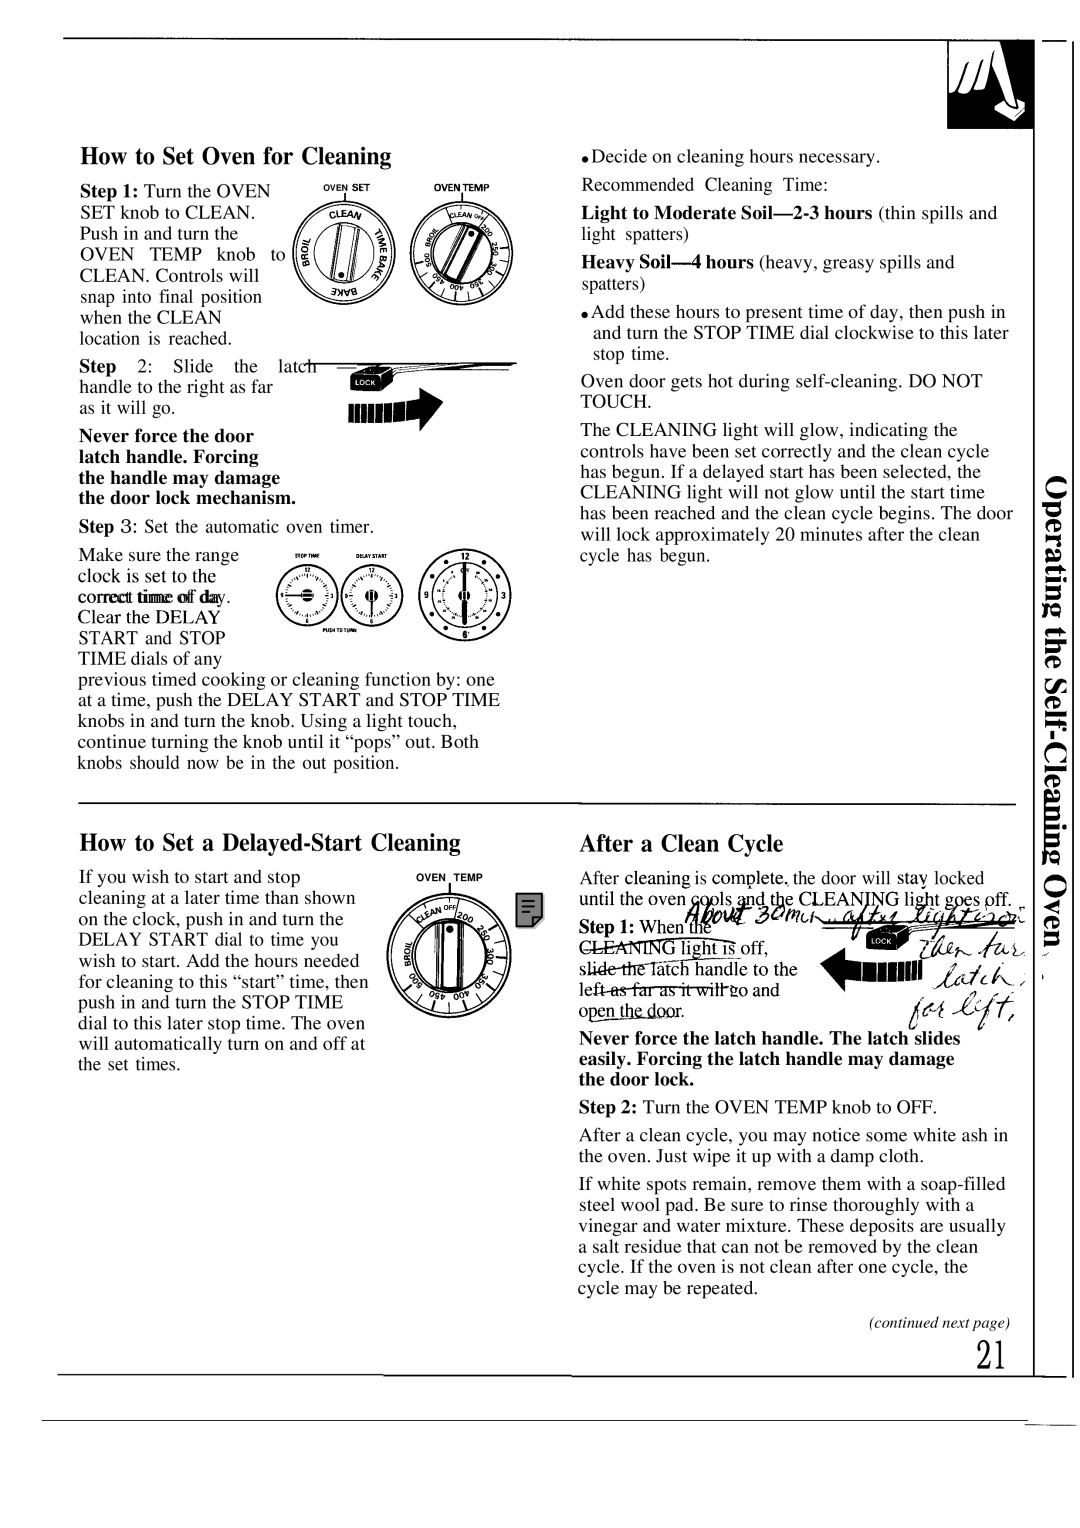
How to Set Oven for Cleaning

Step 1: Turn the OVEN

OVEN S~

OVEN~MP


SET knob to CLEAN.

c-

+

Push in and turn the


OVEN TEMP knob to ~

,L~

;

CLEAN. Controls will

snap into final position @ when the CLEAN

location is reached.

Step 2: Slide the latch — handle to the right as far

as it will go.

Never force the door latch handle. Forcing the handle may damage the door lock mechanism.

Step 3: Set the automatic oven timer.

Make sure the range

:::::;;; @o@@ correct time of day.

START and STOP

6’


TIME dials of any

previous timed cooking or cleaning function by: one at a time, push the DELAY START and STOP TIME knobs in and turn the knob. Using a light touch, continue turning the knob until it “pops” out. Both knobs should now be in the out position.

Decide on cleaning hours necessary. Recommended Cleaning Time:

Light to Moderate Soil—2-3 hours (thin spills and light spatters)

Heavy Soil- hours (heavy, greasy spills and spatters)

Add these hours to present time of day, then push in and turn the STOP TIME dial clockwise to this later stop time.

Oven door gets hot during self-cleaning. DO NOT TOUCH.

The CLEANING light will glow, indicating the controls have been set correctly and the clean cycle has begun. If a delayed start has been selected, the CLEANING light will not glow until the start time has been reached and the clean cycle begins. The door will lock approximately 20 minutes after the clean cycle has begun.

How to Set a Delayed-Start Cleaning

If you wish to start and stop

OVEN TEMP

cleaning at a later time than shown


on the clock, push in and turn the


DELAY START dial to time you


wish to start. Add the hours needed


for cleaning to this “start” time, then


push in and turn the STOP TIME


dial to this later stop time. The oven


will automatically turn on and off at


the set times.


After a Clean Cycle

After cleaning is comulete, the door will stav locked

o~n~~~r.

~$f kyc

Never force the latch handle. The latch slides easily. Forcing the latch handle may damage the door lock.

Step 2: Turn the OVEN TEMP knob to OFF.

After a clean cycle, you may notice some white ash in the oven. Just wipe it up with a damp cloth.

If white spots remain, remove them with a soap-filled steel wool pad. Be sure to rinse thoroughly with a vinegar and water mixture. These deposits are usually a salt residue that can not be removed by the clean cycle. If the oven is not clean after one cycle, the cycle may be repeated.

(continued next page)

21

Page 21
Image 21
GE JGBP29GES How to Set Oven for Cleaning, How to Set a Delayed-Start Cleaning, After a Clean Cycle, Start and Stop

JGBP30AEP, JGBP32WES, JGBP32GES, JGBP30GEP, JGBP29GEN specifications

The GE JGBP33WES, JGBP29GES, JGBP25GEN, JGBP32AES, and JGBP33GES model ranges offer a diverse array of features and technologies designed for modern kitchens. These gas ranges are known for their reliability, ease of use, and innovative designs.

The GE JGBP33WES features a clean and contemporary design in a stainless steel finish, bringing a touch of elegance to any kitchen. This model includes a removable oven door for easy cleaning and features both a conventional and a broil oven. Its electronic ignition system provides a reliable alternative to pilot lights, ensuring safety and convenience.

Similarly, the GE JGBP29GES is designed with user convenience in mind. It features a sealed cooktop with four burners, ensuring that spills and messes are contained for easier cleanup. This model also includes a large oven capacity, accommodating multiple dishes at once, ideal for family gatherings or meal preps. The self-clean feature simplifies maintenance, allowing users to focus more on cooking than on cleanup.

The JGBP25GEN model stands out with its advanced cooking features. It includes a precise simmer burner, perfect for delicate sauces or melting chocolate without scorching. The oven also offers a variable broil option, giving cooks more control over the browning of their dishes. Its durable, alloy construction ensures longevity and ease of maintenance, making it a staple in reliable home cooking.

On the other hand, the GE JGBP32AES introduces additional functionality with its continuous grates and heavy-duty cookware support. This design feature enables easy maneuvering of pots and pans across the cooktop, allowing for efficient multitasking. The range also has a powerful oven with a true convection feature, which promotes even baking and roasting—ideal for baking enthusiasts.

Finally, the GE JGBP33GES combines traditional and modern features with its intuitive controls and a spacious oven design. This model offers precision cooking with adjustable temperature settings, ensuring that every dish is cooked to perfection. The dual fuel capability gives users the flexibility to enjoy the instant heat of gas with the precision of an electric oven, appealing to a wide range of culinary preferences.

Together, these GE gas ranges represent a harmonious blend of performance, convenience, and modern design, catering to diverse cooking needs and enhancing the overall kitchen experience. From family dinners to gourmet meals, these models stand ready to deliver reliable performance for any culinary enthusiast.