Atlas & Yukon Second Stage
19.Using the
20.Remove the exhaust tee(13) from the second stage case to expose the exhaust valve(15) for inspection.
CAUTION: It is important to follow the correct procedure for removing the exhaust tee. Failure to do so can result in permanent damage to the exhaust tee and the second stage case, requiring their replacement.
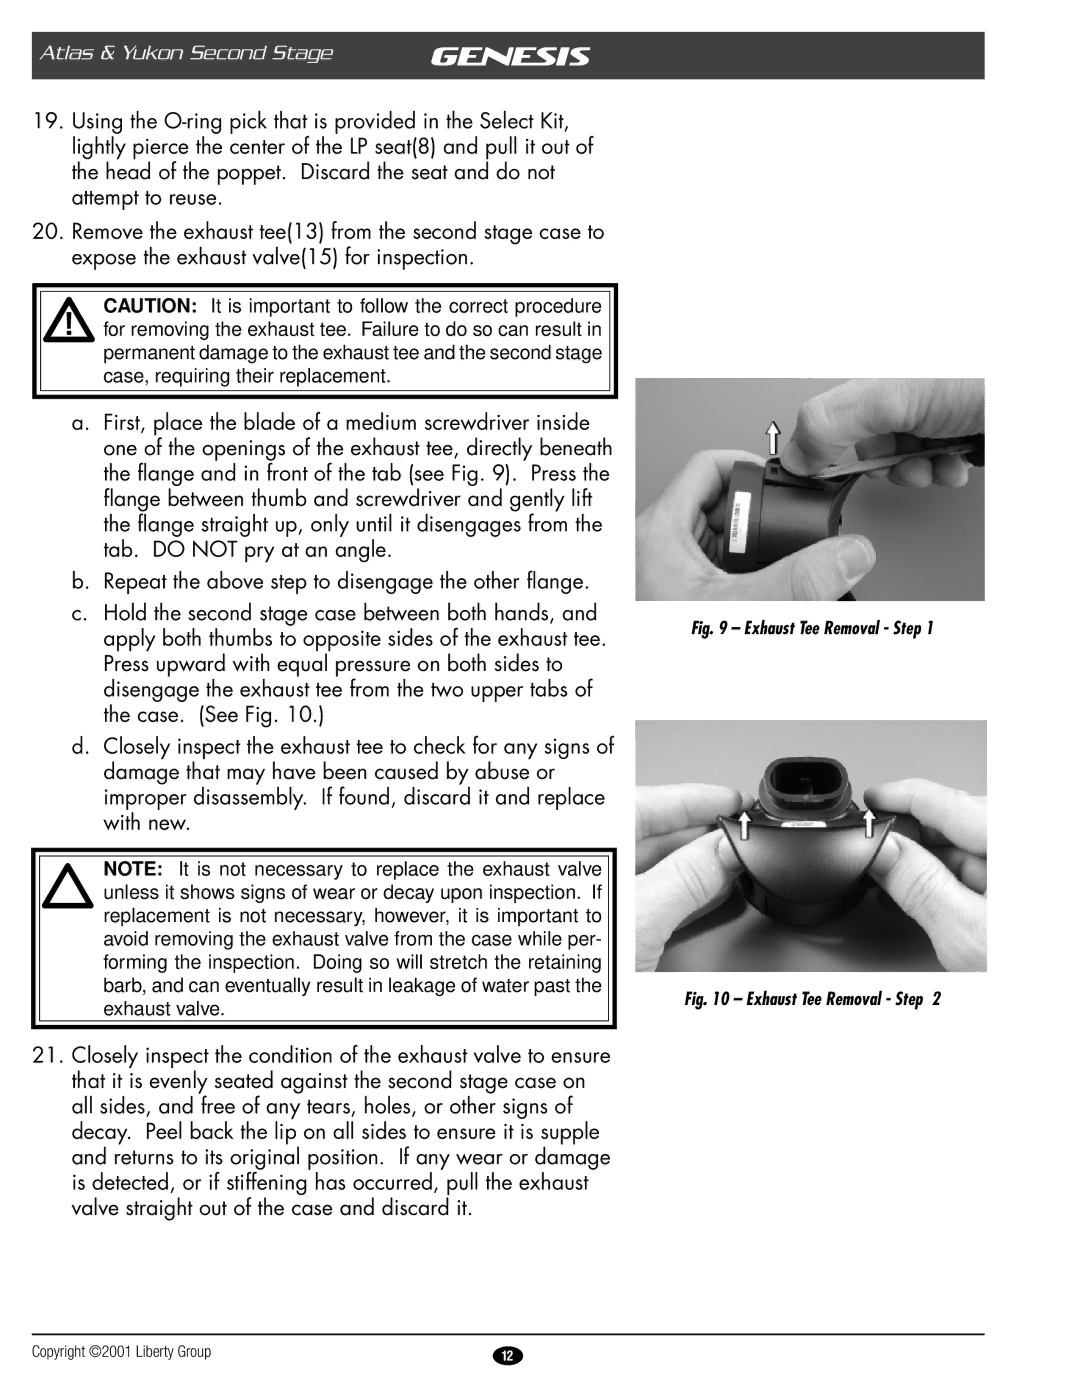
a.First, place the blade of a medium screwdriver inside one of the openings of the exhaust tee, directly beneath the flange and in front of the tab (see Fig. 9). Press the flange between thumb and screwdriver and gently lift the flange straight up, only until it disengages from the tab. DO NOT pry at an angle.
b.Repeat the above step to disengage the other flange.
c.Hold the second stage case between both hands, and apply both thumbs to opposite sides of the exhaust tee. Press upward with equal pressure on both sides to disengage the exhaust tee from the two upper tabs of the case. (See Fig. 10.)
d.Closely inspect the exhaust tee to check for any signs of damage that may have been caused by abuse or improper disassembly. If found, discard it and replace with new.
NOTE: It is not necessary to replace the exhaust valve unless it shows signs of wear or decay upon inspection. If replacement is not necessary, however, it is important to avoid removing the exhaust valve from the case while per- forming the inspection. Doing so will stretch the retaining barb, and can eventually result in leakage of water past the exhaust valve.
21.Closely inspect the condition of the exhaust valve to ensure that it is evenly seated against the second stage case on all sides, and free of any tears, holes, or other signs of decay. Peel back the lip on all sides to ensure it is supple and returns to its original position. If any wear or damage is detected, or if stiffening has occurred, pull the exhaust valve straight out of the case and discard it.
Fig. 9 – Exhaust Tee Removal - Step 1
Fig. 10 – Exhaust Tee Removal - Step 2
Copyright ©2001 Liberty Group | 12 |