English
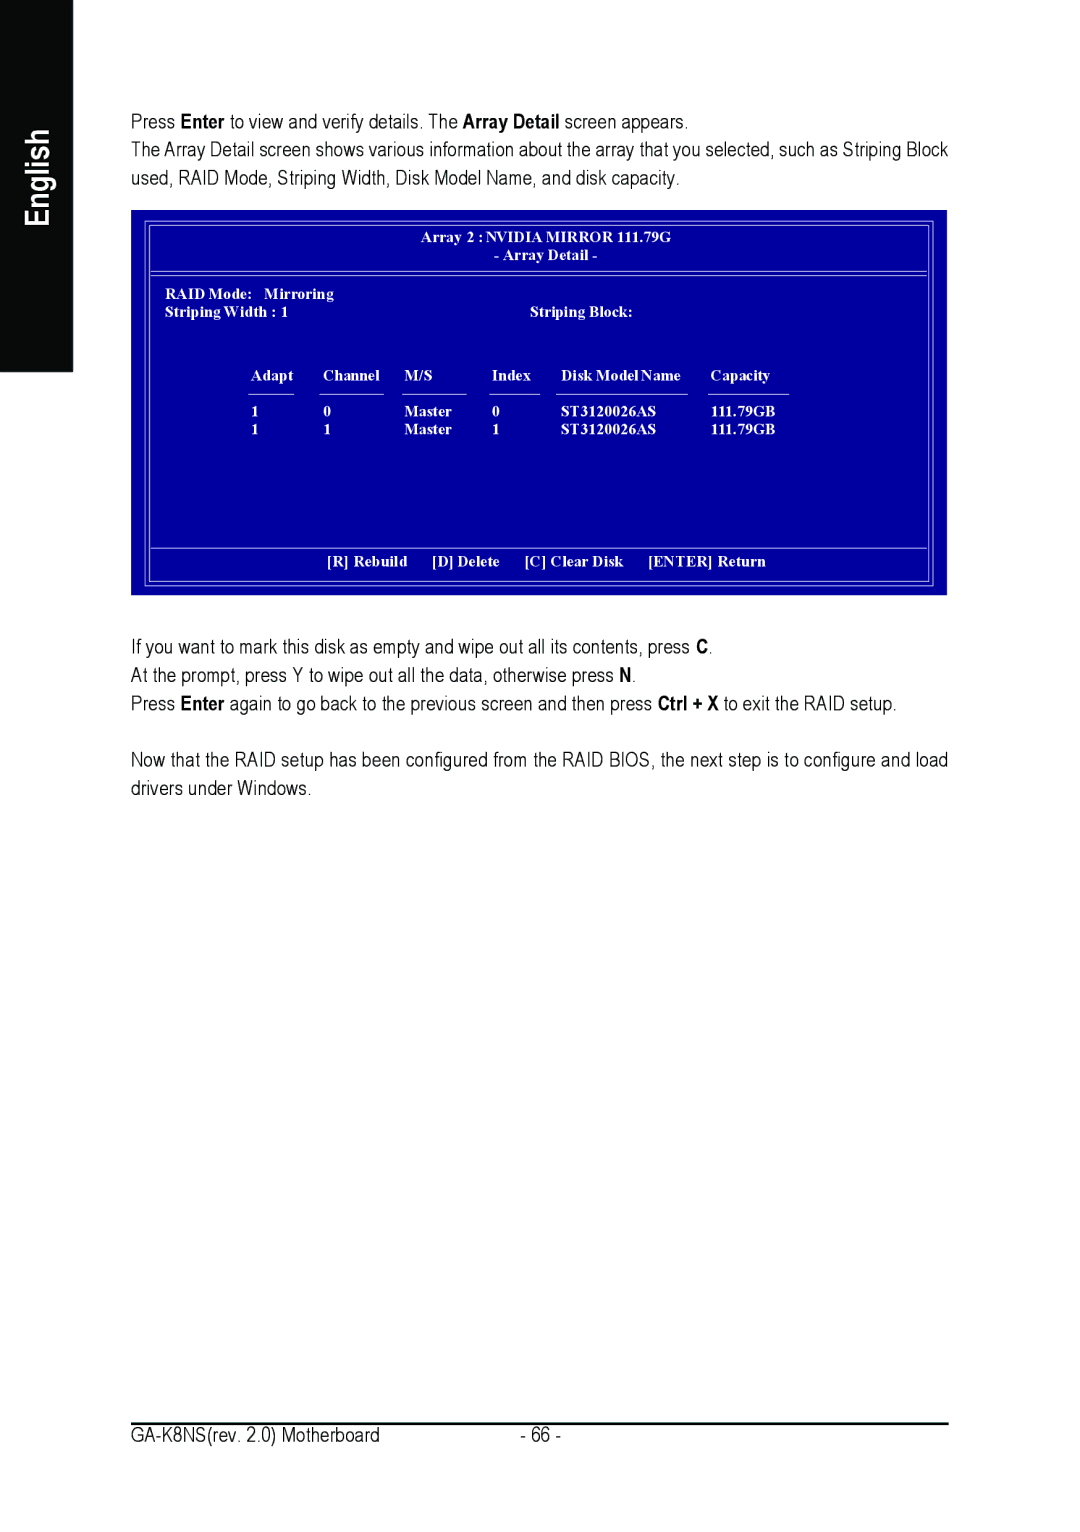
Press Enter to view and verify details. The Array Detail screen appears.
The Array Detail screen shows various information about the array that you selected, such as Striping Block used, RAID Mode, Striping Width, Disk Model Name, and disk capacity.
|
| Array 2 : NVIDIA MIRROR 111.79G |
| |||
|
|
| - Array Detail - |
| ||
RAID Mode: Mirroring |
|
|
|
|
| |
Striping Width : 1 |
|
|
|
| Striping Block: |
|
Adapt | Channel | M/S | Index | Disk Model Name | Capacity | |
1 | 0 | Master | 0 |
| ST3120026AS | 111.79GB |
1 | 1 | Master | 1 |
| ST3120026AS | 111.79GB |
| [R] Rebuild [D] Delete | [C] Clear Disk [ENTER] Return | ||||
|
|
|
|
|
|
|
If you want to mark this disk as empty and wipe out all its contents, press C. At the prompt, press Y to wipe out all the data, otherwise press N.
Press Enter again to go back to the previous screen and then press Ctrl + X to exit the RAID setup.
Now that the RAID setup has been configured from the RAID BIOS, the next step is to configure and load drivers under Windows.
- 66 - |
