Basic Connections/Auto Setup
You will need to connect the DVD+VCR to a TV and run Auto Setup. Auto Setup will automatically search for channels and then set your DVD+VCR's internal clock.
NOTES:
•See Appendix A for Advanced Connections.
•In order to view the DVD+VCR setup menu, you must use either the Standard RF or Line connection between your TV and
DVD+VCR, even if you use the
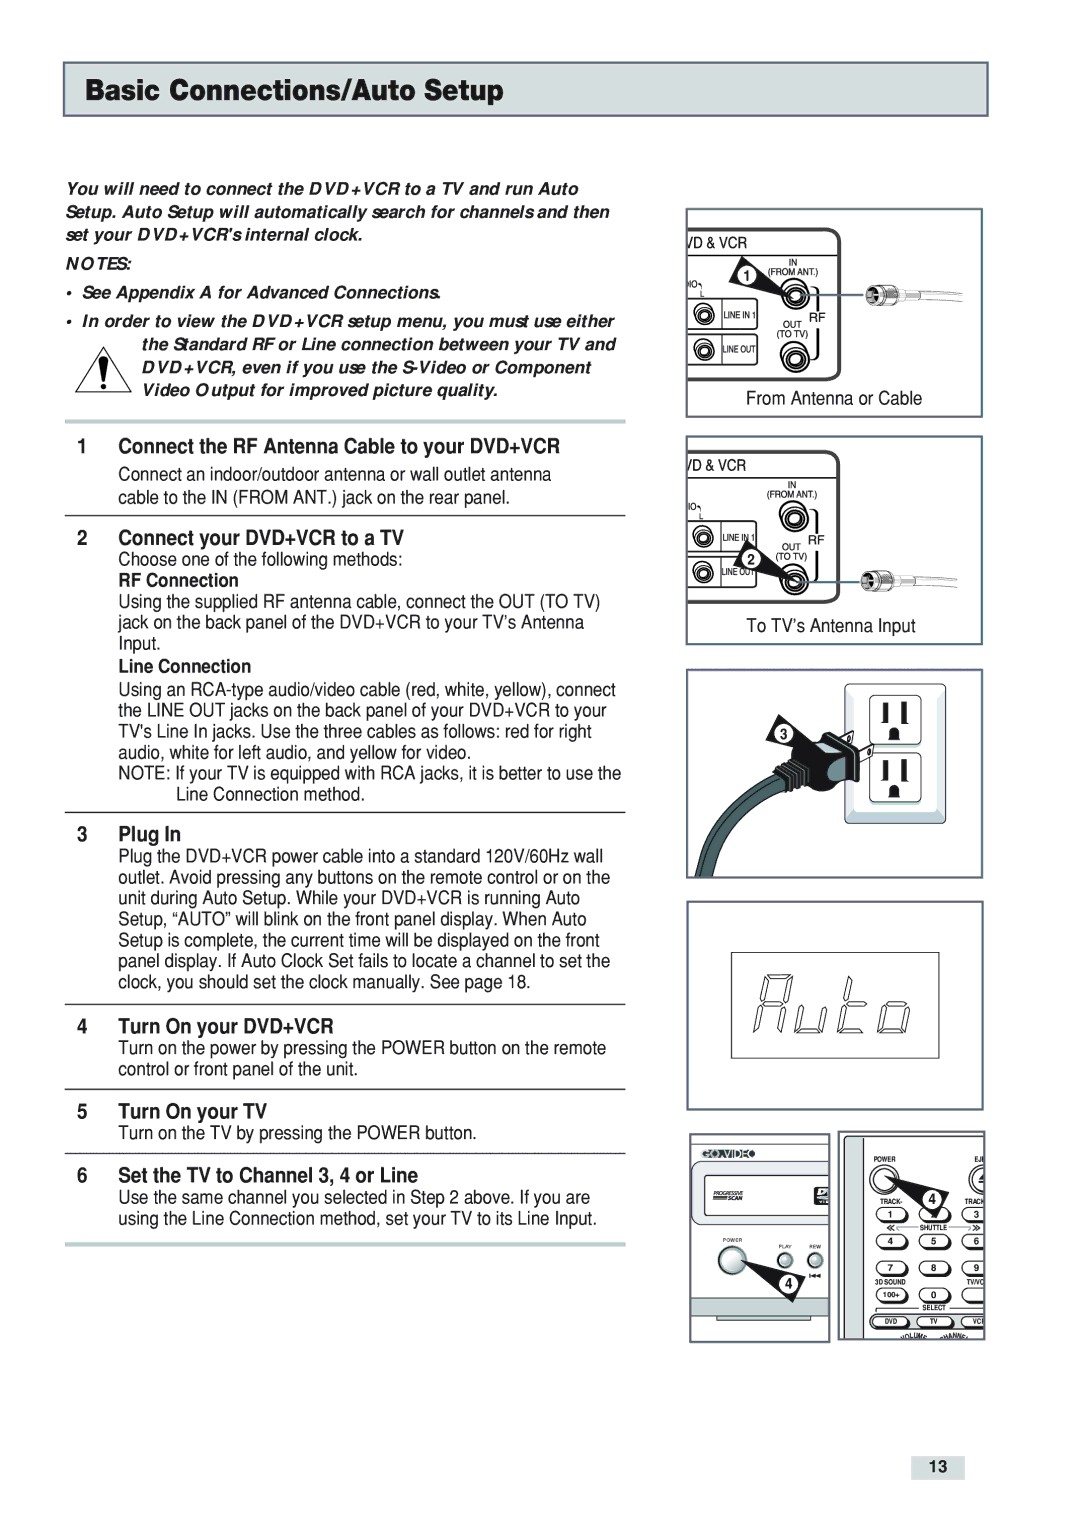
1 Connect the RF Antenna Cable to your DVD+VCR |
Connect an indoor/outdoor antenna or wall outlet antenna |
cable to the IN (FROM ANT.) jack on the rear panel. |
2 Connect your DVD+VCR to a TV |
Choose one of the following methods: |
RF Connection |
Using the supplied RF antenna cable, connect the OUT (TO TV) |
jack on the back panel of the DVD+VCR to your TV’s Antenna |
Input. |
Line Connection |
Using an |
the LINE OUT jacks on the back panel of your DVD+VCR to your |
TV's Line In jacks. Use the three cables as follows: red for right |
audio, white for left audio, and yellow for video. |
NOTE: If your TV is equipped with RCA jacks, it is better to use the |
Line Connection method. |
3 Plug In |
Plug the DVD+VCR power cable into a standard 120V/60Hz wall |
outlet. Avoid pressing any buttons on the remote control or on the |
unit during Auto Setup. While your DVD+VCR is running Auto |
Setup, “AUTO” will blink on the front panel display. When Auto |
Setup is complete, the current time will be displayed on the front |
panel display. If Auto Clock Set fails to locate a channel to set the |
clock, you should set the clock manually. See page 18. |
4 Turn On your DVD+VCR |
Turn on the power by pressing the POWER button on the remote |
control or front panel of the unit. |
5 Turn On your TV |
Turn on the TV by pressing the POWER button. |
1 |
From Antenna or Cable |
2 |
To TV’s Antenna Input |
3
6 Set the TV to Channel 3, 4 or Line |
Use the same channel you selected in Step 2 above. If you are |
using the Line Connection method, set your TV to its Line Input. |
POWER |
|
PLAY | REW |
4 |
|
POWER |
|
| EJE |
TRACK |
| 4 | TRACK |
|
|
| 3 |
| SHUTTLE |
| |
4 |
| 5 | 6 |
7 |
| 8 | 9 |
3D SOUND |
|
| TV/VC |
100+ |
| 0 |
|
| SELECT |
| |
DVD |
| TV | VCR |
LU | ANN | ||
VO | ME | CH | EL |
13