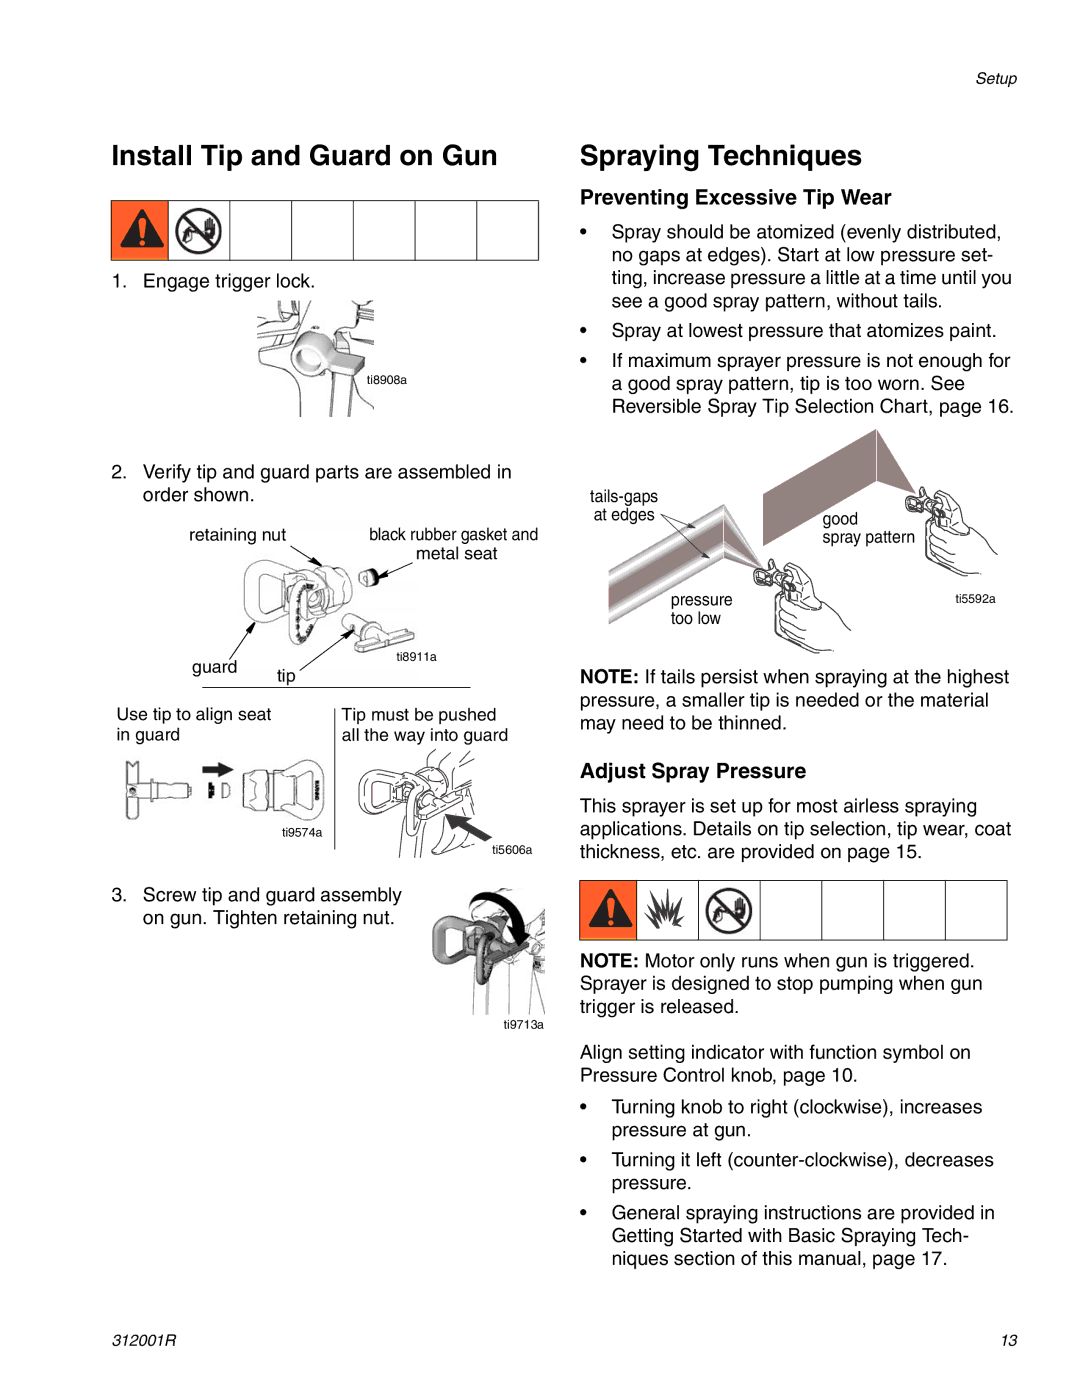
Install Tip and Guard on Gun
1. Engage trigger lock.
ti8908a
2.Verify tip and guard parts are assembled in order shown.
retaining nut | black rubber gasket and |
| metal seat |
guard | ti8911a | |||
tip |
| |||
|
| |||
Use tip to align seat | Tip must be pushed | |||
in guard | all the way into guard | |||
ti9574a
ti5606a
3.Screw tip and guard assembly on gun. Tighten retaining nut.
ti9713a
Setup
Spraying Techniques
Preventing Excessive Tip Wear
•Spray should be atomized (evenly distributed, no gaps at edges). Start at low pressure set- ting, increase pressure a little at a time until you see a good spray pattern, without tails.
•Spray at lowest pressure that atomizes paint.
•If maximum sprayer pressure is not enough for a good spray pattern, tip is too worn. See Reversible Spray Tip Selection Chart, page 16.
at edges ![]() good spray pattern
good spray pattern
pressure | ti5592a |
too low |
|
NOTE: If tails persist when spraying at the highest pressure, a smaller tip is needed or the material may need to be thinned.
Adjust Spray Pressure
This sprayer is set up for most airless spraying applications. Details on tip selection, tip wear, coat thickness, etc. are provided on page 15.
NOTE: Motor only runs when gun is triggered. Sprayer is designed to stop pumping when gun trigger is released.
Align setting indicator with function symbol on Pressure Control knob, page 10.
•Turning knob to right (clockwise), increases pressure at gun.
•Turning it left
•General spraying instructions are provided in Getting Started with Basic Spraying Tech- niques section of this manual, page 17.
312001R | 13 |