Setup
8.Spray test pattern. Aim applicator at floor. Turn air valve ON. Move applicator to spray surface.
3.Turn air valve OFF. Connect applicator to material hose and air hose. Air supply minimum require- ments vary with material thickness and desired thickness.
ti13646a
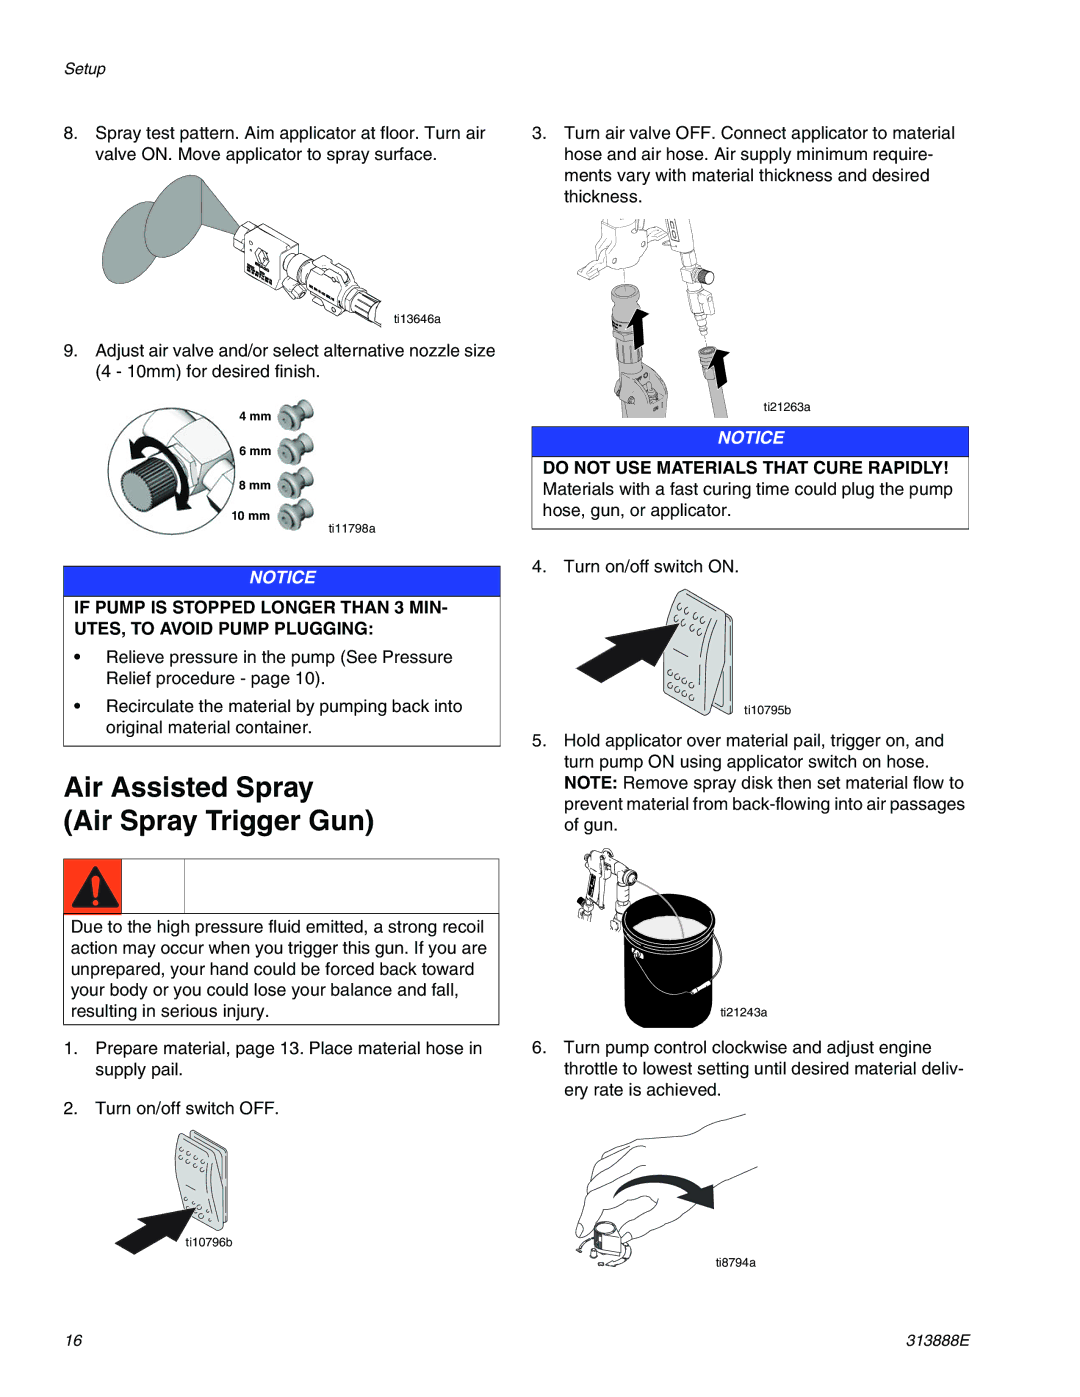
9.Adjust air valve and/or select alternative nozzle size (4 - 10mm) for desired finish.
4mm
6mm
8mm
10mm
ti11798a
NOTICE
IF PUMP IS STOPPED LONGER THAN 3 MIN- UTES, TO AVOID PUMP PLUGGING:
•Relieve pressure in the pump (See Pressure Relief procedure - page 10).
•Recirculate the material by pumping back into original material container.
Air Assisted Spray (Air Spray Trigger Gun)
Due to the high pressure fluid emitted, a strong recoil action may occur when you trigger this gun. If you are unprepared, your hand could be forced back toward your body or you could lose your balance and fall, resulting in serious injury.
1.Prepare material, page 13. Place material hose in supply pail.
2.Turn on/off switch OFF.
ti10796b
ti21263a
NOTICE
DO NOT USE MATERIALS THAT CURE RAPIDLY!
Materials with a fast curing time could plug the pump hose, gun, or applicator.
4. Turn on/off switch ON.
ti10795b
5.Hold applicator over material pail, trigger on, and turn pump ON using applicator switch on hose. NOTE: Remove spray disk then set material flow to prevent material from
ti21243a
6.Turn pump control clockwise and adjust engine throttle to lowest setting until desired material deliv- ery rate is achieved.
ti8794a
16 | 313888E |