Repair
Air Cap/Nozzle Replacement
![]() CAUTION
CAUTION
Hold the front end of the gun up and trigger the gun while removing the nozzle to help drain the gun and prevent any paint or solvent left in the gun from enter- ing the air passages.
1.Prepare gun for service, page 41.
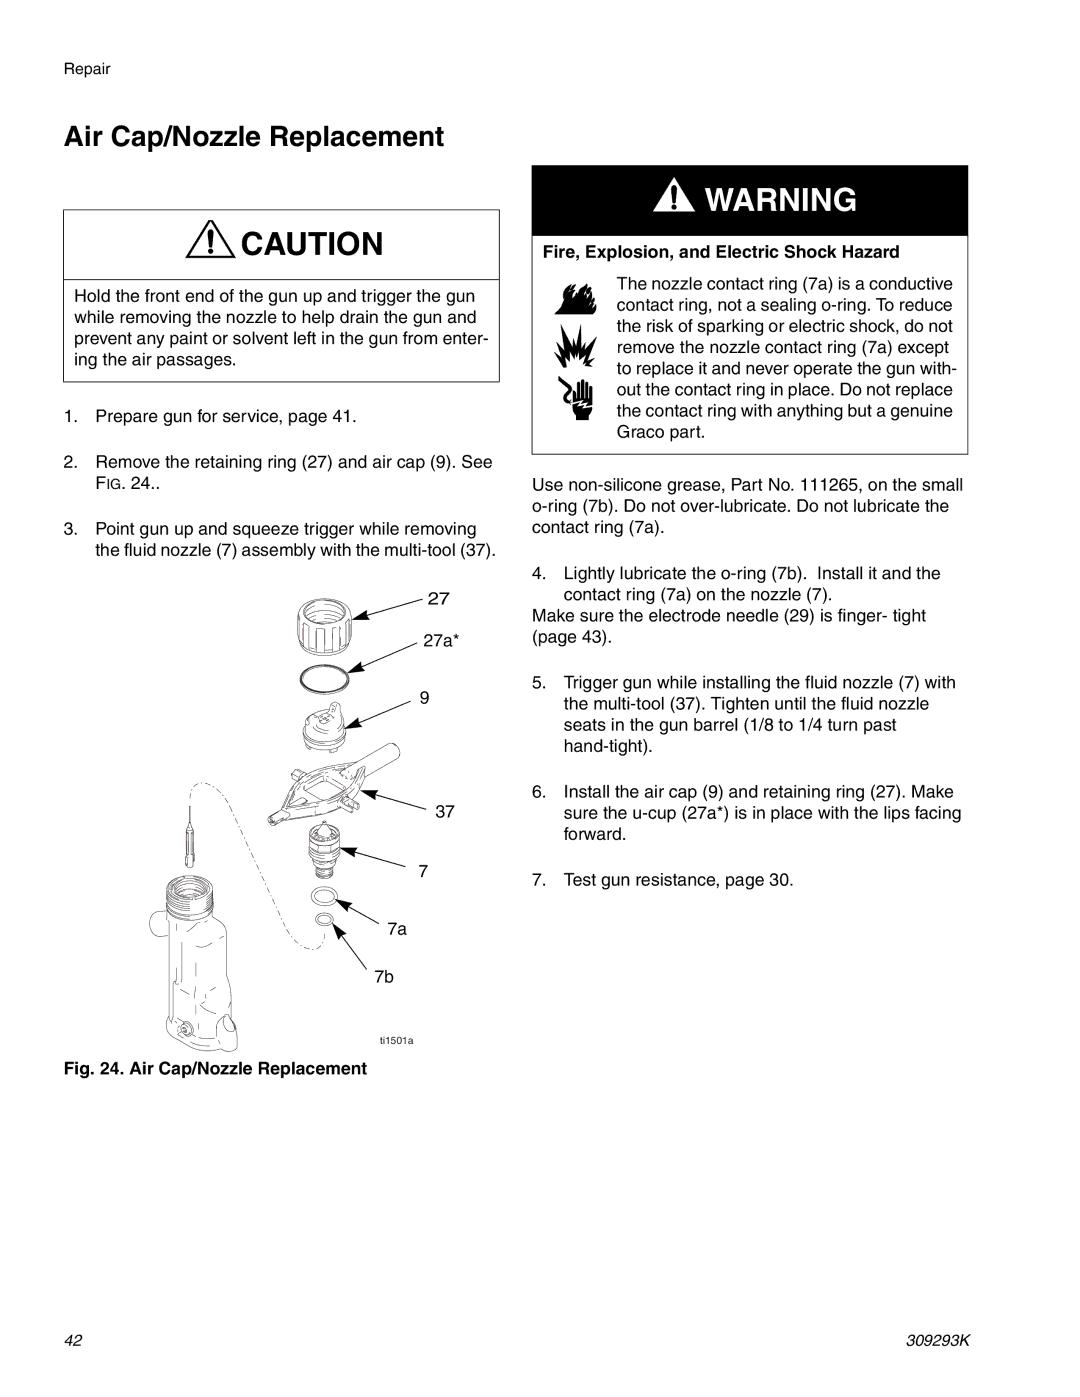
2.Remove the retaining ring (27) and air cap (9). See FIG. 24..
3.Point gun up and squeeze trigger while removing the fluid nozzle (7) assembly with the
27
27a*
9
37
7
7a
7b
ti1501a
Fig. 24. Air Cap/Nozzle Replacement
![]() WARNING
WARNING
Fire, Explosion, and Electric Shock Hazard
The nozzle contact ring (7a) is a conductive contact ring, not a sealing
Use
4.Lightly lubricate the
Make sure the electrode needle (29) is finger- tight (page 43).
5.Trigger gun while installing the fluid nozzle (7) with the
6.Install the air cap (9) and retaining ring (27). Make sure the
7.Test gun resistance, page 30.
42 | 309293K |
