Assem
• . _i_iL¸
....,i!iiii!i
Indicator
Heat
ly Step I
HAROWAREOAG
| NOTE. the | nut is already |
threaded to the back of | ||
the heat indicatorand | ||
1 Required | re,st be | removedfor |
| assembly. |
|
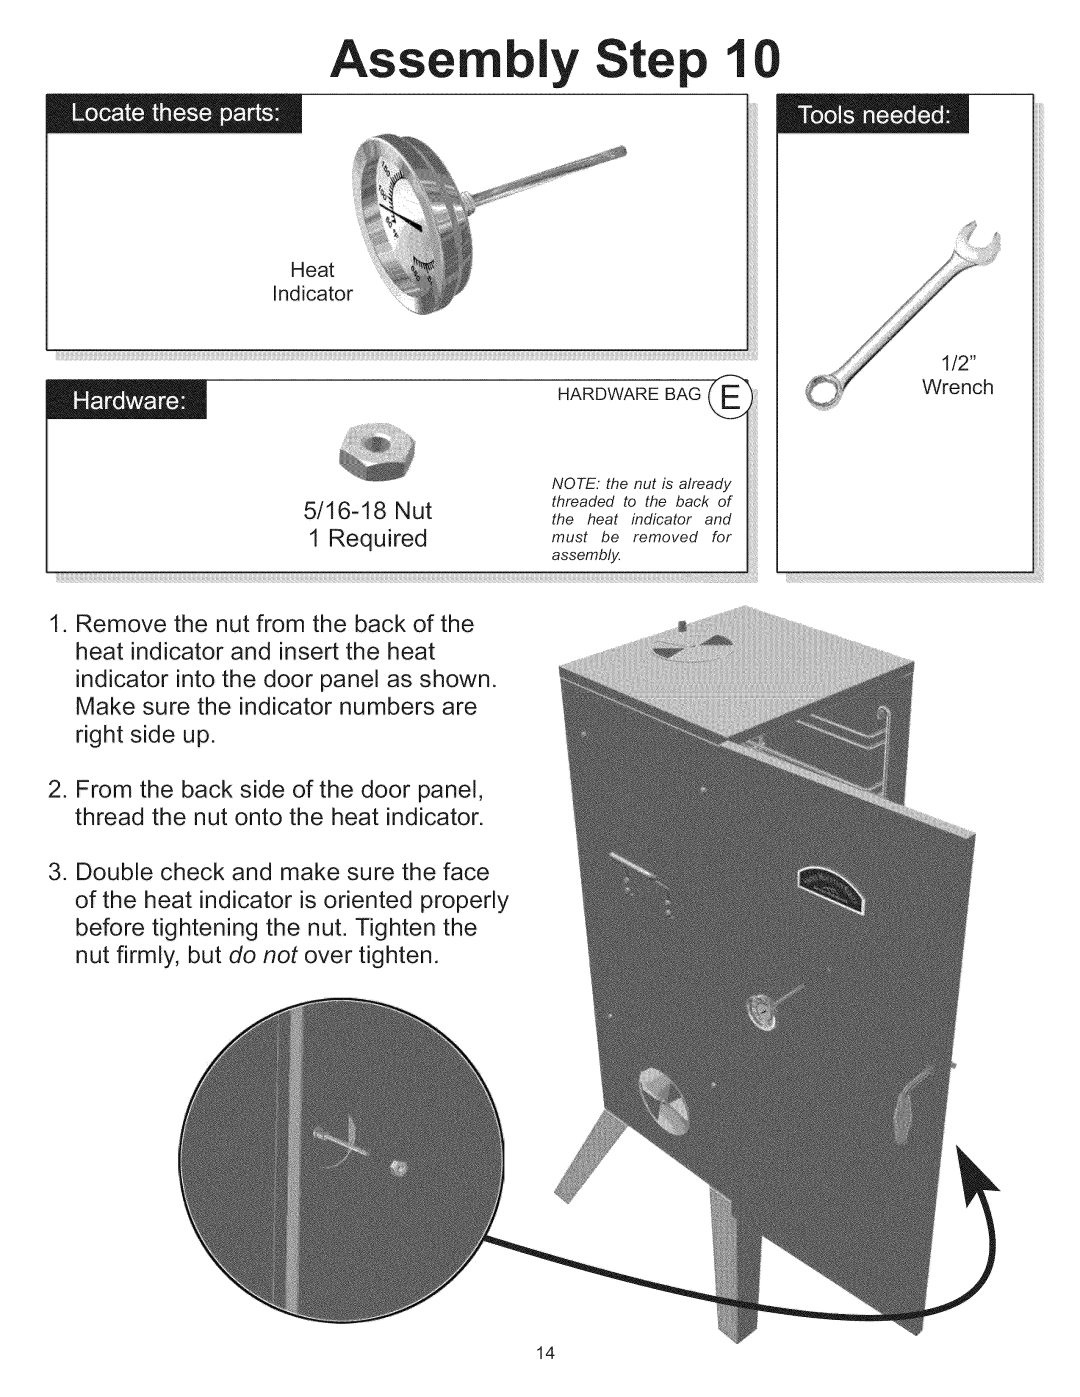
1.Remove the nut from the back of the heat indicator and insert the heat
indicator into the door panel as shown. Make sure the indicator numbers are
right side up.
2.From the back side of the door panel, thread the nut onto the heat indicator.
3.Double check and make sure the face of the heat indicator is oriented properly before tightening the nut. Tighten the nut firmly, but do not over tighten.
14
