Assem ly Step 3
4 Legs
Phillips Head
HAROWAREOAGScrewdriver
14 Req uired
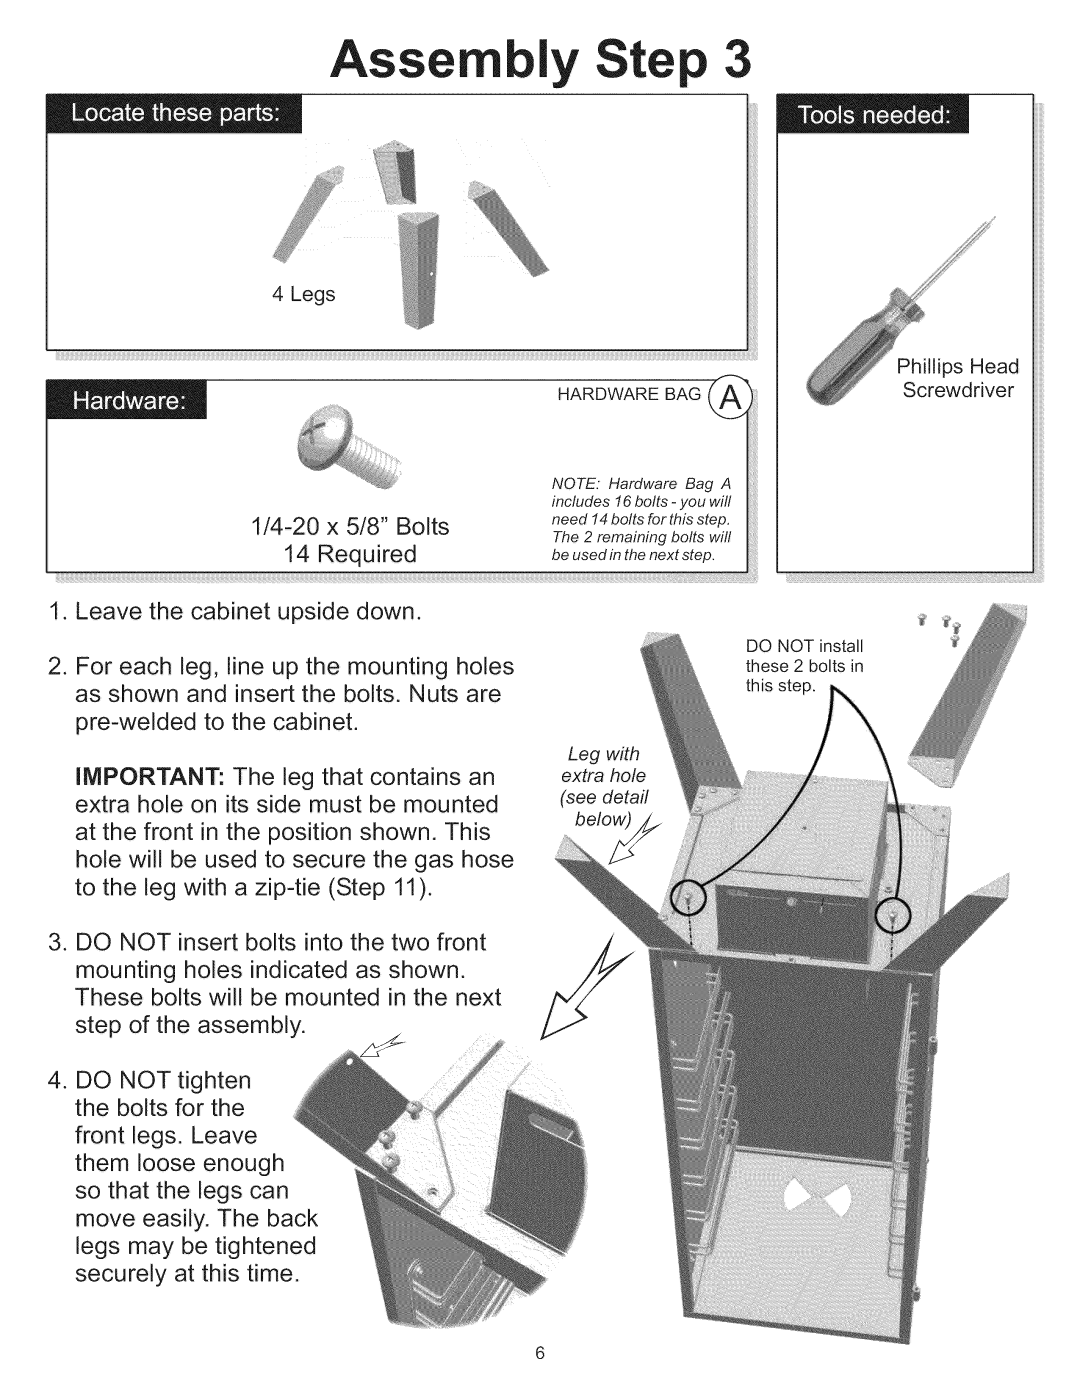
1.Leave the cabinet upside down.
2.For each leg, line up the mounting holes as shown and insert the bolts. Nuts are
IMPORTANT: The leg that contains an extra hole on its side must be mounted
at the front in the position shown. This hole will be used to secure the gas hose to the leg with a
3.DO NOT insert bolts into the two front
mounting holes indicated as shown. These bolts will be mounted in the next
step of the assembly.
4.DO NOT tighten the bolts for the
front legs. Leave them loose enough so that the legs can move easily. The back legs may be tightened securely at this time.
NOTE. Hardware Bag A includes 16 bolts - you will
need14boltsforthisstep.
The 2 remaining bolts will
beusedinthenextstep.
_!_!;:_i_;_i!_;_;_;:_;_;:_;_;:_;_;:_;_;:_;_;:_;_;:_;_;:_;_;:¸i!i!!i!!!;!;:¸I;¸!ii!!iiiiiiiiiiiii;: ;;iiiiiii!;!i¸iii!;iiiii!!;:;: !!!;__;::i!
DO NOT install these 2 bolts in this step.
Leg with extra hole
(see detail
