Site Considerations
Floor Load
Refer to the Machine Data Sheet for the weight and footprint specifications of your machine. Some residential floors may require additional reinforcement to support both the machine and operator.
Placement Location
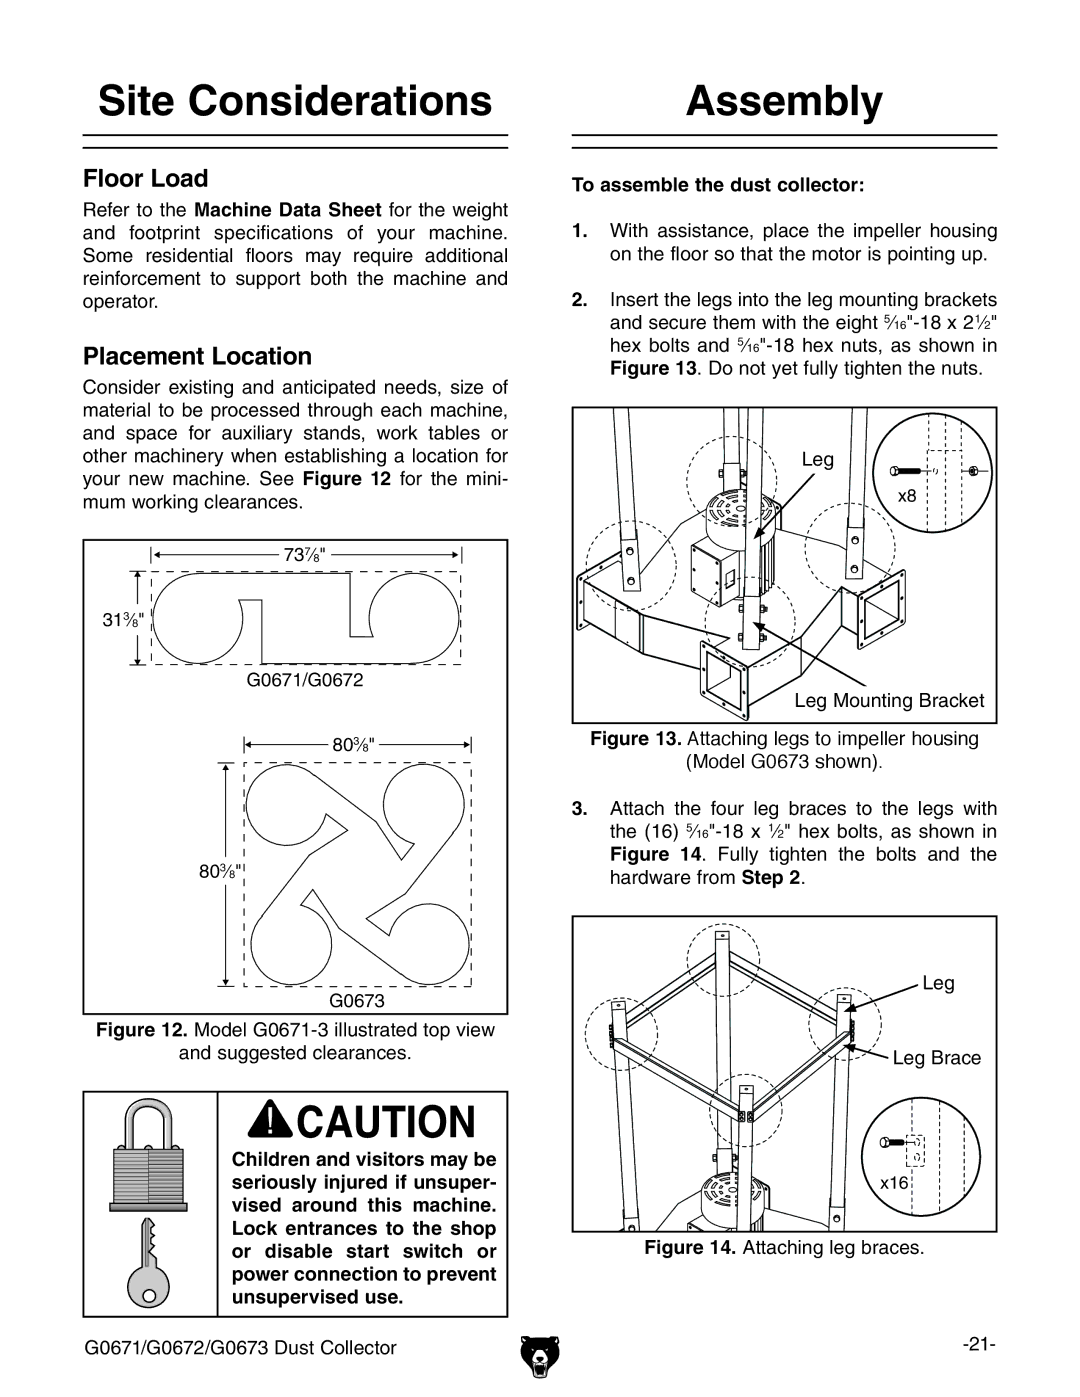
Consider existing and anticipated needs, size of material to be processed through each machine, and space for auxiliary stands, work tables or other machinery when establishing a location for your new machine. See Figure 12 for the mini- mum working clearances.
<%+,&$<%+,' |
<%+,( |
Figure 12. Model G0671-3 illustrated top view
and suggested clearances.
Children and visitors may be seriously injured if unsuper- vised around this machine. Lock entrances to the shop or disable start switch or power connection to prevent unsupervised use.
G0671/G0672/G0673 Dust Collector
Assembly
To assemble the dust collector:
1.With assistance, place the impeller housing on the floor so that the motor is pointing up.
2.Insert the legs into the leg mounting brackets and secure them with the eight
Leg |
m- |
Leg Mounting Bracket |
Figure 13. Attaching legs to impeller housing |
(Model G0673 shown). |
3.Attach the four leg braces to the legs with the (16)
Leg
![]() Leg Brace
Leg Brace
m&+
