MountingAssembly
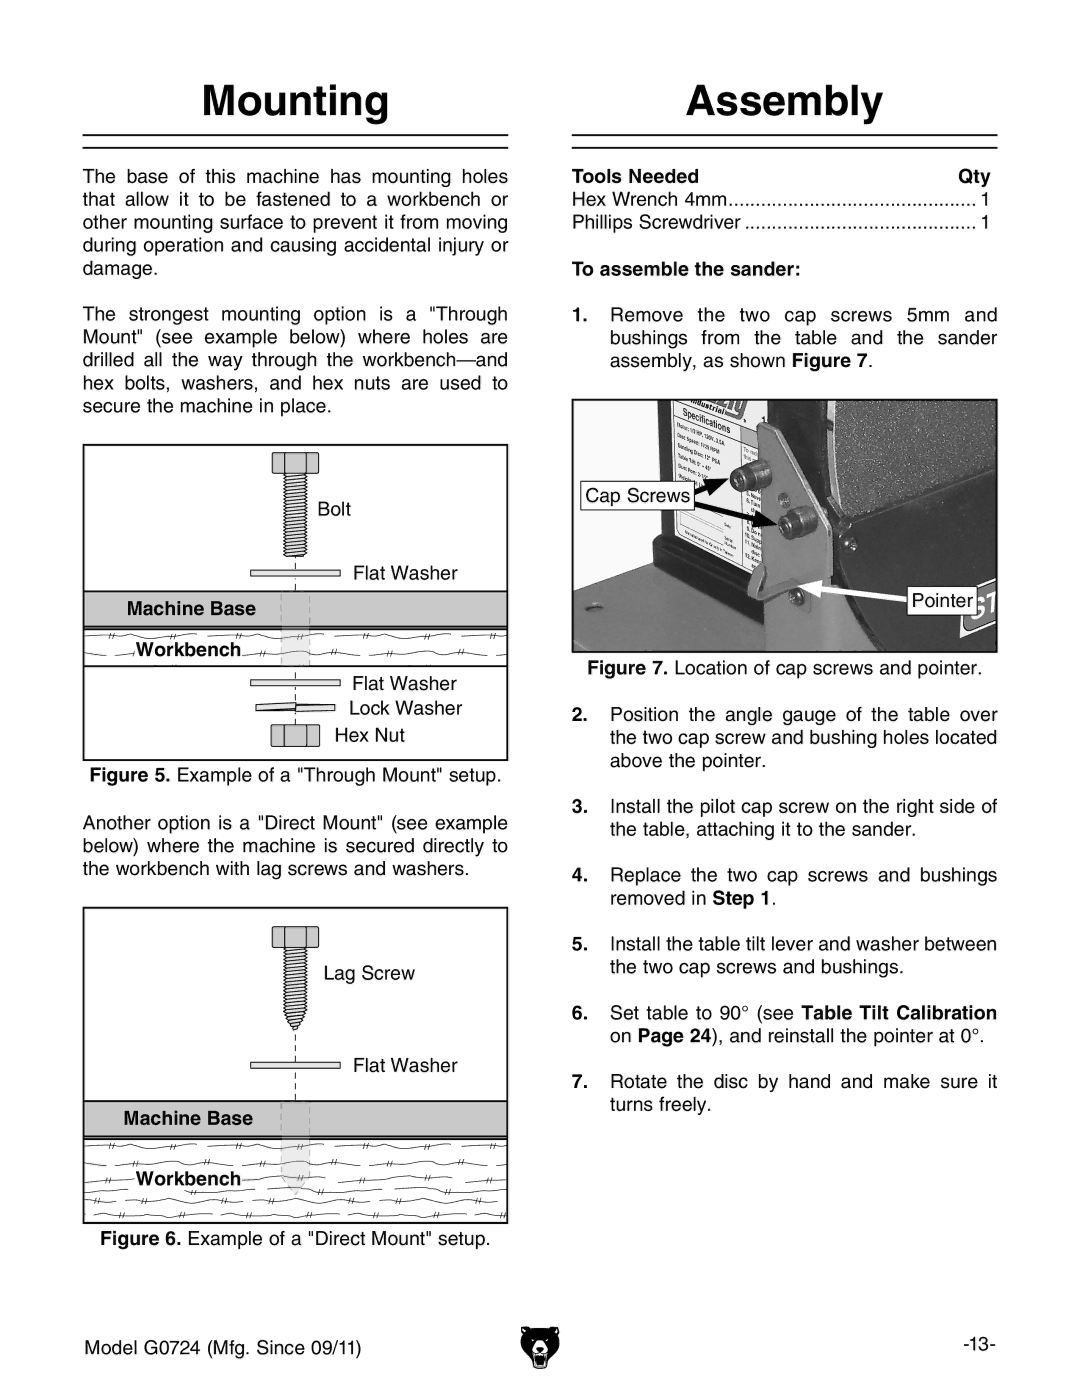
The base of this machine has mounting holes that allow it to be fastened to a workbench or other mounting surface to prevent it from moving during operation and causing accidental injury or damage.
The strongest mounting option is a "Through Mount" (see example below) where holes are drilled all the way through the
Bolt |
Flat Washer |
Machine Base |
Workbench |
Flat Washer |
Lock Washer |
Hex Nut |
Figure 5. Example of a "Through Mount" setup.
Another option is a "Direct Mount" (see example below) where the machine is secured directly to the workbench with lag screws and washers.
Lag Screw
Flat Washer
Machine Base
Workbench
Figure 6. Example of a "Direct Mount" setup.
Model G0724 (Mfg. Since 09/11)
Tools Needed | Qty |
Hex Wrench 4mm | 1 |
Phillips Screwdriver | 1 |
To assemble the sander:
1.Remove the two cap screws 5mm and bushings from the table and the sander assembly, as shown Figure 7.
Cap Screws |
Pointer |
