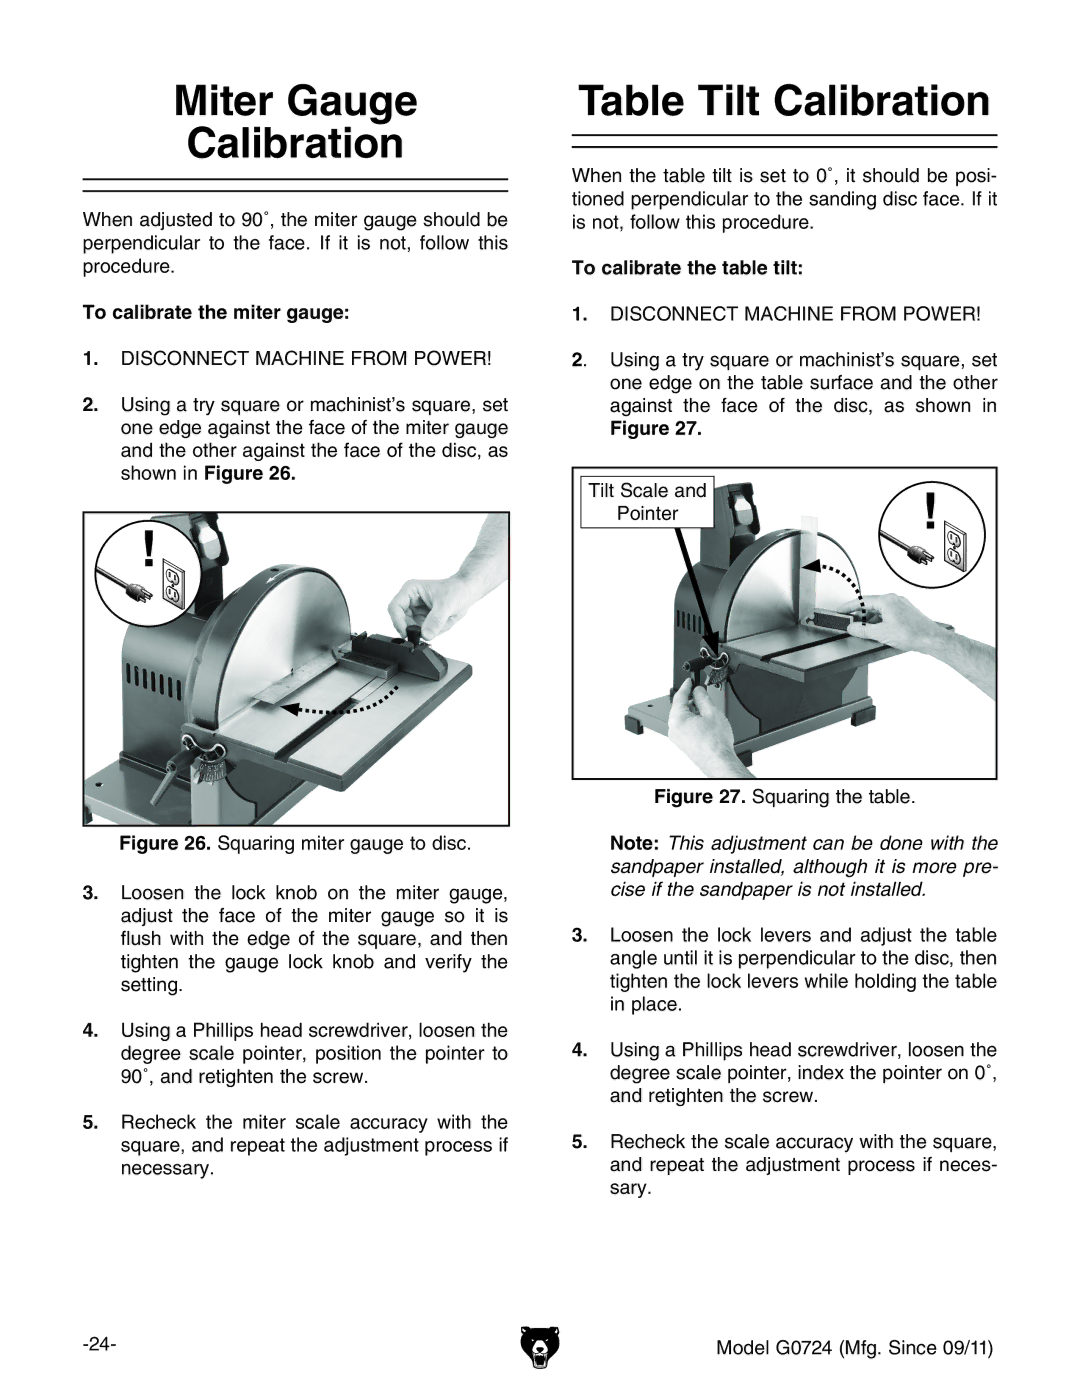
Using a try square or machinist’s square, set one edge on the table surface and the other against the face of the disc, as shown in
Figure 27.
Miter Gauge
Calibration
When adjusted to 90˚, the miter gauge should be perpendicular to the face. If it is not, follow this procedure.
To calibrate the miter gauge:
1.DISCONNECT MACHINE FROM POWER!
2.Using a try square or machinist’s square, set one edge against the face of the miter gauge and the other against the face of the disc, as shown in Figure 26.
Figure 26. Squaring miter gauge to disc.
3.Loosen the lock knob on the miter gauge, adjust the face of the miter gauge so it is flush with the edge of the square, and then tighten the gauge lock knob and verify the setting.
4.Using a Phillips head screwdriver, loosen the degree scale pointer, position the pointer to 90˚, and retighten the screw.
5.Recheck the miter scale accuracy with the square, and repeat the adjustment process if necessary.
Table Tilt Calibration
When the table tilt is set to 0˚, it should be posi- tioned perpendicular to the sanding disc face. If it is not, follow this procedure.
To calibrate the table tilt:
1.DISCONNECT MACHINE FROM POWER!
2.
Tilt Scale and
Pointer
Figure 27. Squaring the table.
Note: This adjustment can be done with the sandpaper installed, although it is more pre- cise if the sandpaper is not installed.
3.Loosen the lock levers and adjust the table angle until it is perpendicular to the disc, then tighten the lock levers while holding the table in place.
4.Using a Phillips head screwdriver, loosen the degree scale pointer, index the pointer on 0˚, and retighten the screw.
5.Recheck the scale accuracy with the square, and repeat the adjustment process if neces- sary.
Model G0724 (Mfg. Since 09/11) |
