Guide Adjustment
The blade will cut best when the blade is support- ed as close to the workpiece as possible. Once the material has been secured in the vise, loosen the two knobs on top of the saw bow and slide the moveable guide over as close to the material as possible without interfering with the cut. Tighten the knobs. See Figure 15.
Figure 15. Moveable blade guide.
Vise and Stop
The workpiece(s) must always be secured in the vise for cutting. Never attempt to hold the mate- rial by hand, the cutting forces on a
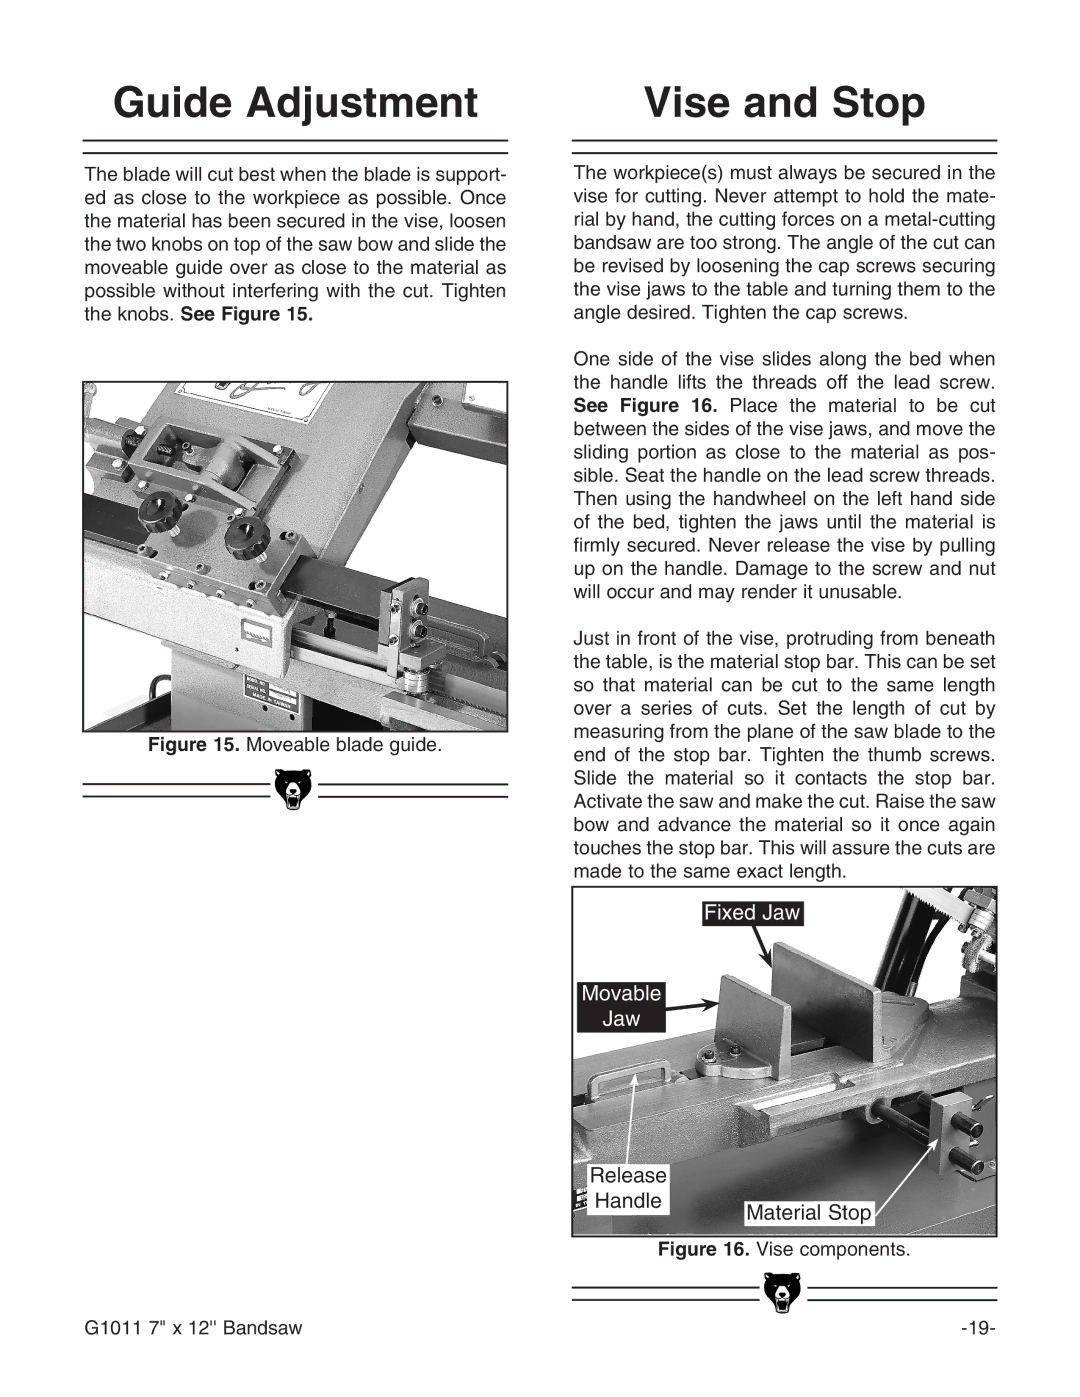
One side of the vise slides along the bed when the handle lifts the threads off the lead screw. See Figure 16. Place the material to be cut between the sides of the vise jaws, and move the sliding portion as close to the material as pos- sible. Seat the handle on the lead screw threads. Then using the handwheel on the left hand side of the bed, tighten the jaws until the material is firmly secured. Never release the vise by pulling up on the handle. Damage to the screw and nut will occur and may render it unusable.
Just in front of the vise, protruding from beneath the table, is the material stop bar. This can be set so that material can be cut to the same length over a series of cuts. Set the length of cut by measuring from the plane of the saw blade to the end of the stop bar. Tighten the thumb screws. Slide the material so it contacts the stop bar. Activate the saw and make the cut. Raise the saw bow and advance the material so it once again touches the stop bar. This will assure the cuts are made to the same exact length.
Fixed Jaw
Movable
Jaw
Release |
|
Handle | Material Stop |
|
Figure 16. Vise components.
G1011 7" x 12'' Bandsaw |