5.Moving the arbor bracket moves the
6.Reattach the table, making sure there is ade- quate blade clearance through all blade adjustments. Recheck guard alignment to the blade and to the table top. Adjust as nec- essary and tighten down all the bolts before use.
7.If the blade is still contacting the insert, repeat Steps
8.Recheck the blade to miter slot adjustments, and adjust as necessary.
Rip Fence
The rip fence included with your Model G1023SL/G1023SLX
Miter Gauge
To adjust the miter gauge so it is perpendicu- lar to the saw blade:
1.Loosen the lock knob on the miter gauge and place a square against the face of the miter body and the blade.
2.Adjust the miter body until there is no space between the square and the blade. Tighten the lock knob.
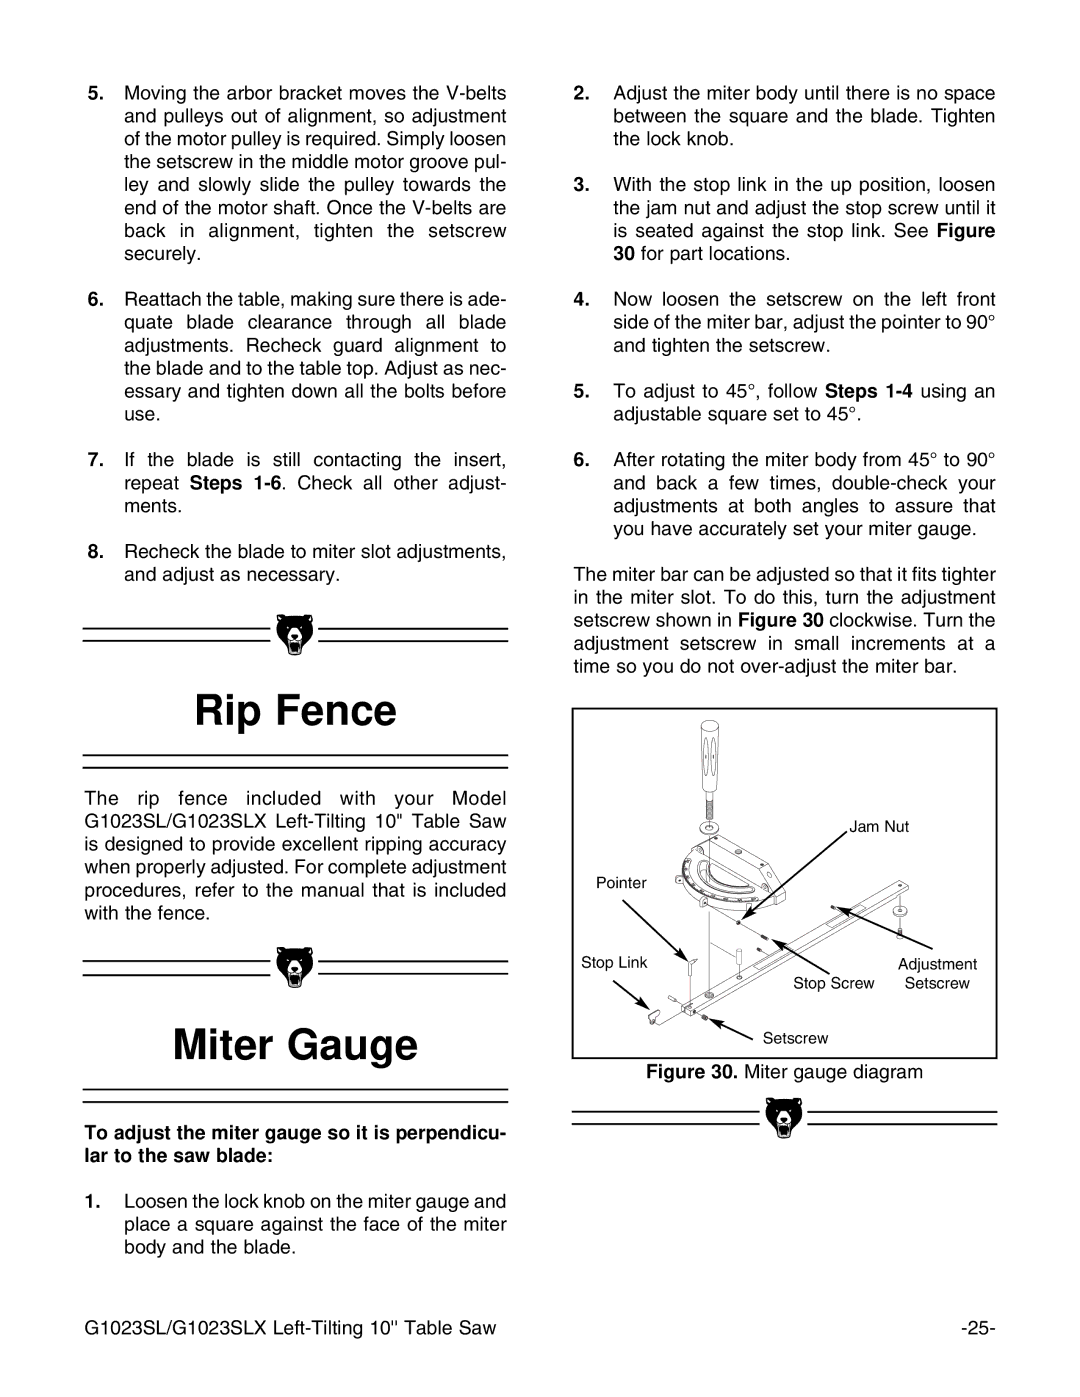
3.With the stop link in the up position, loosen the jam nut and adjust the stop screw until it is seated against the stop link. See Figure 30 for part locations.
4.Now loosen the setscrew on the left front side of the miter bar, adjust the pointer to 90¡ and tighten the setscrew.
5.To adjust to 45¡, follow Steps
6.After rotating the miter body from 45¡ to 90¡ and back a few times,
The miter bar can be adjusted so that it fits tighter in the miter slot. To do this, turn the adjustment setscrew shown in Figure 30 clockwise. Turn the adjustment setscrew in small increments at a time so you do not
Jam Nut | |
Pointer |
|
Stop Link | Adjustment |
Stop Screw | Setscrew |
Setscrew |
|
Figure 30. Miter gauge diagram
G1023SL/G1023SLX |