Guide Blocks
The guide blocks ensure that the blade is not pushed too far laterally. Perform steps
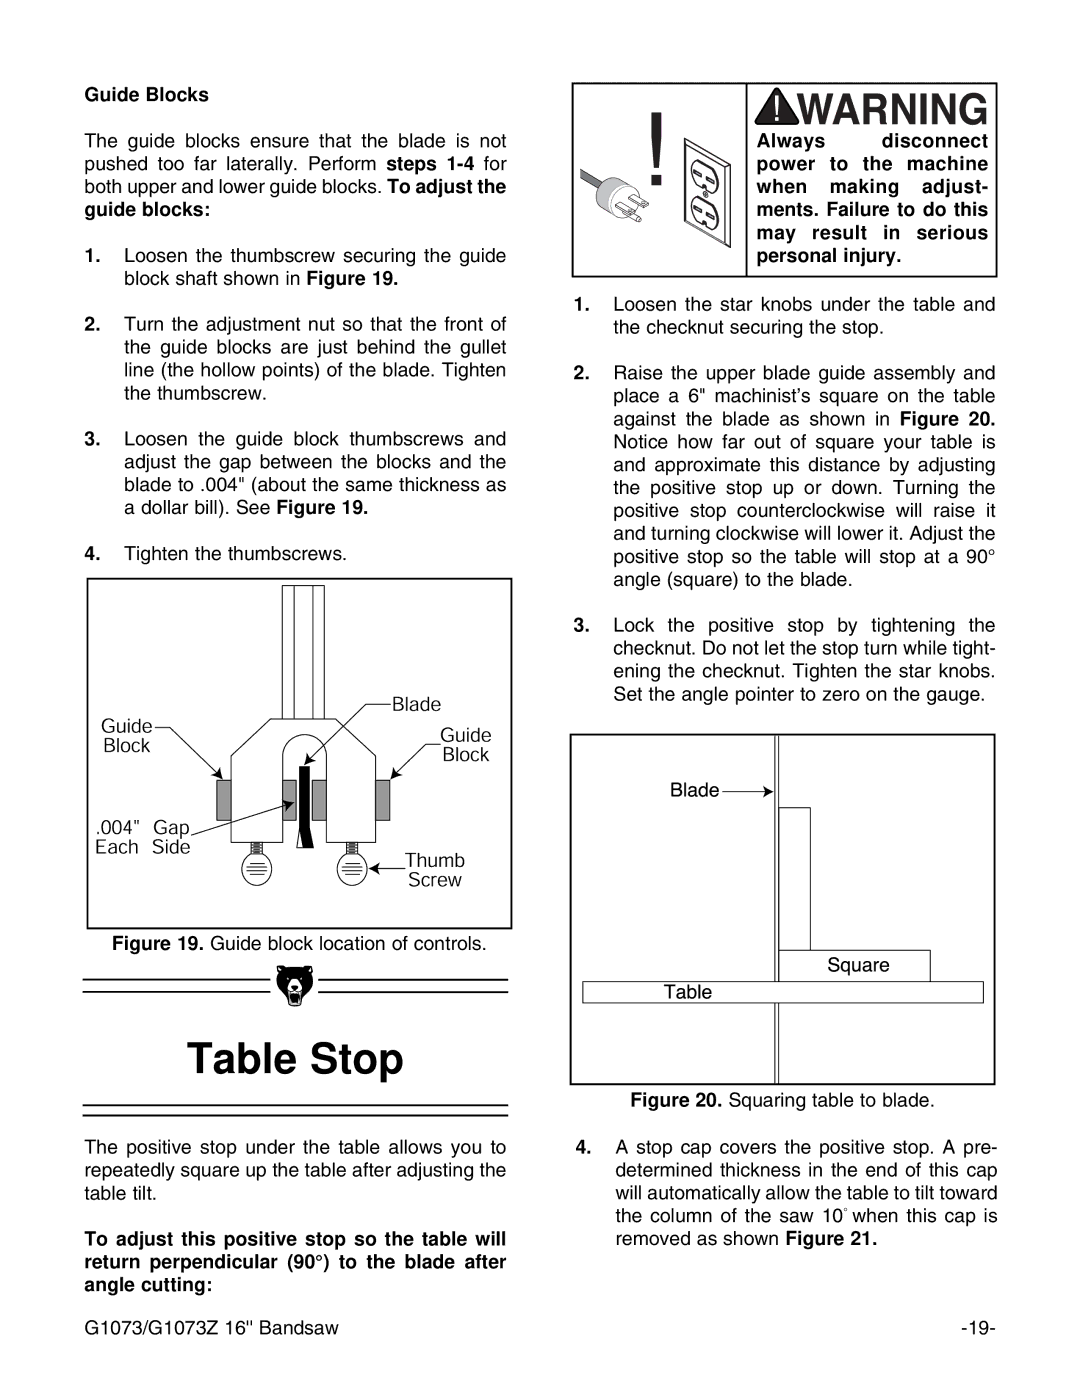
1.Loosen the thumbscrew securing the guide block shaft shown in Figure 19.
2.Turn the adjustment nut so that the front of the guide blocks are just behind the gullet line (the hollow points) of the blade. Tighten the thumbscrew.
3.Loosen the guide block thumbscrews and adjust the gap between the blocks and the blade to .004" (about the same thickness as a dollar bill). See Figure 19.
4. | Tighten the thumbscrews. |
Figure 19. Guide block location of controls.
Always disconnect power to the machine when making adjust- ments. Failure to do this may result in serious personal injury.
1.Loosen the star knobs under the table and the checknut securing the stop.
2.Raise the upper blade guide assembly and place a 6" machinistÕs square on the table against the blade as shown in Figure 20. Notice how far out of square your table is and approximate this distance by adjusting the positive stop up or down. Turning the positive stop counterclockwise will raise it and turning clockwise will lower it. Adjust the positive stop so the table will stop at a 90¡ angle (square) to the blade.
3.Lock the positive stop by tightening the checknut. Do not let the stop turn while tight- ening the checknut. Tighten the star knobs. Set the angle pointer to zero on the gauge.
Table Stop
The positive stop under the table allows you to repeatedly square up the table after adjusting the table tilt.
To adjust this positive stop so the table will return perpendicular (90°) to the blade after angle cutting:
G1073/G1073Z 16'' Bandsaw