2.Remove the blade from the saw, then the securing nut and washers from the wheel that needs to be shimmed. Now remove the wheel. Use the washers that were behind the securing nut for shims. Measure how many you will need to equal the space of your gap and place them on the mounting shaft.
Figure 30. Measuring wheel difference.
3.Replace wheel, any remaining washers and the securing nut. It is important to tighten the blade as it will be used during operation before you check the wheels for being coplanar. In other words, it is possible that the wheels may be coplanar with the blade loose, then be pulled out of alignment when it is tightened.
4.The first time you get the wheels coplanar it is a good idea to place a mark on each wheel where you held the straightedge. This assures repeated accuracy every time you adjust your wheels.
NOTICE
When wheels are properly coplanar, the blade may not be centered on the crown of the wheel, but it will be balanced.
Adjusting Parallelism
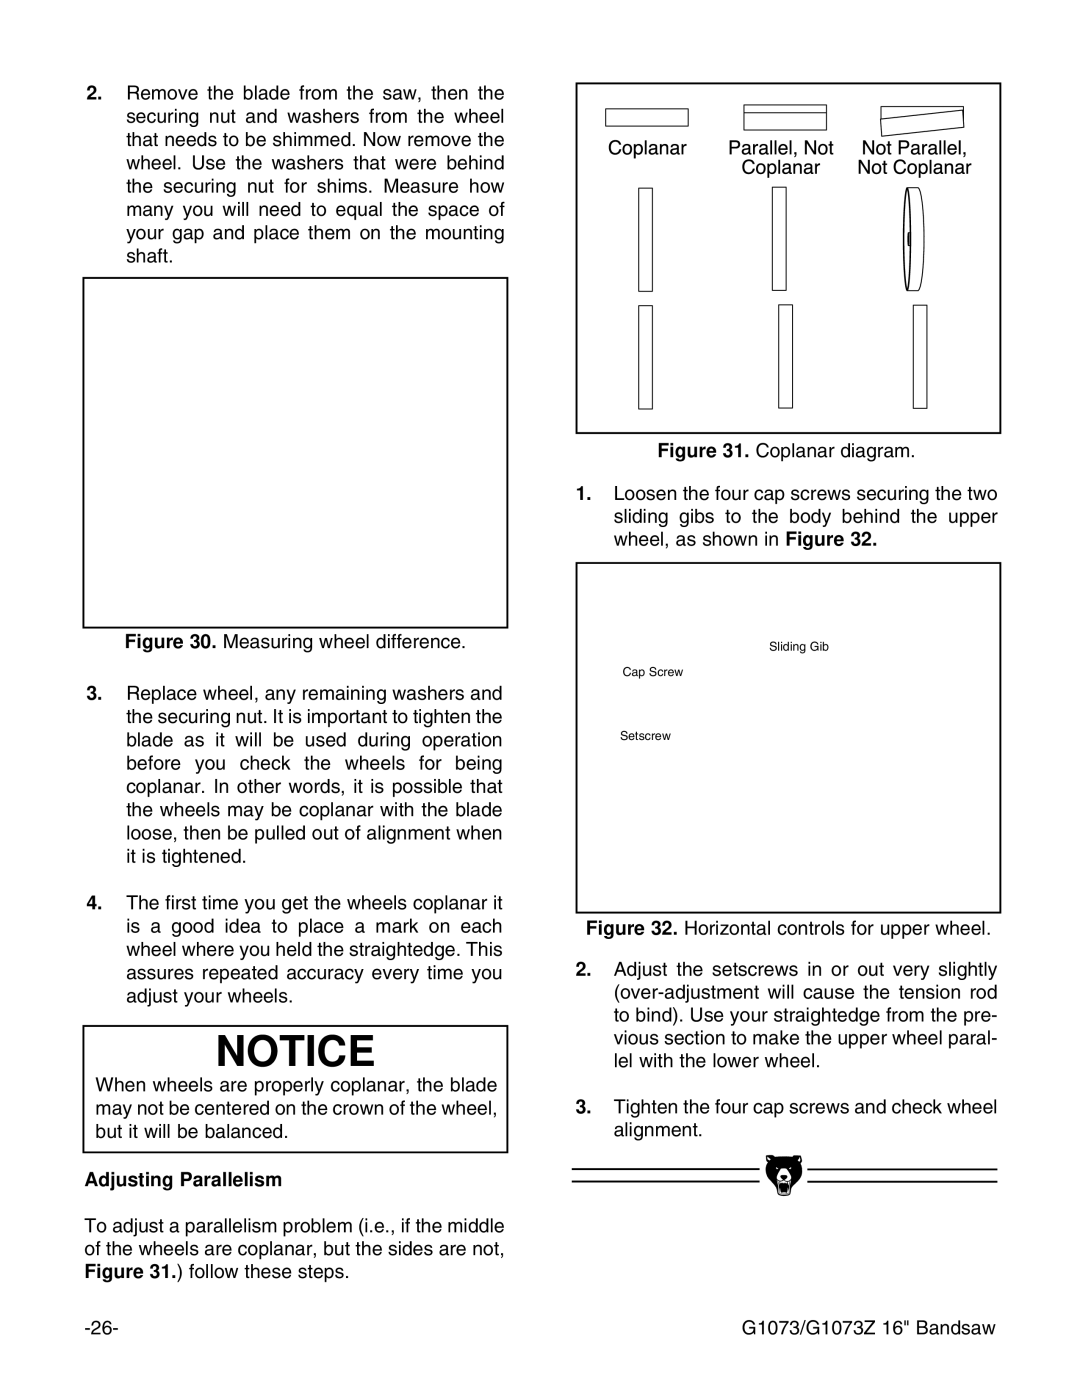
To adjust a parallelism problem (i.e., if the middle of the wheels are coplanar, but the sides are not, Figure 31.) follow these steps.
Figure 31. Coplanar diagram.
1.Loosen the four cap screws securing the two sliding gibs to the body behind the upper wheel, as shown in Figure 32.
Sliding Gib
Cap Screw
Setscrew ![]()
Figure 32. Horizontal controls for upper wheel.
2.Adjust the setscrews in or out very slightly (over-adjustment will cause the tension rod to bind). Use your straightedge from the pre- vious section to make the upper wheel paral- lel with the lower wheel.
3.Tighten the four cap screws and check wheel alignment.
G1073/G1073Z 16" Bandsaw |