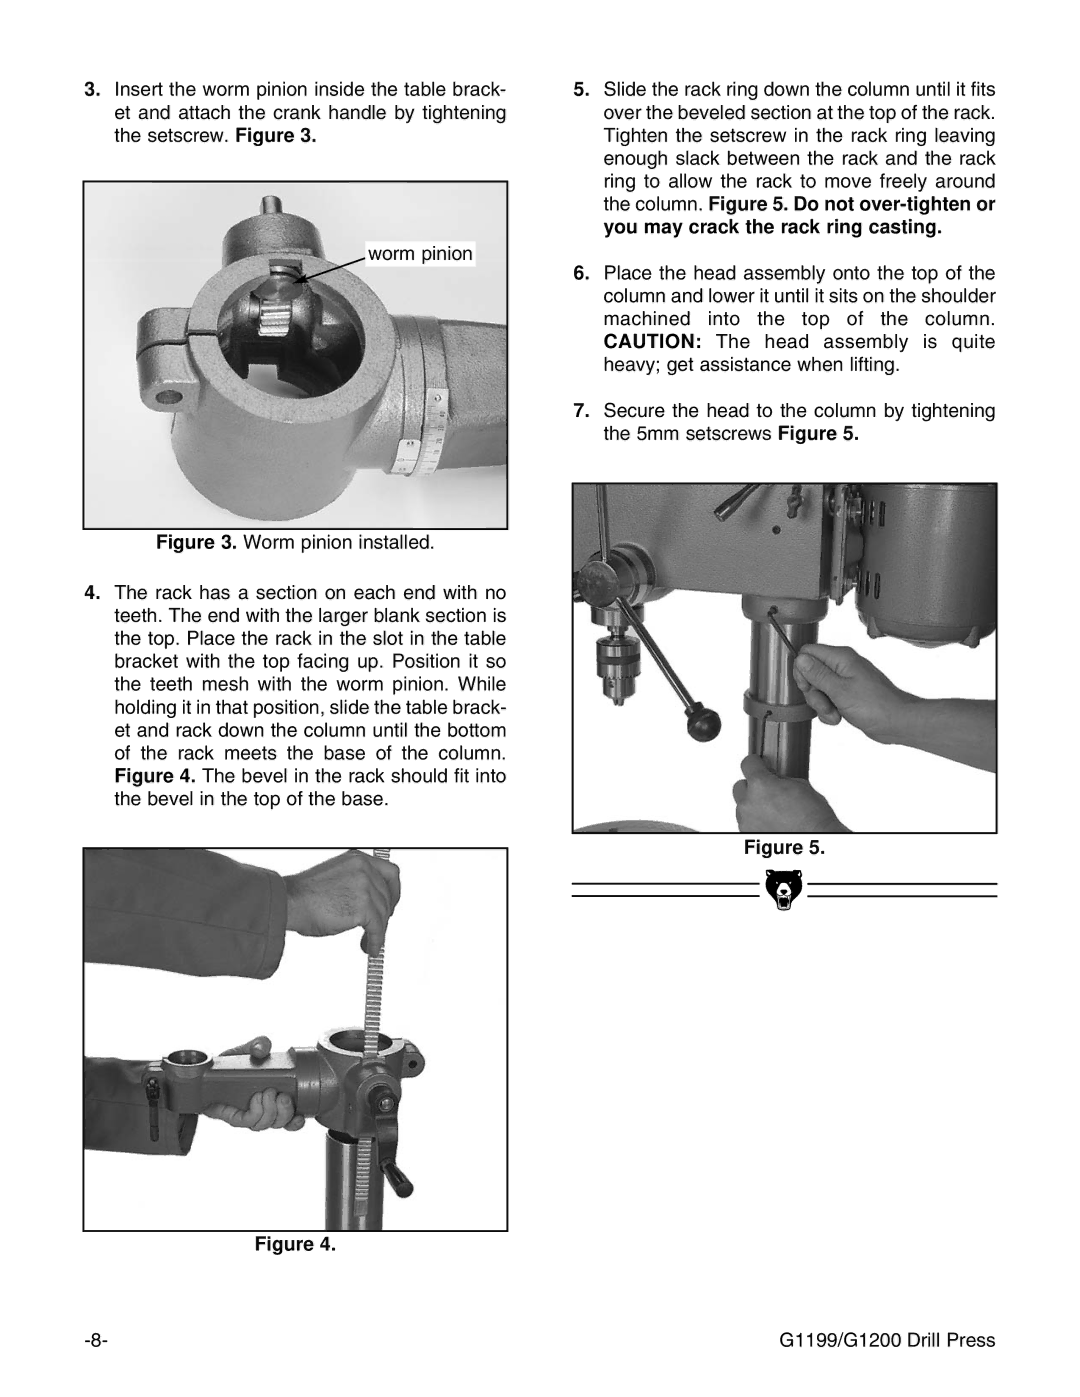
3.Insert the worm pinion inside the table brack- et and attach the crank handle by tightening the setscrew. Figure 3.
worm pinion
Figure 3. Worm pinion installed.
4.The rack has a section on each end with no teeth. The end with the larger blank section is the top. Place the rack in the slot in the table bracket with the top facing up. Position it so the teeth mesh with the worm pinion. While holding it in that position, slide the table brack- et and rack down the column until the bottom of the rack meets the base of the column. Figure 4. The bevel in the rack should fit into the bevel in the top of the base.
Figure 4.
5.Slide the rack ring down the column until it fits over the beveled section at the top of the rack. Tighten the setscrew in the rack ring leaving enough slack between the rack and the rack ring to allow the rack to move freely around the column. Figure 5. Do not over-tighten or you may crack the rack ring casting.
6.Place the head assembly onto the top of the column and lower it until it sits on the shoulder machined into the top of the column. CAUTION: The head assembly is quite heavy; get assistance when lifting.
7.Secure the head to the column by tightening the 5mm setscrews Figure 5.
Figure 5.
G1199/G1200 Drill Press |