2.Insert a UL listed strain relief into the mounting bracket hole. Position the strain relief so that one tab is pointing up and one tab is pointing down. Tighten the strain relief screws just enough to hold the two halves together.
Tab | A |
Strain Relief | B |
|
3.Insert a power cord into the strain relief. Take care to ensure that the wire insulation of the power cord is inside the strain relief.
4.Connect power cord wires following Part A for a
CAUTION: A
5.Tighten strain relief screws.
6.Be sure that none of the wires are touching the dryer drum inside the dryer cabinet.
7.Reinstall the terminal block cover.
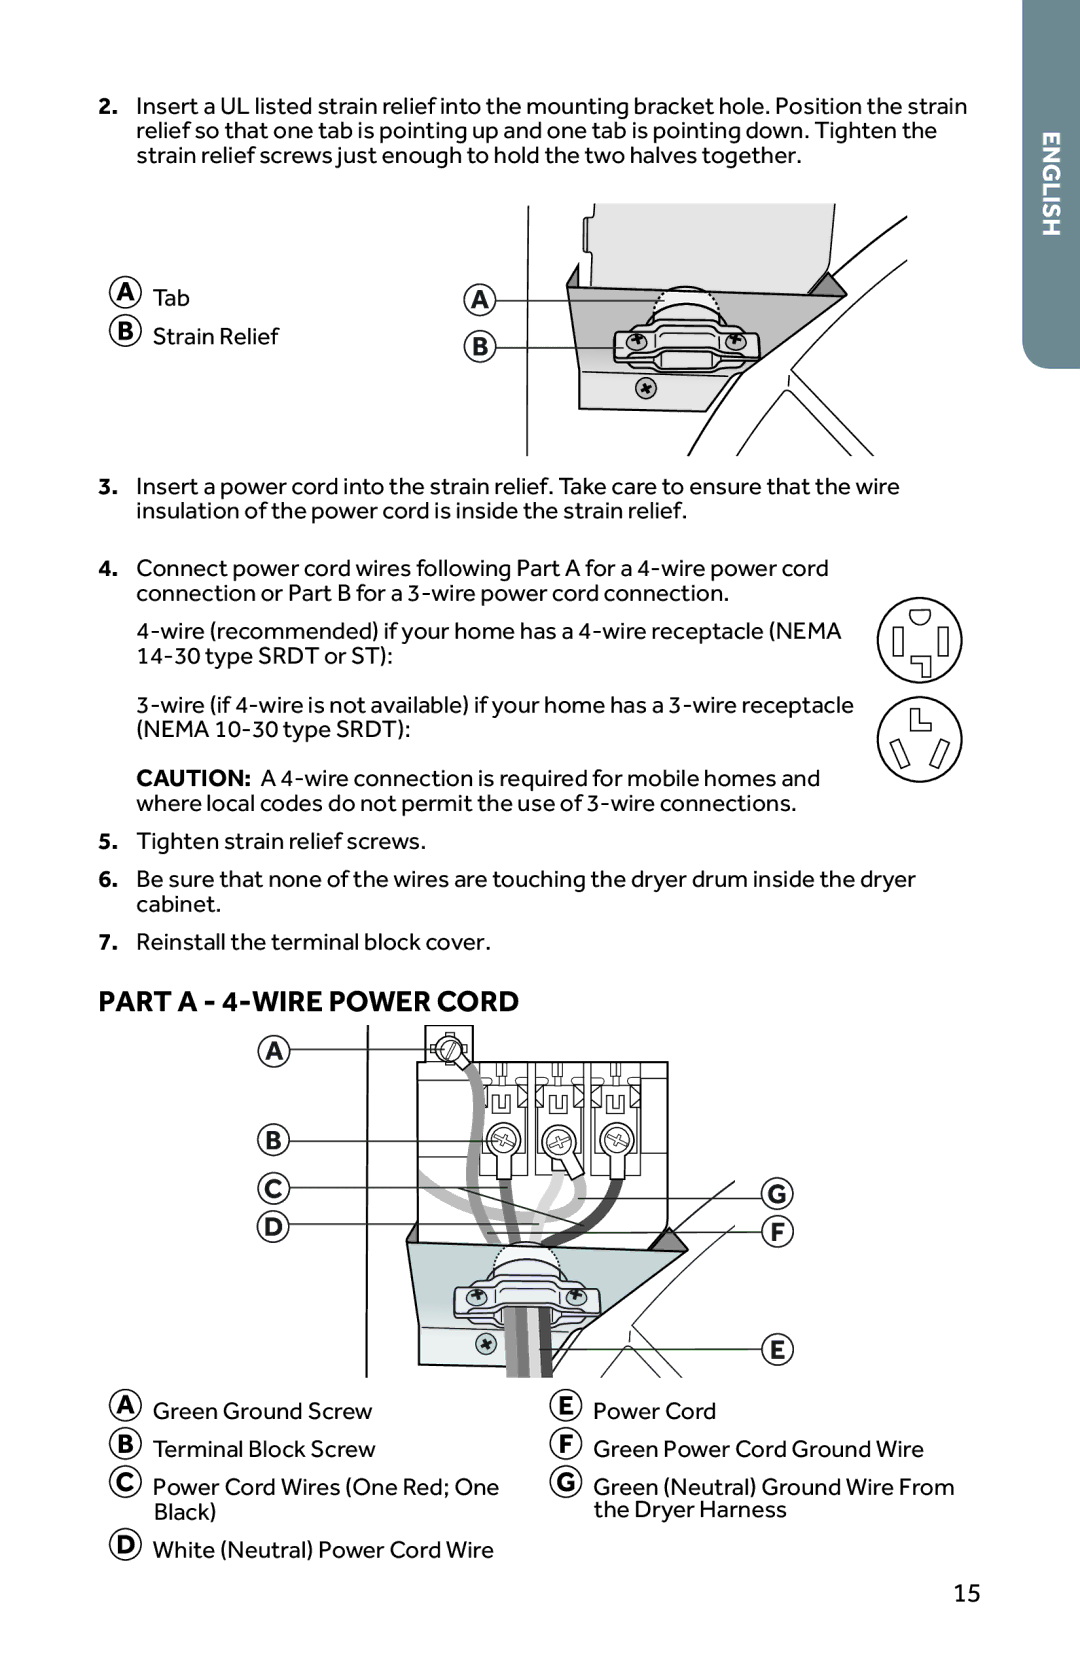
PART A - |
|
A |
|
B |
|
C | G |
D | F |
| E |
Green Ground Screw | Power Cord |
Terminal Block Screw | Green Power Cord Ground Wire |
Power Cord Wires (One Red; One | Green (Neutral) Ground Wire From |
Black) | the Dryer Harness |
![]() White (Neutral) Power Cord Wire
White (Neutral) Power Cord Wire
15