Status lights indicate the progress of an operating drying cycle.
OPERATING INSTRUCTIONS
STEP 1 - PREPARE AND SORT LAUNDRY
•Check garment labels for manufacturers’ drying instructions.
•Where possible, turn pockets inside out for uniform drying.
•Tie strings and sashes so they don’t tangle.
•Close zippers, snaps and hooks to avoid snagging.
•Make sure buttons and ornaments on the clothes are high temperature resistant and will not damage drum surface.
•To avoid permanently setting stains or soils, check that all stains and soils have been removed during the wash cycle. If not, wash them again.
•To avoid entanglement and ensure easy removal, small articles should be collected in a mesh bag before loading.
• Separate fabrics that attract lint from fabrics that give o lint. Clothes prone to linting should be turned inside out before being put into the dryer.
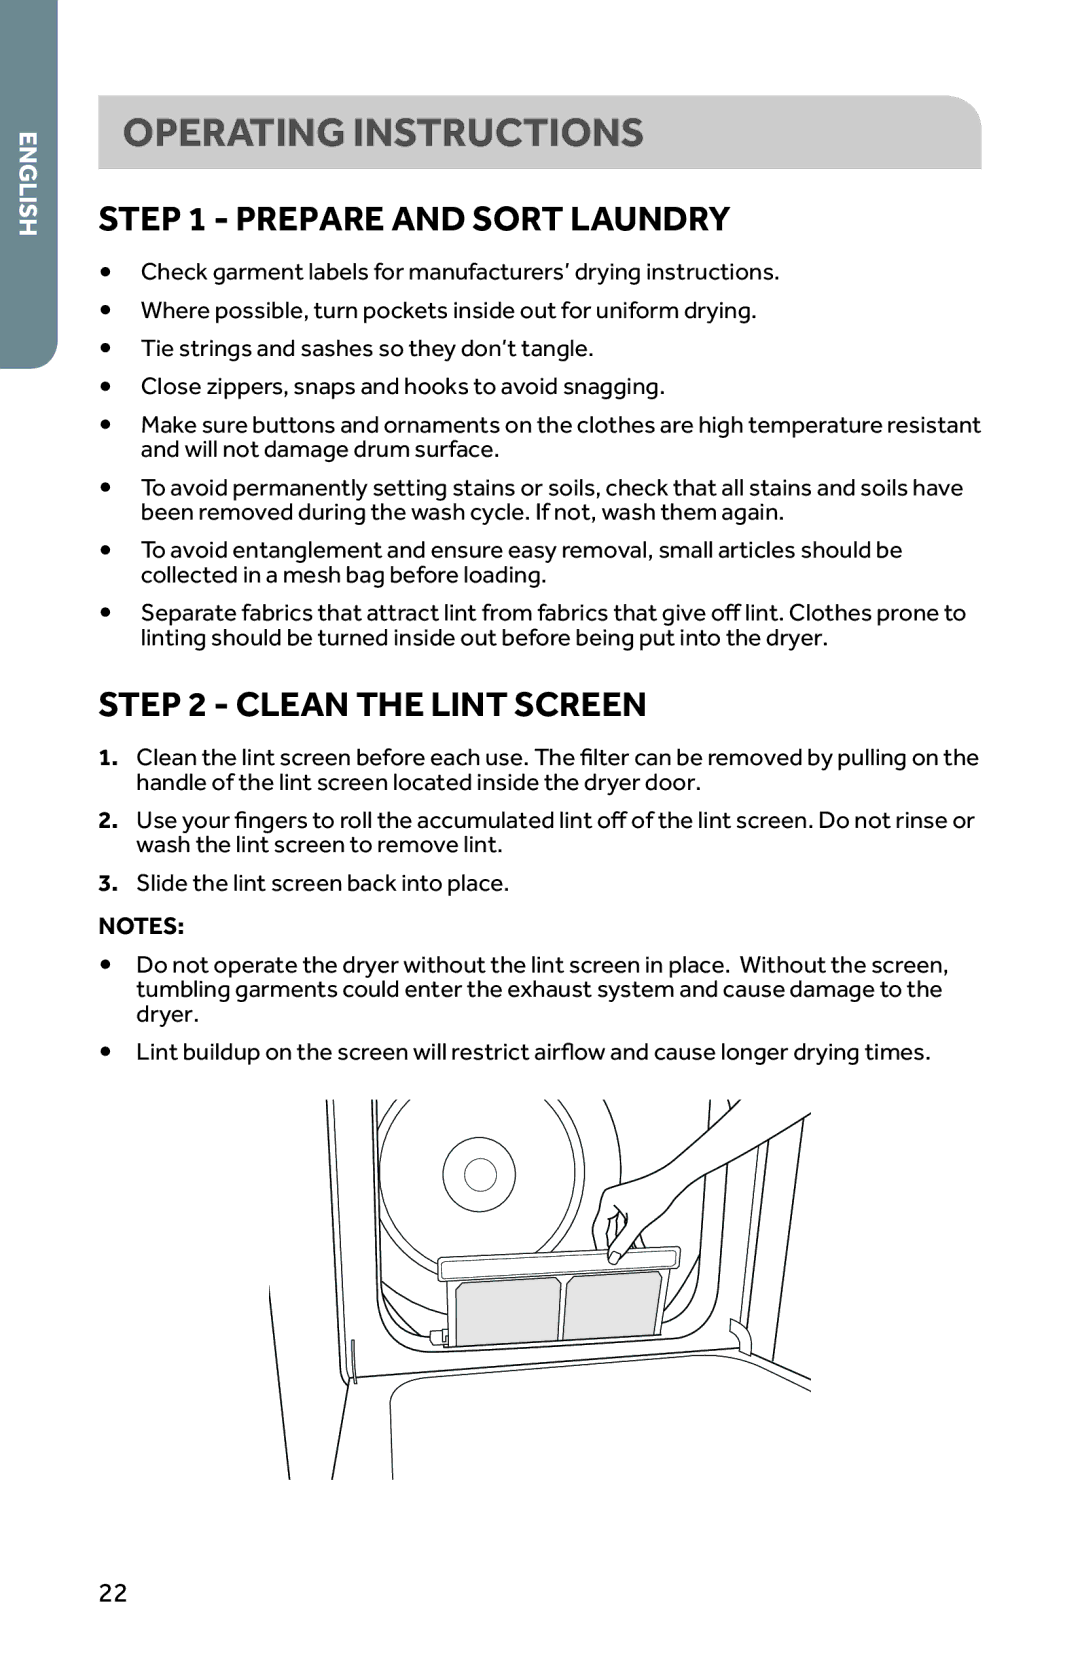
STEP 2 - CLEAN THE LINT SCREEN
1.Clean the lint screen before each use. The Þlter can be removed by pulling on the handle of the lint screen located inside the dryer door.
2. Use your Þngers to roll the accumulated lint o of the lint screen. Do not rinse or wash the lint screen to remove lint.
3.Slide the lint screen back into place.
NOTES:
•Do not operate the dryer without the lint screen in place. Without the screen, tumbling garments could enter the exhaust system and cause damage to the dryer.
•Lint buildup on the screen will restrict airßow and cause longer drying times.
22