A1. Remove the green (neutral) ground wire from the green ground screw located above the terminal block.
A2. Attach the green power cord ground wire to the cabinet with the green ground screw. Tighten the screw securely.
A3. Attach the green (neutral) ground wire from the dryer harness and the white (neutral) power cord wire to the center terminal block screw. Tighten the screw securely.
A4. Attach each of the remaining 2 power cord wires (red and black) to one of the outer terminal block screws. Either wire can be attached to either screw. Tighten both screws securely.
IMPORTANT: Do not make a sharp bend or crimp the wires at connections.
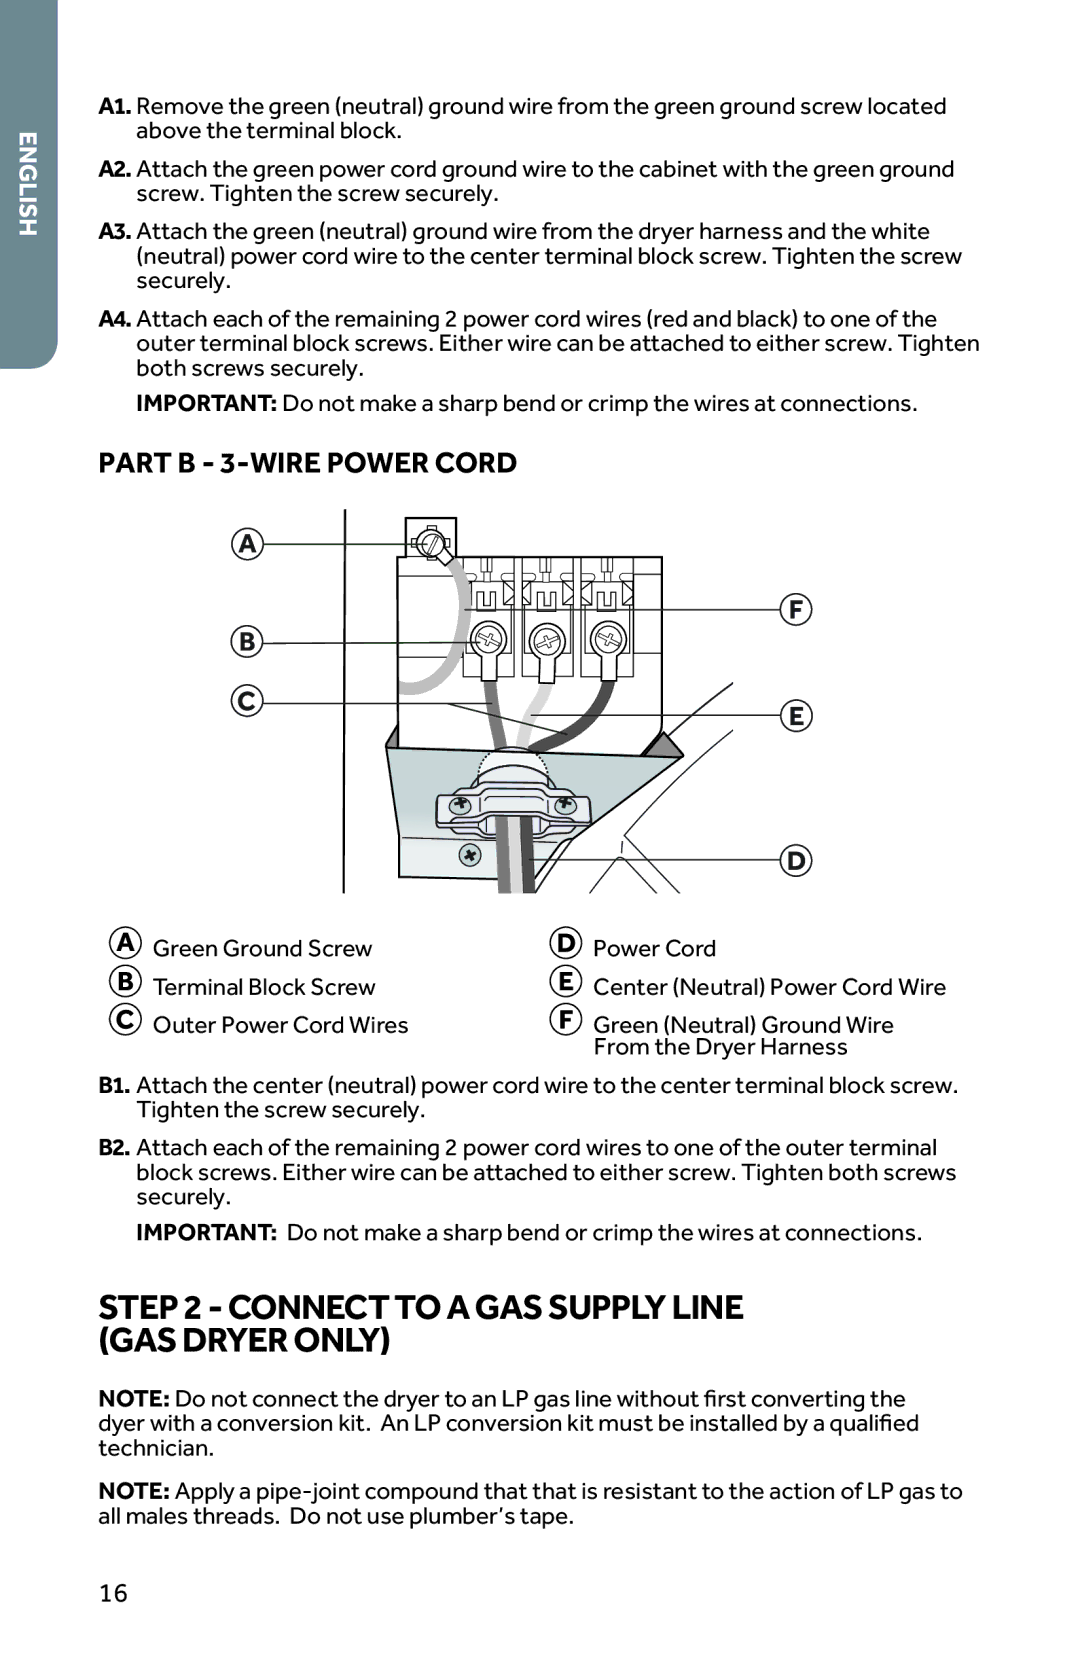
PART B - 3-WIRE POWER CORD
A
B
C
F
E
D
Green Ground Screw | Power Cord |
Terminal Block Screw | Center (Neutral) Power Cord Wire |
Outer Power Cord Wires | Green (Neutral) Ground Wire |
| From the Dryer Harness |
B1. Attach the center (neutral) power cord wire to the center terminal block screw. Tighten the screw securely.
B2. Attach each of the remaining 2 power cord wires to one of the outer terminal block screws. Either wire can be attached to either screw. Tighten both screws securely.
IMPORTANT: Do not make a sharp bend or crimp the wires at connections.
STEP 2 - CONNECT TO A GAS SUPPLY LINE (GAS DRYER ONLY)
NOTE: Do not connect the dryer to an LP gas line without Þrst converting the dyer with a conversion kit. An LP conversion kit must be installed by a qualiÞed technician.
NOTE: Apply a
16