8.Check all connections for leaks by applying a noncorrosive
solution. Bubbles will identify leaks. If leaks are found, close the
![]() WARNING
WARNING
Never use an open o test for gas leaks.
STEP 3 - CONNECT TO AN EXHAUST SYSTEM
![]() WARNING
WARNING
To reduce the risk of e, this dryer must be exhausted outdoors.
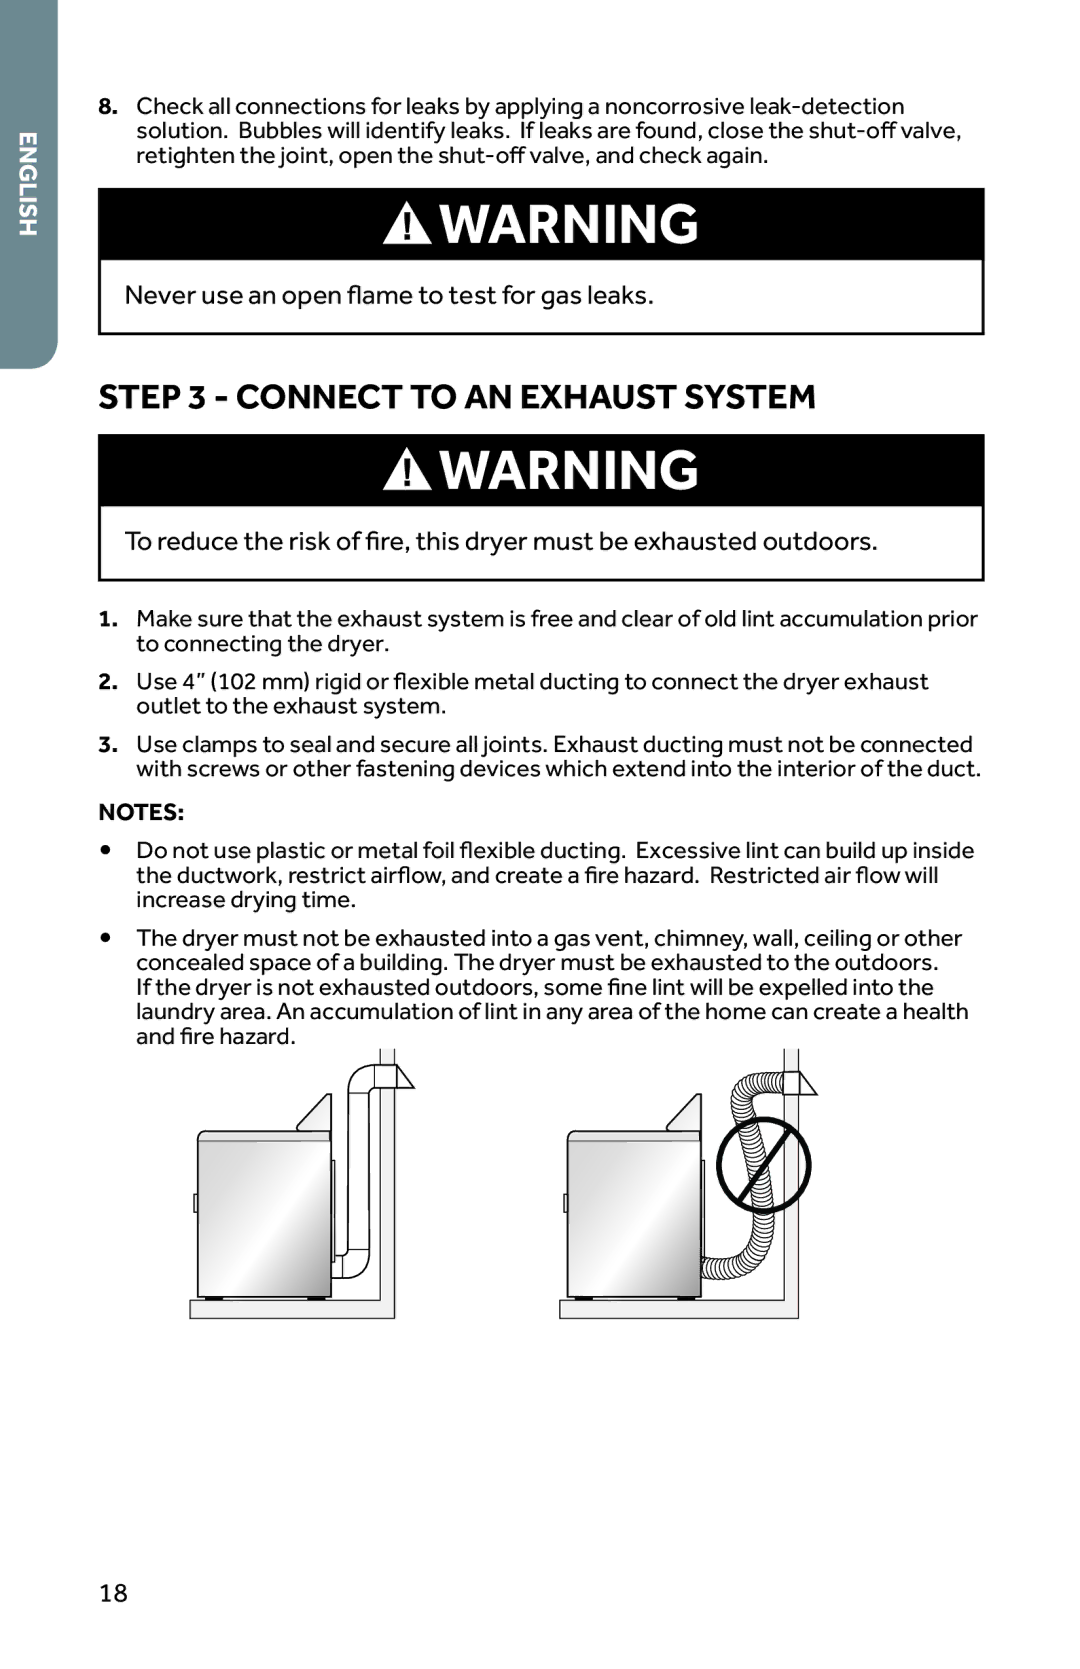
1.Make sure that the exhaust system is free and clear of old lint accumulation prior to connecting the dryer.
2.Use 4” (102 mm) rigid or ßexible metal ducting to connect the dryer exhaust outlet to the exhaust system.
3.Use clamps to seal and secure all joints. Exhaust ducting must not be connected with screws or other fastening devices which extend into the interior of the duct.
NOTES:
•Do not use plastic or metal foil ßexible ducting. Excessive lint can build up inside the ductwork, restrict airßow, and create a Þre hazard. Restricted air ßow will increase drying time.
•The dryer must not be exhausted into a gas vent, chimney, wall, ceiling or other concealed space of a building. The dryer must be exhausted to the outdoors. If the dryer is not exhausted outdoors, some Þne lint will be expelled into the laundry area. An accumulation of lint in any area of the home can create a health and Þre hazard.
18