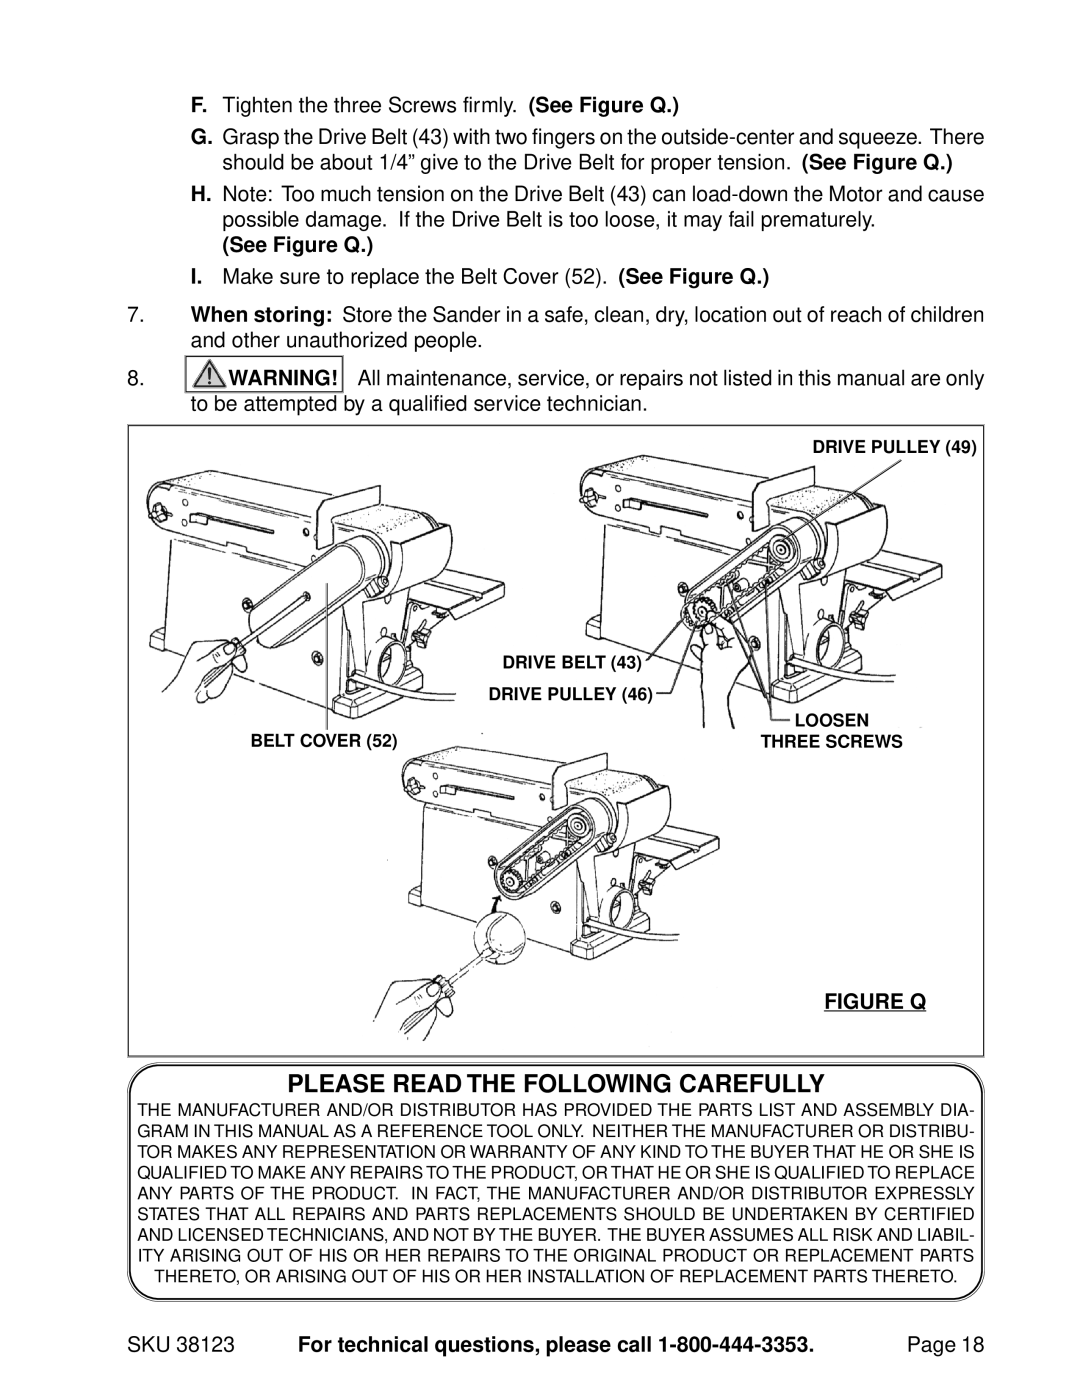
F.Tighten the three Screws firmly. (See Figure Q.)
G.Grasp the Drive Belt (43) with two fingers on the
H.Note: Too much tension on the Drive Belt (43) can
(See Figure Q.)
I.Make sure to replace the Belt Cover (52). (See Figure Q.)
7.When storing: Store the Sander in a safe, clean, dry, location out of reach of children and other unauthorized people.
8.![]()
![]()
![]() WARNING!
WARNING! ![]()
![]() All maintenance, service, or repairs not listed in this manual are only to be attempted by a qualified service technician.
All maintenance, service, or repairs not listed in this manual are only to be attempted by a qualified service technician.
DRIVE PULLEY (49)
|
| DRIVE BELT (43) |
|
| DRIVE PULLEY (46) |
|
| LOOSEN |
BELT COVER (52) | THREE SCREWS | |
FIGURE Q
PLEASE READ THE FOLLOWING CAREFULLY
THE MANUFACTURER AND/OR DISTRIBUTOR HAS PROVIDED THE PARTS LIST AND ASSEMBLY DIA- GRAM IN THIS MANUAL AS A REFERENCE TOOL ONLY. NEITHER THE MANUFACTURER OR DISTRIBU- TOR MAKES ANY REPRESENTATION OR WARRANTY OF ANY KIND TO THE BUYER THAT HE OR SHE IS QUALIFIED TO MAKE ANY REPAIRS TO THE PRODUCT, OR THAT HE OR SHE IS QUALIFIED TO REPLACE ANY PARTS OF THE PRODUCT. IN FACT, THE MANUFACTURER AND/OR DISTRIBUTOR EXPRESSLY STATES THAT ALL REPAIRS AND PARTS REPLACEMENTS SHOULD BE UNDERTAKEN BY CERTIFIED AND LICENSED TECHNICIANS, AND NOT BY THE BUYER. THE BUYER ASSUMES ALL RISK AND LIABIL- ITY ARISING OUT OF HIS OR HER REPAIRS TO THE ORIGINAL PRODUCT OR REPLACEMENT PARTS
THERETO, OR ARISING OUT OF HIS OR HER INSTALLATION OF REPLACEMENT PARTS THERETO.
SKU 38123 | For technical questions, please call | Page 18 |
