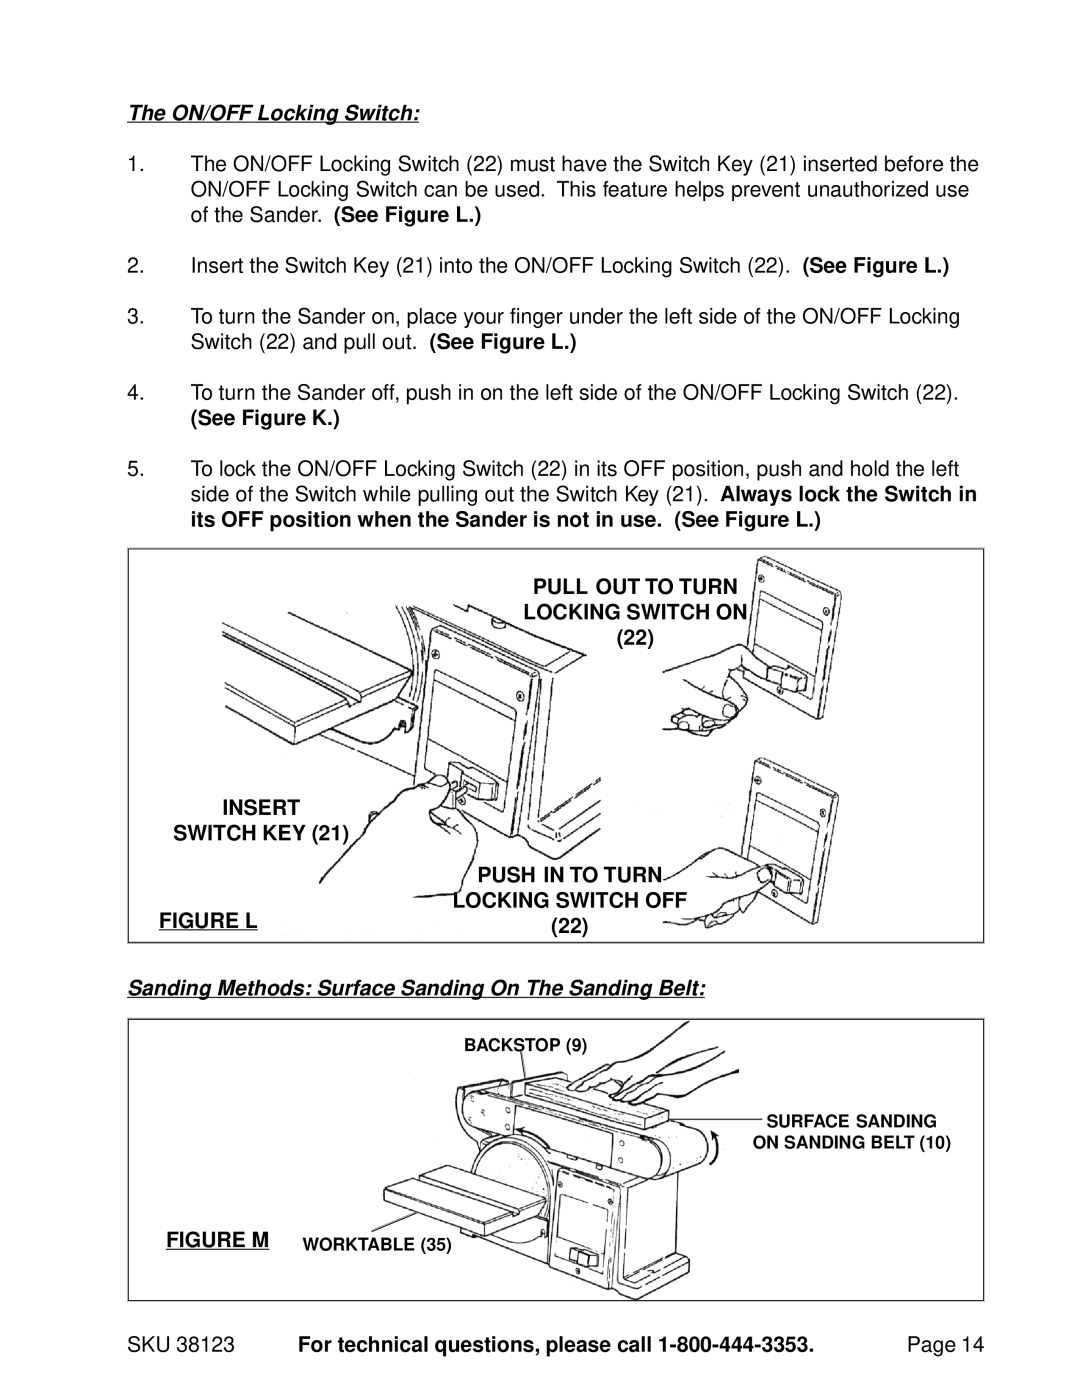
The ON/OFF Locking Switch:
1.The ON/OFF Locking Switch (22) must have the Switch Key (21) inserted before the ON/OFF Locking Switch can be used. This feature helps prevent unauthorized use of the Sander. (See Figure L.)
2.Insert the Switch Key (21) into the ON/OFF Locking Switch (22). (See Figure L.)
3.To turn the Sander on, place your finger under the left side of the ON/OFF Locking Switch (22) and pull out. (See Figure L.)
4.To turn the Sander off, push in on the left side of the ON/OFF Locking Switch (22).
(See Figure K.)
5.To lock the ON/OFF Locking Switch (22) in its OFF position, push and hold the left side of the Switch while pulling out the Switch Key (21). Always lock the Switch in its OFF position when the Sander is not in use. (See Figure L.)
PULL OUT TO TURN LOCKING SWITCH ON (22)
INSERT
SWITCH KEY (21)
| PUSH IN TO TURN |
FIGURE L | LOCKING SWITCH OFF |
(22) |
Sanding Methods: Surface Sanding On The Sanding Belt:
BACKSTOP (9)
SURFACE SANDING
ON SANDING BELT (10)
FIGURE M WORKTABLE (35)
SKU 38123 | For technical questions, please call | Page 14 |