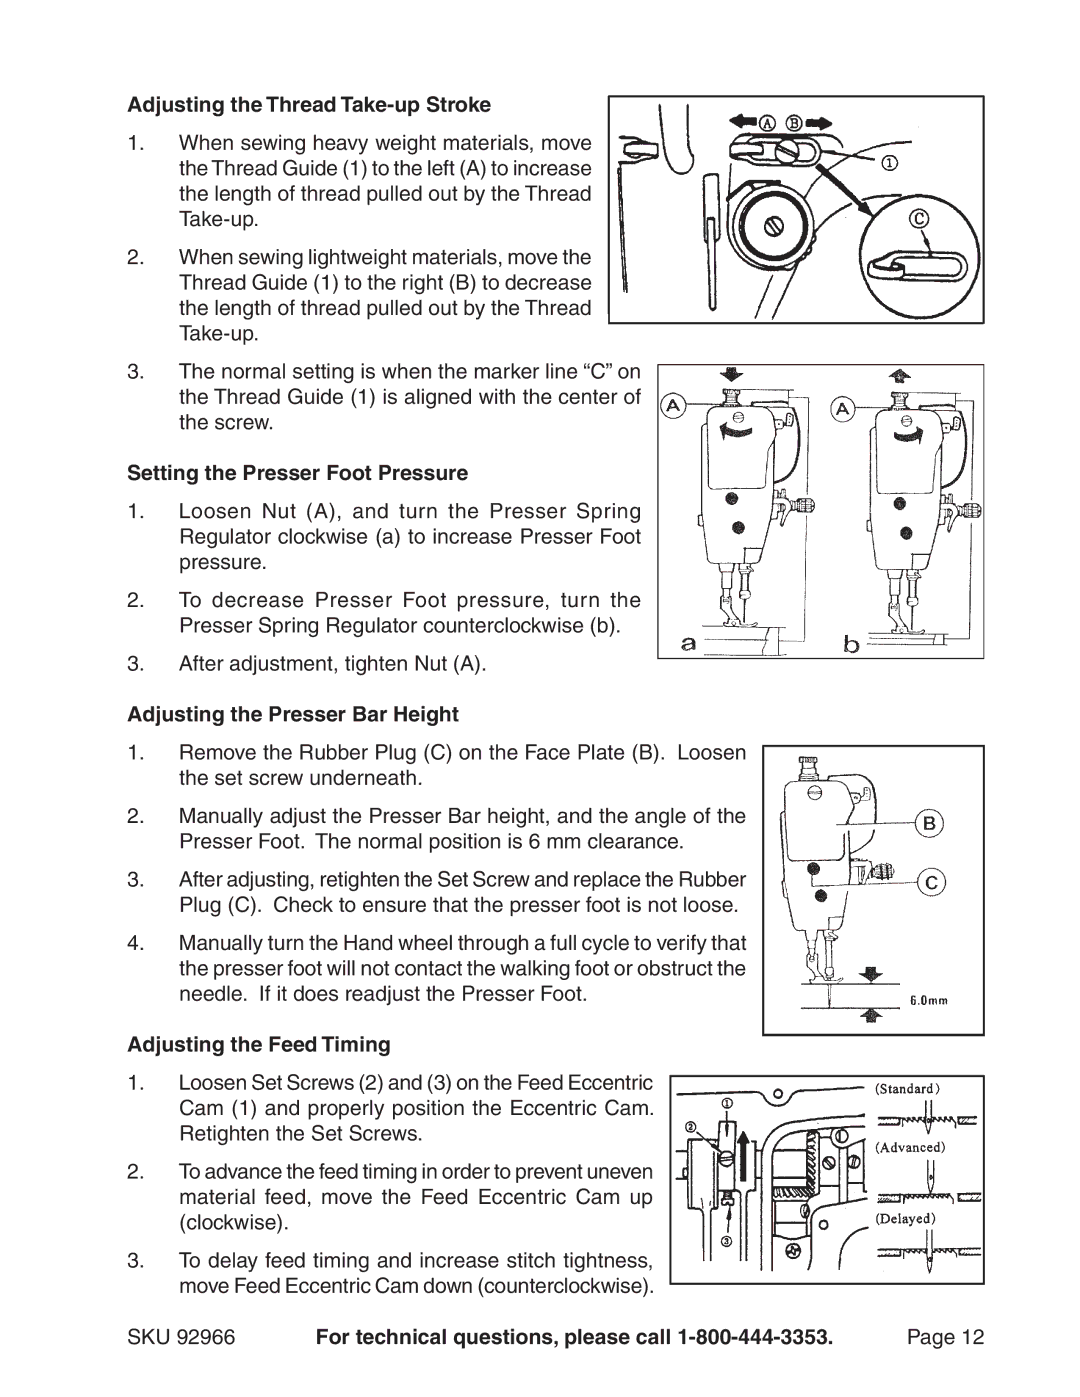
Adjusting the Thread Take-up Stroke
1.When sewing heavy weight materials, move the Thread Guide (1) to the left (A) to increase the length of thread pulled out by the Thread
2.When sewing lightweight materials, move the Thread Guide (1) to the right (B) to decrease the length of thread pulled out by the Thread
3.The normal setting is when the marker line “C” on the Thread Guide (1) is aligned with the center of the screw.
Setting the Presser Foot Pressure
1.Loosen Nut (A), and turn the Presser Spring Regulator clockwise (a) to increase Presser Foot pressure.
2.To decrease Presser Foot pressure, turn the Presser Spring Regulator counterclockwise (b).
3.After adjustment, tighten Nut (A).
Adjusting the Presser Bar Height
1.Remove the Rubber Plug (C) on the Face Plate (B). Loosen the set screw underneath.
2.Manually adjust the Presser Bar height, and the angle of the Presser Foot. The normal position is 6 mm clearance.
3.After adjusting, retighten the Set Screw and replace the Rubber Plug (C). Check to ensure that the presser foot is not loose.
4.Manually turn the Hand wheel through a full cycle to verify that the presser foot will not contact the walking foot or obstruct the needle. If it does readjust the Presser Foot.
Adjusting the Feed Timing
1.Loosen Set Screws (2) and (3) on the Feed Eccentric Cam (1) and properly position the Eccentric Cam. Retighten the Set Screws.
2.To advance the feed timing in order to prevent uneven material feed, move the Feed Eccentric Cam up (clockwise).
3.To delay feed timing and increase stitch tightness, move Feed Eccentric Cam down (counterclockwise).
SKU 92966 | For technical questions, please call | Page 12 |