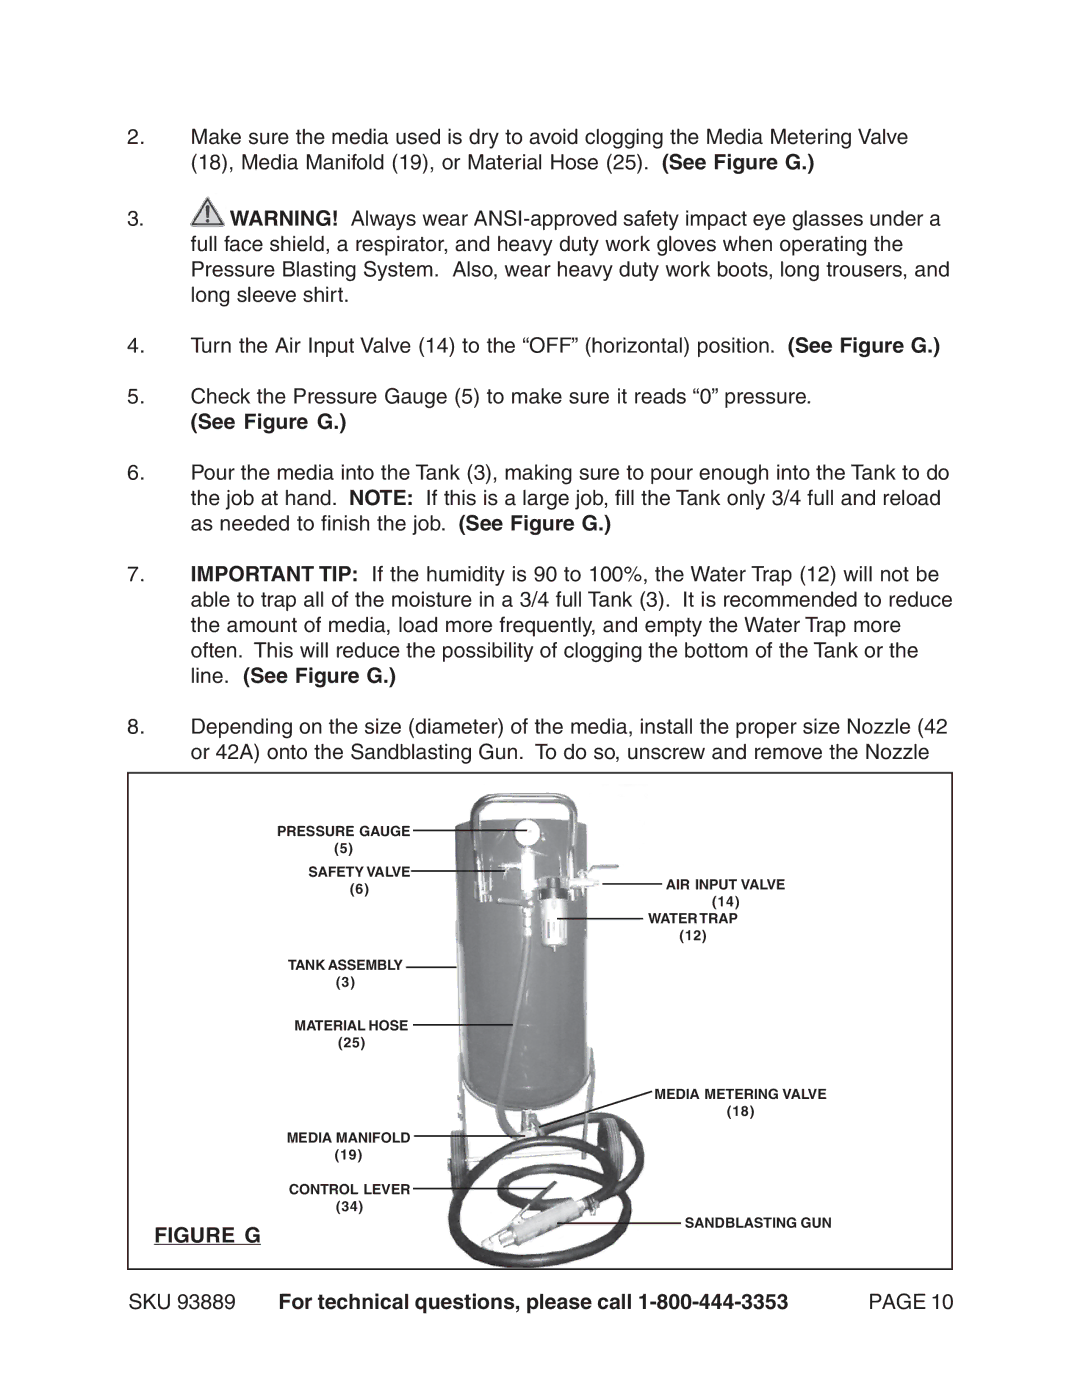
2.Make sure the media used is dry to avoid clogging the Media Metering Valve (18), Media Manifold (19), or Material Hose (25). (See Figure G.)
3.![]() WARNING! Always wear
WARNING! Always wear
4.Turn the Air Input Valve (14) to the “OFF” (horizontal) position. (See Figure G.)
5.Check the Pressure Gauge (5) to make sure it reads “0” pressure.
(See Figure G.)
6.Pour the media into the Tank (3), making sure to pour enough into the Tank to do the job at hand. NOTE: If this is a large job, fill the Tank only 3/4 full and reload as needed to finish the job. (See Figure G.)
7.IMPORTANT TIP: If the humidity is 90 to 100%, the Water Trap (12) will not be able to trap all of the moisture in a 3/4 full Tank (3). It is recommended to reduce the amount of media, load more frequently, and empty the Water Trap more often. This will reduce the possibility of clogging the bottom of the Tank or the line. (See Figure G.)
8.Depending on the size (diameter) of the media, install the proper size Nozzle (42 or 42A) onto the Sandblasting Gun. To do so, unscrew and remove the Nozzle
PRESSURE GAUGE
(5)
SAFETY VALVE
(6)AIR INPUT VALVE
(14) WATER TRAP
(12)
TANK ASSEMBLY
(3)
MATERIAL HOSE
(25)
MEDIA METERING VALVE
(18)
MEDIA MANIFOLD
(19)
CONTROL LEVER
(34)
FIGURE G
SANDBLASTING GUN
SKU 93889 For technical questions, please call | PAGE 10 |