System Configuration
However, we recommend that the first time you use the AVR, you take advantage of the simplicity of configuring the system using the EzSet+ process, which takes the guesswork out of speak- er size and delay settings, and balances the speaker output levels to tailor the AVR’s sound presentation to your specific system and room. Before beginning the EzSet+ procedure, there are a few adjustments that need to be made to ensure accurate results.
The factory default settings for the AVR 240 have all inputs configured for an analog audio input except for the DVD input, where the Coaxial Digital Input is the default and the Video 2 input, where the Optical Digital Audio Input
is the default. Once the DSP processing system is used for the first time for any input, the speaker settings will automatically default to “Small” at all positions with the subwoofer set to “LFE.” The default setting for the surround modes is Logic 7 Music, although Dolby Digital or DTS will auto- matically be selected as appropriate when a source with digital encoding is in use.
Before using the unit, you will probably want to change the settings for most inputs so that they are properly configured to reflect the use of digi- tal or analog inputs and the surround mode asso- ciated with the input. Remember that since the AVR memorizes the settings for each input indi- vidually, you will need to make these adjustments for each input used. However, once they are made, further adjustment is only required when system components are changed.
To make this process as quick and as easy as pos- sible, we suggest that you use the
It is recommended that you record your settings for each input using the
Input Setup
The first step in configuring the AVR is to select an input, i.e. to associate an analog or digital input with each input source in use, e.g. CD or DVD. Note that once an input is selected, all settings for the Digital Input, Speaker Configura- tion, Delay and Surround Mode will ”attach” themselves to that input and be stored in a nonvolatile memory. This means that once made, the selection of an input will automatically recall those settings. For that reason, the procedures described below must be repeated for each input source so that you have the opportunity to custom tailor each source to your specific listening requirements. However, once made they need not be changed again unless you need to alter a setting.
When using the
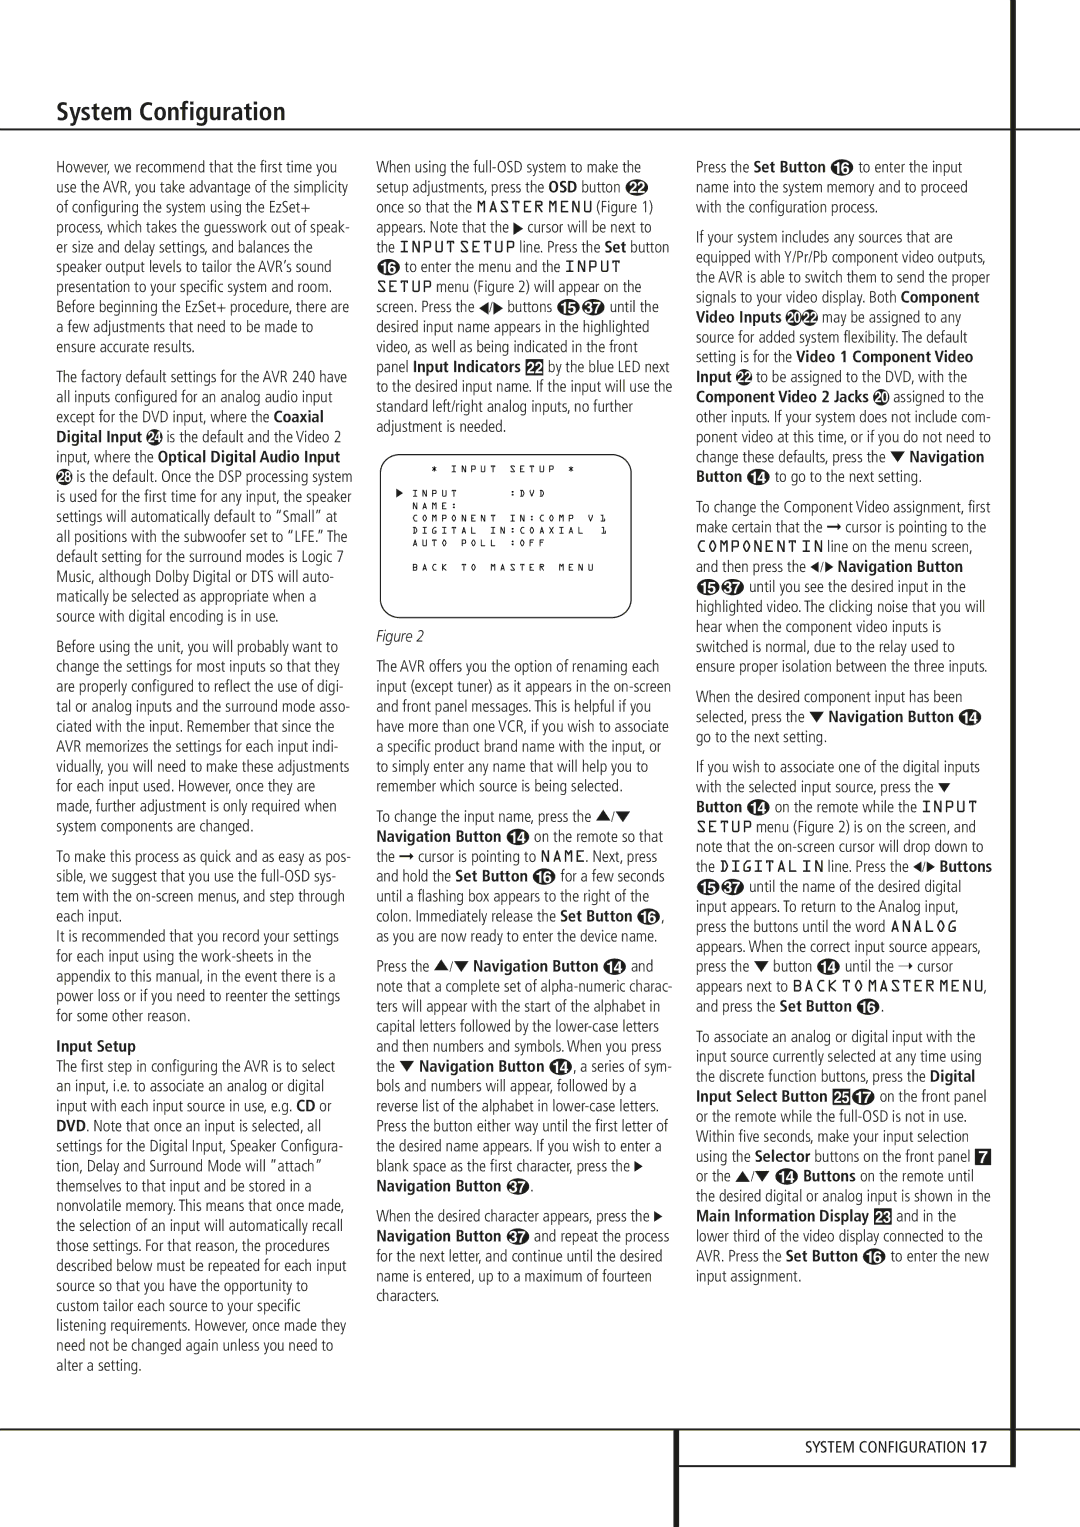
Fto enter the menu and the INPUT SETUP menu (Figure 2) will appear on the
screen. Press the ‹/› buttons E until the desired input name appears in the highlighted video, as well as being indicated in the front panel Input Indicators by the blue LED next to the desired input name. If the input will use the standard left/right analog inputs, no further adjustment is needed.
* I N P U T | S E T U P * |
I N P U T | : D V D |
N A M E : |
|
C O M P O N E N T | I N : C O M P V 1 |
D I G I T A L I N : C O A X I A L 1 | |
A U T O P O L L | : O F F |
B A C K T O M A S T E R M E N U
Figure 2
The AVR offers you the option of renaming each input (except tuner) as it appears in the
To change the input name, press the ⁄/¤ Navigation Button D on the remote so that the ➞ cursor is pointing to NAME. Next, press and hold the Set Button F for a few seconds until a flashing box appears to the right of the colon. Immediately release the Set Button F, as you are now ready to enter the device name.
Press the ⁄/¤ Navigation Button D and note that a complete set of
Navigation Button | . |
When the desired character appears, press the ›
Navigation Button and repeat the process for the next letter, and continue until the desired name is entered, up to a maximum of fourteen characters.
Press the Set Button F to enter the input name into the system memory and to proceed with the configuration process.
If your system includes any sources that are equipped with Y/Pr/Pb component video outputs, the AVR is able to switch them to send the proper signals to your video display. Both Component
Video Inputs may be assigned to any source for added system flexibility. The default setting is for the Video 1 Component Video Input to be assigned to the DVD, with the Component Video 2 Jacks assigned to the other inputs. If your system does not include com- ponent video at this time, or if you do not need to change these defaults, press the ¤ Navigation Button D to go to the next setting.
To change the Component Video assignment, first make certain that the ➞ cursor is pointing to the COMPONENT IN line on the menu screen, and then press the ‹ /› Navigation Button
Euntil you see the desired input in the highlighted video. The clicking noise that you will hear when the component video inputs is switched is normal, due to the relay used to ensure proper isolation between the three inputs.
When the desired component input has been selected, press the ¤ Navigation Button D go to the next setting.
If you wish to associate one of the digital inputs with the selected input source, press the ¤ Button D on the remote while the INPUT SETUP menu (Figure 2) is on the screen, and note that the
Euntil the name of the desired digital input appears. To return to the Analog input, press the buttons until the word ANALOG appears. When the correct input source appears, press the ¤ button D until the ➝ cursor appears next to BACK TO MASTER MENU, and press the Set Button F.
To associate an analog or digital input with the input source currently selected at any time using the discrete function buttons, press the Digital Input Select Button ÛG on the front panel or the remote while the
SYSTEM CONFIGURATION 17