System Setup
normal for surround speakers to operate only occasionally. Artificially increasing the volume to the rear speakers may destroy the illusion of an enveloping sound field that duplicates the way you hear sound in a movie theater or concert hall.
The default settings of the DVD player is 0 dB for all channels. In case you feel adjustments are necessary in your setup, we advise you to make the adjustments using the internal test tone generator.
Once the cursor is moved to any of the speaker level icons, the test noise will be heard from the corresponding speaker. If this is not the case please check whether the loudspeaker is con- nected to the correct loudspeaker output on the rear panel. The speaker level can be adjusted by pressing ENTER and selecting an appropriate level indicated in the Lower Menu Line. The test noise will stop as soon as the cursor is moved away from any speaker level icon.
Video Settings
Figure 8
The Video Setting Submenu contains the following settings. Follow the explanations in the Upper Menu Line on the bottom of your screen to change the settings.
Aspect Ratio: This step selects the TV aspect ratio, conventional screen shape (4:3) or widescreen (16:9), according to your TV. If you have a conventional 4:3 TV that can (automati- cally) switch to show a 16:9 format, you should select 16:9 rather than 4:3.
TV Standard: Sets the output video format i.e. NTSC or PAL, of the HS Controller. If you have a multi standard TV, we recommend the AUTO setting for optimal picture quality.
Scan Type: Sets the component video output to Interlace or Progressive. Before changing the setting to Progressive, make sure that your video display connected to the component output is capable of handling progressive scan signals. As soon as you select progressive scan the scan type, the Video Output will automatically change to Component. All other outputs, composite video on cinch, SCART and
Scart Output: Selects which kind of video out- put signals will be routed over the scart. RGB will be used for most TV’s as it provides the best picture quality.
Video Mode: This setting affects only the Component Video Outputs, and it controls how the video signals are optimized for progressive scan display. In most cases, the “automatic” mode is your best choice, as it senses whether the disc being played was originally recorded on video or shot on film. However, in some cases you may wish to compensate for errors in the disc authoring that occur when the frame rate is not properly maintained when films are converted to video. Three choices are available:
•Auto: This is the recommended setting, as it lets the HS System analyze the signals from the DVD and adjust the output accordingly.
•Movie: Choose this option for optimal play- back of material that was shot on film, even though you are viewing it on video via a DVD.
•Video: Choose this option for optimal playback of material that was shot directly to video, such as concerts and sports programming.
Video Resolution: Selects the resolution of the video output. When the HS system is connected to either one of the Composite,
When you connect your HS system via a digital HDMI or Component Video connection, the preferred setting is either 720p (progressive scan with 720 lines) or 1080i (interlaced with 1080 lines).
If you select any of the 720p or 1080i high resolution formats, all analog video outputs (Composite,
In order to watch low resolution formats again,
press the Video Output Button on the remote control.
Please note that with Component Video non- encrypted movies will be upscaled to 720p. Encrypted movies will not play in 720p and will have to played back on standard progressive scan component or HDMI.
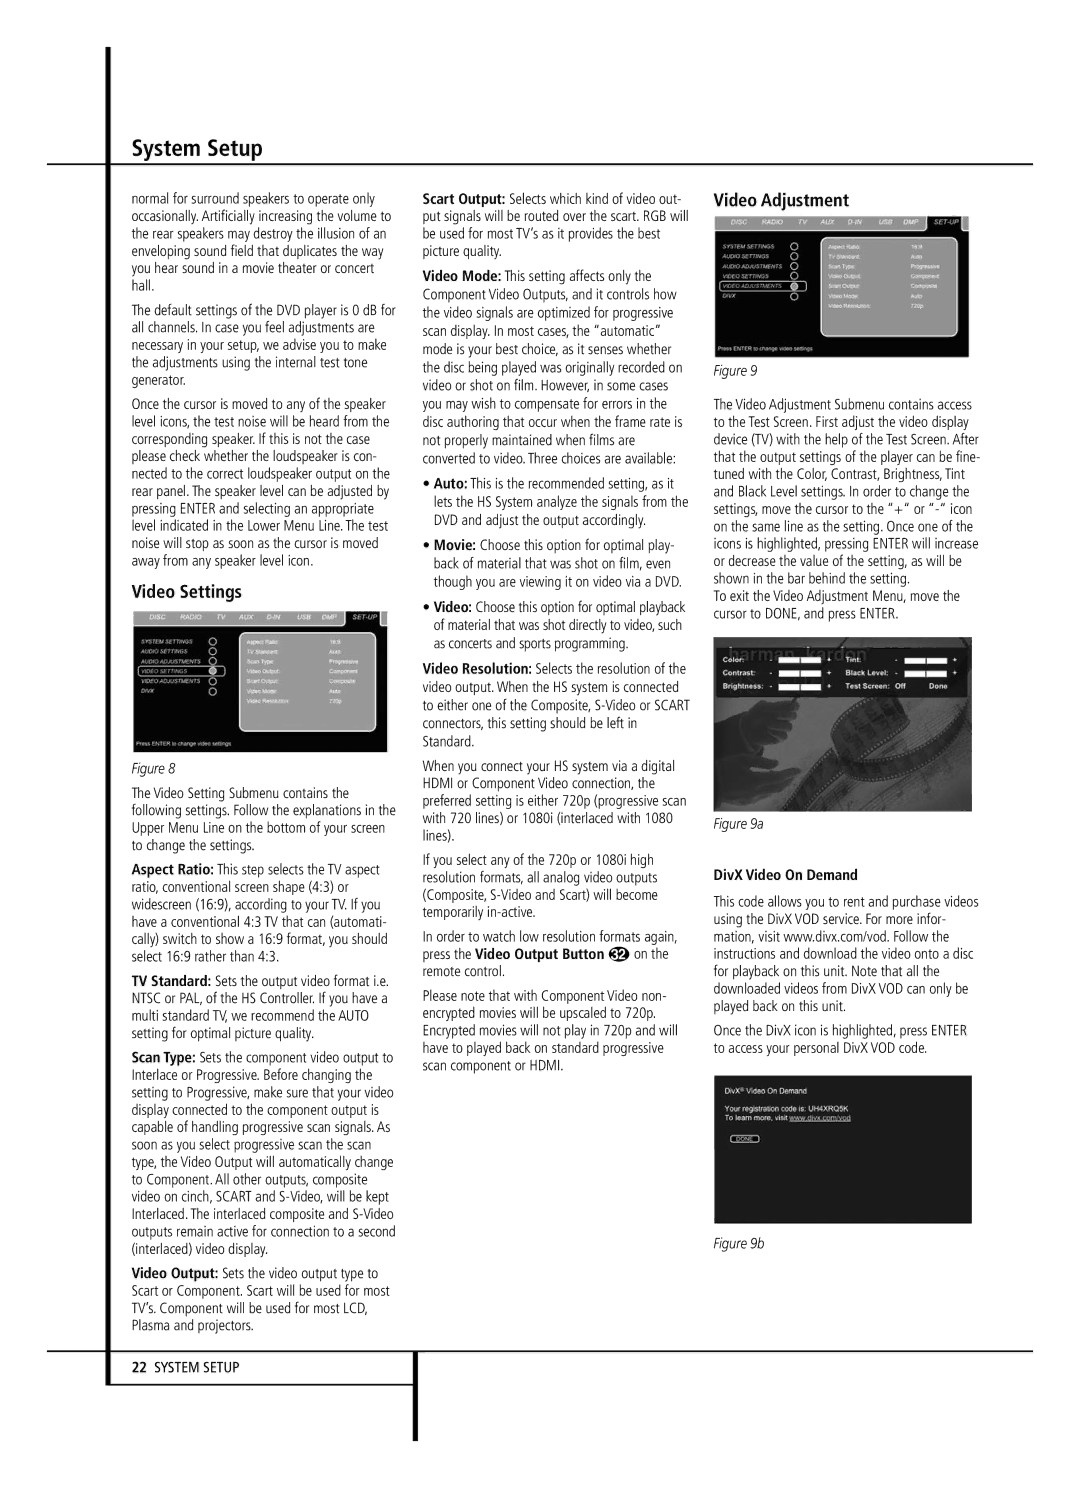
Video Adjustment
Figure 9
The Video Adjustment Submenu contains access to the Test Screen. First adjust the video display device (TV) with the help of the Test Screen. After that the output settings of the player can be fine- tuned with the Color, Contrast, Brightness, Tint and Black Level settings. In order to change the settings, move the cursor to the “+“ or
To exit the Video Adjustment Menu, move the cursor to DONE, and press ENTER.
Figure 9a
DivX Video On Demand
This code allows you to rent and purchase videos using the DivX VOD service. For more infor- mation, visit www.divx.com/vod. Follow the instructions and download the video onto a disc for playback on this unit. Note that all the downloaded videos from DivX VOD can only be played back on this unit.
Once the DivX icon is highlighted, press ENTER to access your personal DivX VOD code.
(interlaced) video display.
Video Output: Sets the video output type to Scart or Component. Scart will be used for most TV’s. Component will be used for most LCD, Plasma and projectors.
Figure 9b