System Setup
the AUX input is highlighted in dark blue. Press the Enter Button 6 to confirm. Next proceed to the
6to confirm. Next, press the M/N Navigation Buttons 9 to move the
Figure 6a
Step 5: The first two screens of the EzSet/EQ system will now appear to remind you to connect all the loudspeakers and to plug in the micro- phone. If you have not already done so, connect all loudspeakers and plug the microphone into the Headphone Jack 4 as described in steps 2 and 3. When you are ready to proceed, make certain that the cursor is pointing to NEXT and press the Enter Button 6. If you do not wish to continue with the EzSet/EQ process, press the ‹/› Navigation Buttons 9 to highlight BACK and then press the ENTER Button 6 to return to the MASTER MENU. Note that if you attempt to move to the next menu without plugging in the microphone, a reminder message will flash at the bottom of the screen.
Figure 6b
IMPORTANT NOTE: Anyone with hearing that is sensitive to loud noises should leave the room at this point, or use ear protection sufficient to reduce the noise level. Inexpensive
20SYSTEM SETUP
Figure 6c
Step 6. At this point you will begin to hear a series of test tones circulate among all the speakers in your system. While this is happening, the HS 350 is reading the signal to determine which speaker positions are active, what type of speaker is present at each active position, what the distance is from the listening position to each speaker, and to begin to build a profile of the impact of the room’s acoustics on the quality of audio reproduction. When the test is completed you will hear the tones stop, and the system will pause for as long as a minute while the proces- sor makes its calculations. Do not be alarmed if the “WARNING” message remains on the screen after tones stop until a results message is dis- played as shown in Step 6 or 7, below.
NOTE: While these tests detect whether a speak- er is connected to a particular output, they can- not determine whether the speaker is in the cor- rect position. (For example, it can tell whether a speaker is connected to the Surround Right out- put, but it cannot tell whether the speaker is on the right or left side of your listening room.) For that reason, we strongly recommend that you try to listen as the tone circulates, around you, starting at the left front, right front, center, and finishing at the left surround and right surround. If a tone is heard from a speaker position that does not match this order, make a note of the incorrect speaker connections. When the test process stops you will see a message indicating the Far Field measurements are complete, but since there is a connection error press the ¤ Navigation Button 9 so that the
Step 7. When the Far Field tests are complete a message screen will appear to confirm if the pro- cedure was successful or not. In most cases there will not be any problems and you will see the message shown in Figure 6d on your screen. If the speaker positions shown match the actual speaker layout in your system select NEXT and, press the ENTER Button 6 to complete EzSet/EQ by performing the Near Field Measurements from the front left, center, front right and surround left and right speakers. By taking this separate set of measurements, the HS 350 is able to complete its view of the room’s sonic signature and apply equalization as needed to correct spikes and dips in the system’s
response. Continue these instructions with Step 8.
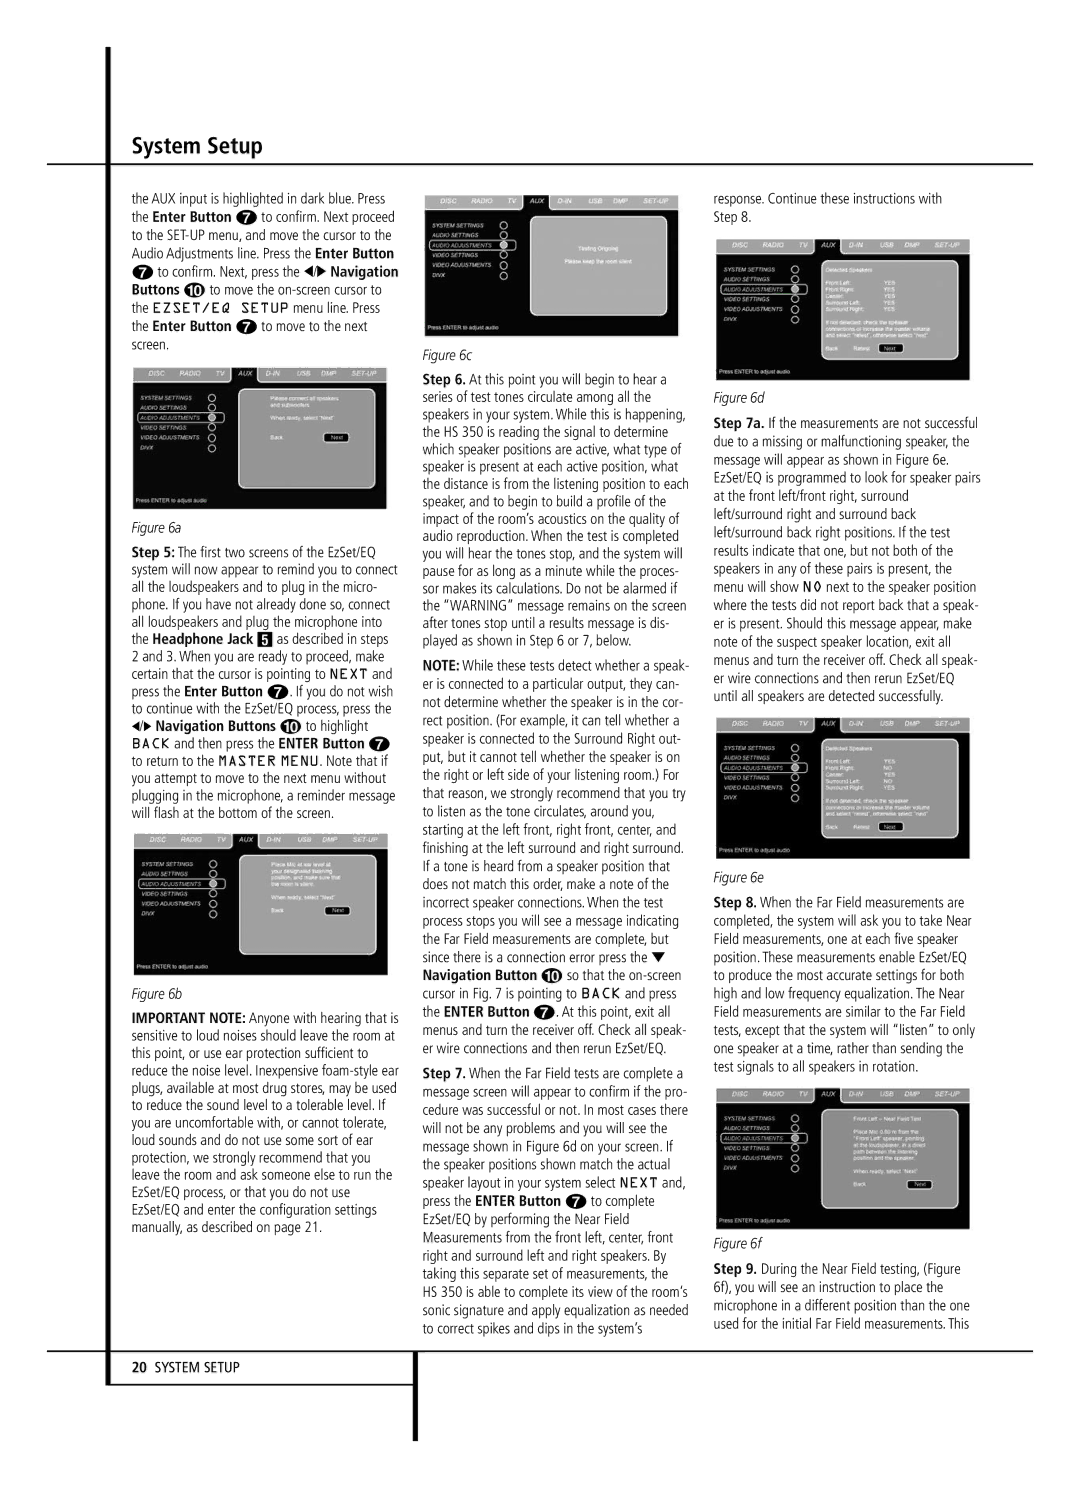
Figure 6d
Step 7a. If the measurements are not successful due to a missing or malfunctioning speaker, the message will appear as shown in Figure 6e. EzSet/EQ is programmed to look for speaker pairs at the front left/front right, surround left/surround right and surround back left/surround back right positions. If the test results indicate that one, but not both of the speakers in any of these pairs is present, the menu will show NO next to the speaker position where the tests did not report back that a speak- er is present. Should this message appear, make note of the suspect speaker location, exit all menus and turn the receiver off. Check all speak- er wire connections and then rerun EzSet/EQ until all speakers are detected successfully.
Figure 6e
Step 8. When the Far Field measurements are completed, the system will ask you to take Near Field measurements, one at each five speaker position. These measurements enable EzSet/EQ to produce the most accurate settings for both high and low frequency equalization. The Near Field measurements are similar to the Far Field tests, except that the system will “listen” to only one speaker at a time, rather than sending the test signals to all speakers in rotation.
Figure 6f
Step 9. During the Near Field testing, (Figure 6f), you will see an instruction to place the microphone in a different position than the one used for the initial Far Field measurements. This