CEILING MOUNTING
Chain Mounting
![]() WARNING
WARNING
To avoid any injury or damage to the unit when using chains for installation, the chains must have sufficient strength and be securely fastened, or the unit could become loose or fall. Do not place anything on top of warmers supported by chains.
Chain supplied by Hatco is constructed of sufficient strength to securely hold the weight of the unit only when properly mounted.
1.Securely fasten the chain to the surface above the desired area. Be sure chain is located so the unit will be suspended at a safe and proper distance from walls, counter and food.
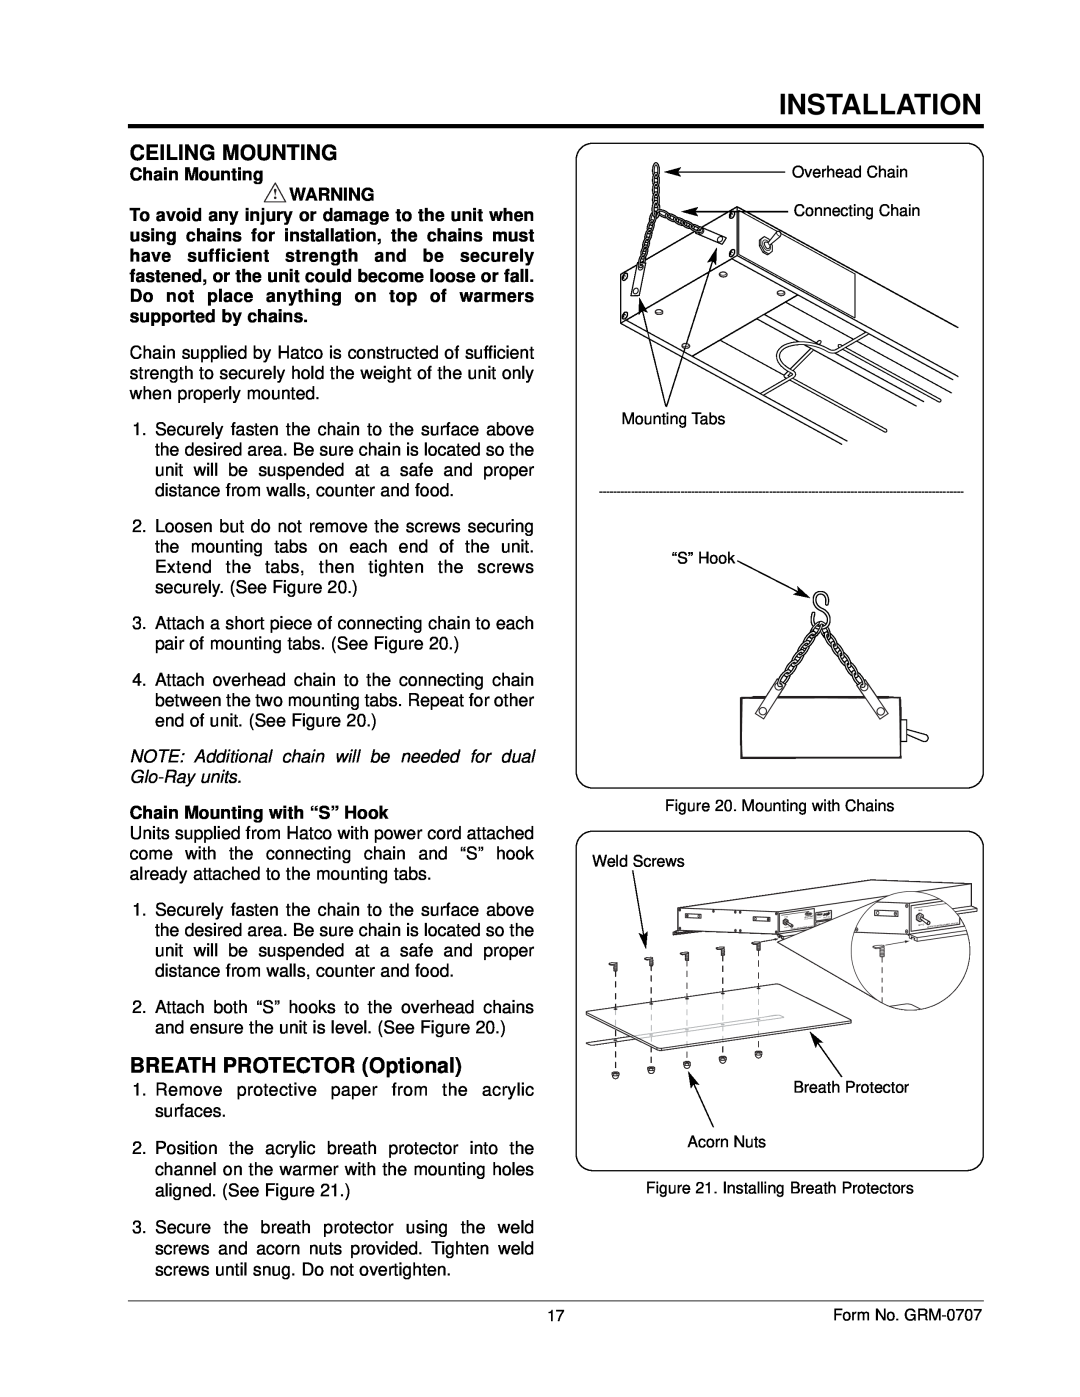
2.Loosen but do not remove the screws securing the mounting tabs on each end of the unit. Extend the tabs, then tighten the screws securely. (See Figure 20.)
3.Attach a short piece of connecting chain to each pair of mounting tabs. (See Figure 20.)
4.Attach overhead chain to the connecting chain between the two mounting tabs. Repeat for other end of unit. (See Figure 20.)
NOTE: Additional chain will be needed for dual Glo-Ray units.
Chain Mounting with “S” Hook
Units supplied from Hatco with power cord attached come with the connecting chain and “S” hook already attached to the mounting tabs.
1.Securely fasten the chain to the surface above the desired area. Be sure chain is located so the unit will be suspended at a safe and proper distance from walls, counter and food.
2.Attach both “S” hooks to the overhead chains and ensure the unit is level. (See Figure 20.)
BREATH PROTECTOR (Optional)
1.Remove protective paper from the acrylic surfaces.
2.Position the acrylic breath protector into the channel on the warmer with the mounting holes aligned. (See Figure 21.)
3.Secure the breath protector using the weld screws and acorn nuts provided. Tighten weld screws until snug. Do not overtighten.
INSTALLATION
Overhead Chain
![]()
![]() Connecting Chain
Connecting Chain
Mounting Tabs
“S” Hook
Figure 20. Mounting with Chains
Weld Screws
CAUTION - HOT | O |
Breath Protector
Acorn Nuts
Figure 21. Installing Breath Protectors
17 | Form No. |