MAINTENANCE
HOW TO
REPLACE THE DRIVE BELT
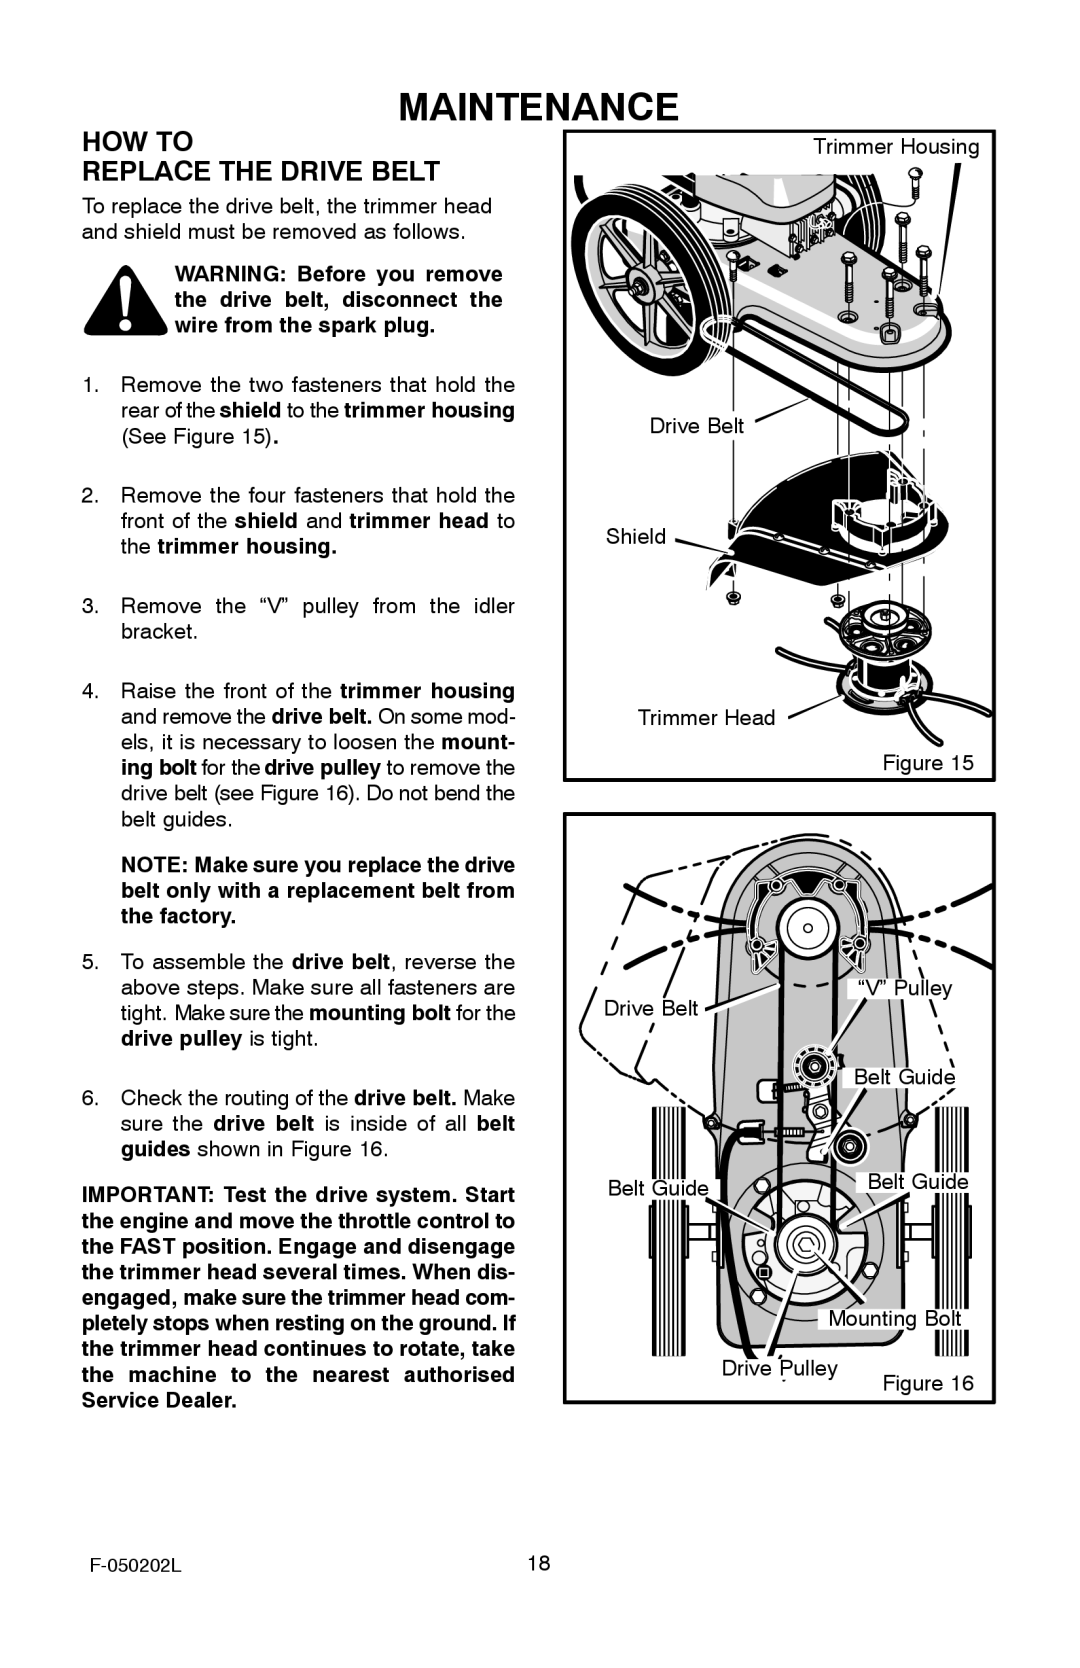
To replace the drive belt, the trimmer head and shield must be removed as follows.
WARNING: Before you remove the drive belt, disconnect the wire from the spark plug.
1.Remove the two fasteners that hold the rear of the shield to the trimmer housing (See Figure 15).
2.Remove the four fasteners that hold the front of the shield and trimmer head to the trimmer housing.
3.Remove the “V” pulley from the idler bracket.
4.Raise the front of the trimmer housing and remove the drive belt. On some mod- els, it is necessary to loosen the mount- ing bolt for the drive pulley to remove the drive belt (see Figure 16). Do not bend the belt guides.
NOTE: Make sure you replace the drive belt only with a replacement belt from the factory.
5.To assemble the drive belt, reverse the above steps. Make sure all fasteners are tight. Make sure the mounting bolt for the drive pulley is tight.
6.Check the routing of the drive belt. Make sure the drive belt is inside of all belt guides shown in Figure 16.
IMPORTANT: Test the drive system. Start the engine and move the throttle control to the FAST position. Engage and disengage the trimmer head several times. When dis- engaged, make sure the trimmer head com- pletely stops when resting on the ground. If the trimmer head continues to rotate, take the machine to the nearest authorised Service Dealer.
Trimmer Housing |
Drive Belt |
Shield |
Trimmer Head |
Figure 15 |
Drive Belt |
| “V” Pulley |
|
| |
|
| Belt Guide |
Belt Guide |
| Belt Guide |
|
| |
| Mounting Bolt | |
| Drive Pulley | Figure 16 |
|
| |
18 |