9 Appliance Preparation
A. Attaching Sheetrock Ledges
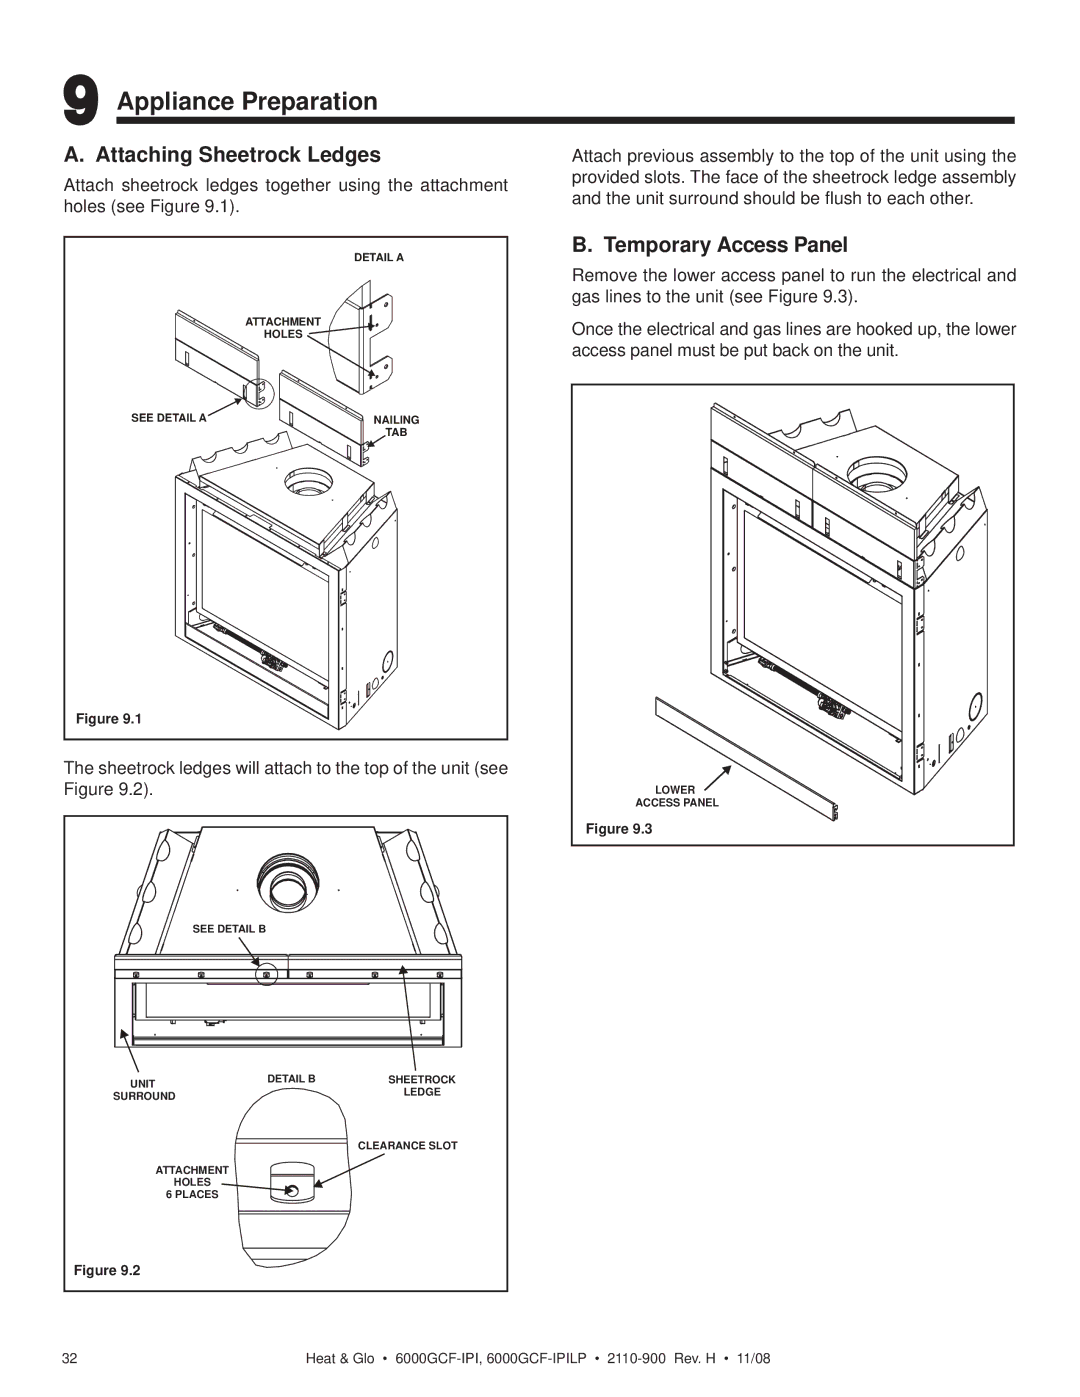
Attach sheetrock ledges together using the attachment holes (see Figure 9.1).
Attach previous assembly to the top of the unit using the provided slots. The face of the sheetrock ledge assembly and the unit surround should be flush to each other.
| B. Temporary Access Panel |
| DETAIL A |
| Remove the lower access panel to run the electrical and |
| gas lines to the unit (see Figure 9.3). |
ATTACHMENT | Once the electrical and gas lines are hooked up, the lower |
HOLES | |
| access panel must be put back on the unit. |
SEE DETAIL A | NAILING |
| TAB |
Figure 9.1 |
|
The sheetrock ledges will attach to the top of the unit (see |
|
Figure 9.2). | LOWER |
ACCESS PANEL
|
| Figure 9.3 |
SEE DETAIL B |
|
|
UNIT | DETAIL B | SHEETROCK |
| LEDGE | |
SURROUND |
| |
|
| |
|
| CLEARANCE SLOT |
ATTACHMENT |
|
|
HOLES |
|
|
6 PLACES |
|
|
Figure 9.2 |
|
|
32 | Heat & Glo • | |