
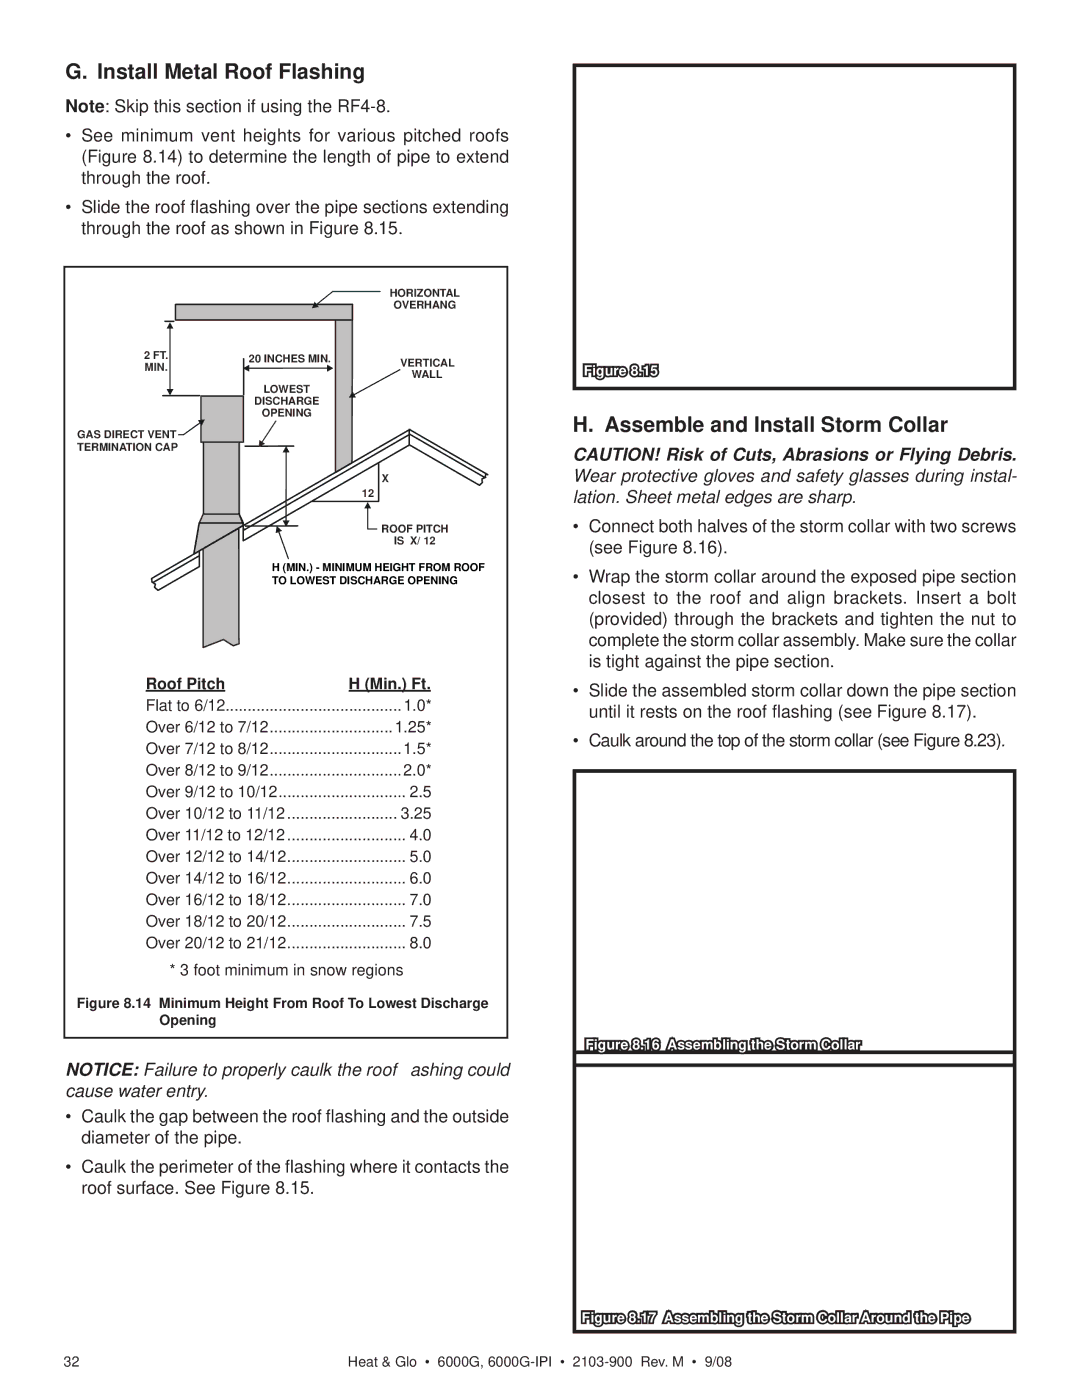
6000G-IPILP, 6000G-IPI, 6000G, 6000G-LP specifications
The Heat & Glo LifeStyle 6000 series offers a sophisticated solution for homeowners seeking both performance and style in their heating options. With models such as the 6000G, 6000G-IPILP, 6000G-IPI, and 6000G-LP, this series combines innovative technologies with elegant design, making it a preferred choice for many.One of the standout features of the LifeStyle 6000 series is its advanced heating technology. The units utilize Direct Vent technology, which ensures efficient combustion by drawing air from the outside for combustion and venting exhaust air outdoors. This not only enhances efficiency but also maintains a safe and comfortable indoor environment. Additionally, these models are designed with advanced burner systems that provide realistic flame effects and a warm ambiance, making them perfect for any living space.
The aesthetic appeal of the LifeStyle 6000 series cannot be overlooked. These fireplaces boast a contemporary design that seamlessly integrates into various architectural styles. With customizable options like different front styles and finishes, homeowners can truly make the fireplace their own. The impressive viewing area, thanks to large glass doors, amplifies the beauty of the flames while also allowing for maximum heat output.
Thermal efficiency is a key characteristic of the LifeStyle 6000 series. With an impressive heating capacity, these units can effectively warm large spaces. Furthermore, they feature a range of BTU outputs, allowing users to select the model that best suits their heating needs. Models equipped with the IntelliFire Ignition system further enhance usability, providing reliable startup with the convenience of remote control operation.
Safety is also paramount in the design of the LifeStyle 6000 series. Each model comes with built-in safety features such as a glass safety barrier and optional automatic shut-off systems, ensuring peace of mind for users.
In summary, the Heat & Glo LifeStyle 6000 series, including the 6000G, 6000G-IPILP, 6000G-IPI, and 6000G-LP, stands out in the market for its combination of modern aesthetics, innovative heating technologies, and robust safety features. Whether enhancing a cozy living room or providing warmth in a spacious area, these fireplaces offer a stylish and efficient heating solution for contemporary homes.