
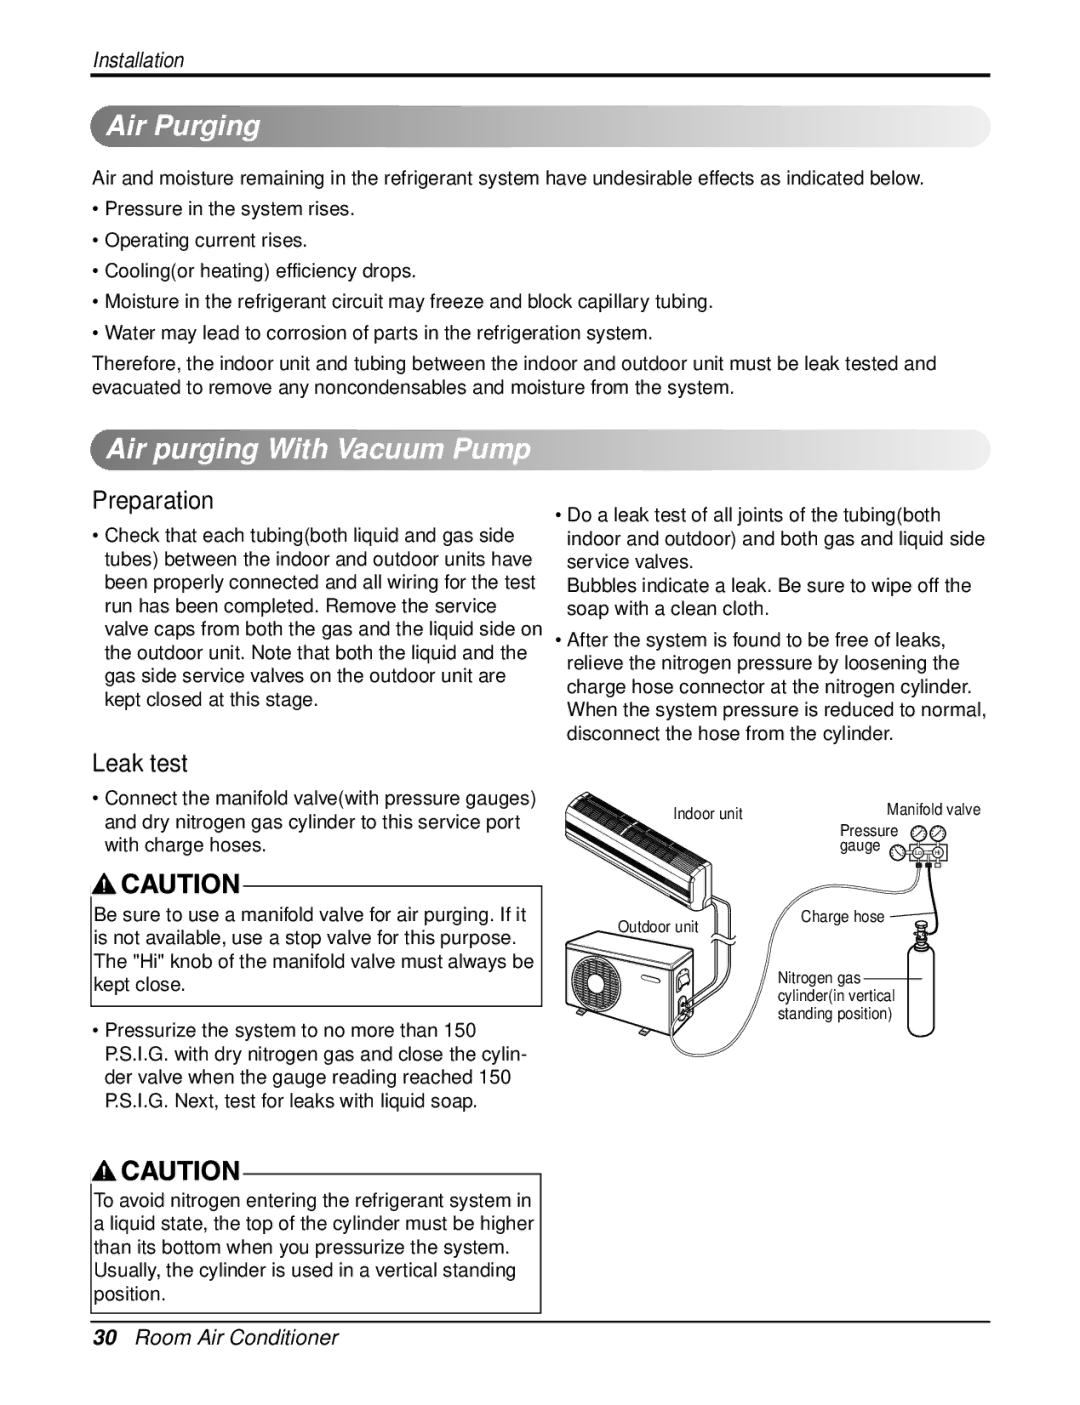
DMH12SB-0, DMH18SB-1, DMC24SB-1, DMH24SB-1, DMH09SB-0 specifications
The Heat Controller DMC24SB-1, DMH18SB-1, DMH09SB-0, DMH24SB-1, and DMC18SB-1 are a series of high-efficiency air conditioning systems designed to meet diverse climate control needs. Each model is equipped with advanced technologies to ensure optimal performance, energy efficiency, and user comfort.One of the standout features across this range is the incorporation of inverter technology. This technology allows the units to adjust the compressor speed based on the desired temperature, significantly reducing energy consumption compared to traditional systems. As a result, users can enjoy lower utility bills while maintaining a consistent indoor climate.
The DMC24SB-1 is particularly notable for its robust cooling capacity, making it ideal for larger spaces. It boasts a sleek design that complements modern interiors while providing efficient air distribution through its multi-directional airflow system. The unit is also equipped with a programmable timer and remote control for added convenience.
The DMH series, including the DMH18SB-1, DMH09SB-0, and DMH24SB-1, offers versatility in terms of size and cooling capacity. The DMH09SB-0 is perfect for smaller rooms, while the DMH24SB-1 can effectively cool larger areas. Each model in the series features a quiet operation mode, ensuring minimal noise when cooling or heating.
The DMC18SB-1 stands out for its dual functionality, providing both heating and cooling options. This model is equipped with an advanced Eco-friendly refrigerant that not only reduces environmental impact but also enhances overall system efficiency. Additionally, it features self-cleaning technology that eliminates dust and allergens, improving indoor air quality.
All models are designed with user-friendliness in mind, featuring clear digital displays and easy-to-navigate controls. Moreover, these heat controllers adhere to the highest energy efficiency ratings, ensuring they meet stringent environmental guidelines.
In summary, the Heat Controller line featuring models DMC24SB-1, DMH18SB-1, DMH09SB-0, DMH24SB-1, and DMC18SB-1 exemplifies cutting-edge heating and cooling solutions. With their advanced technologies, energy-efficient performance, and user-centric designs, these units are well-suited for both residential and commercial applications, offering reliable comfort year-round.