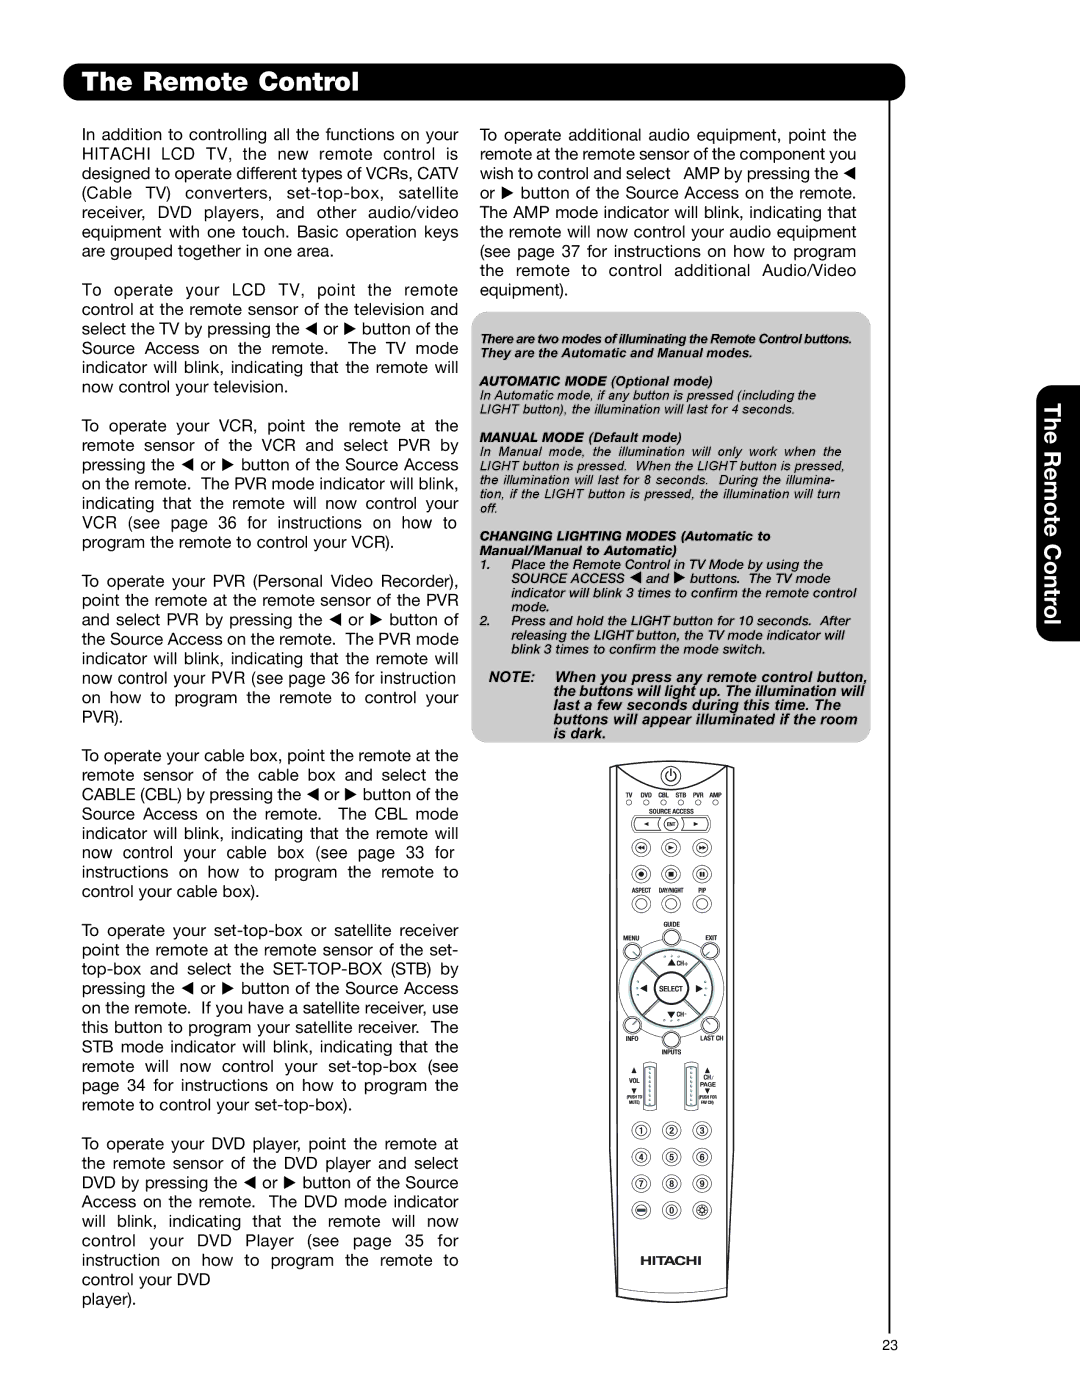
The Remote Control
In addition to controlling all the functions on your HITACHI LCD TV, the new remote control is designed to operate different types of VCRs, CATV (Cable TV) converters,
To operate your LCD TV, point the remote control at the remote sensor of the television and select the TV by pressing the or button of the Source Access on the remote. The TV mode indicator will blink, indicating that the remote will now control your television.
To operate your VCR, point the remote at the remote sensor of the VCR and select PVR by
pressing the or button of the Source Access on the remote. The PVR mode indicator will blink, indicating that the remote will now control your
VCR (see page 36 for instructions on how to
program the remote to control your VCR).
To operate your PVR (Personal Video Recorder), point the remote at the remote sensor of the PVR
and select PVR by pressing the or button of the Source Access on the remote. The PVR mode indicator will blink, indicating that the remote will
now control your PVR (see page 36 for instruction
on how to program the remote to control your PVR).
To operate your cable box, point the remote at the remote sensor of the cable box and select the CABLE (CBL) by pressing the or button of the Source Access on the remote. The CBL mode indicator will blink, indicating that the remote will now control your cable box (see page 33 for instructions on how to program the remote to control your cable box).
To operate your
pressing the or button of the Source Access on the remote. If you have a satellite receiver, use this button to program your satellite receiver. The STB mode indicator will blink, indicating that the remote will now control your
To operate your DVD player, point the remote at the remote sensor of the DVD player and select
DVD by pressing the or button of the Source Access on the remote. The DVD mode indicator will blink, indicating that the remote will now control your DVD Player (see page 35 for instruction on how to program the remote to control your DVD
player).
To operate additional audio equipment, point the remote at the remote sensor of the component you wish to control and select AMP by pressing the
or button of the Source Access on the remote. The AMP mode indicator will blink, indicating that the remote will now control your audio equipment (see page 37 for instructions on how to program the remote to control additional Audio/Video equipment).
There are two modes of illuminating the Remote Control buttons. They are the Automatic and Manual modes.
AUTOMATIC MODE (Optional mode)
In Automatic mode, if any button is pressed (including the LIGHT button), the illumination will last for 4 seconds.
MANUAL MODE (Default mode)
In Manual mode, the illumination will only work when the LIGHT button is pressed. When the LIGHT button is pressed, the illumination will last for 8 seconds. During the illumina- tion, if the LIGHT button is pressed, the illumination will turn off.
CHANGING LIGHTING MODES (Automatic to Manual/Manual to Automatic)
1.Place the Remote Control in TV Mode by using the
SOURCE ACCESS and buttons. The TV mode indicator will blink 3 times to confirm the remote control mode.
2.Press and hold the LIGHT button for 10 seconds. After releasing the LIGHT button, the TV mode indicator will blink 3 times to confirm the mode switch.
NOTE: When you press any remote control button, the buttons will light up. The illumination will last a few seconds during this time. The buttons will appear illuminated if the room is dark.
A/V NET
![]()
![]() +
+ ![]()
![]()
![]() -
-
![]() /
/
The Remote Control
23