TV Guide On Screen
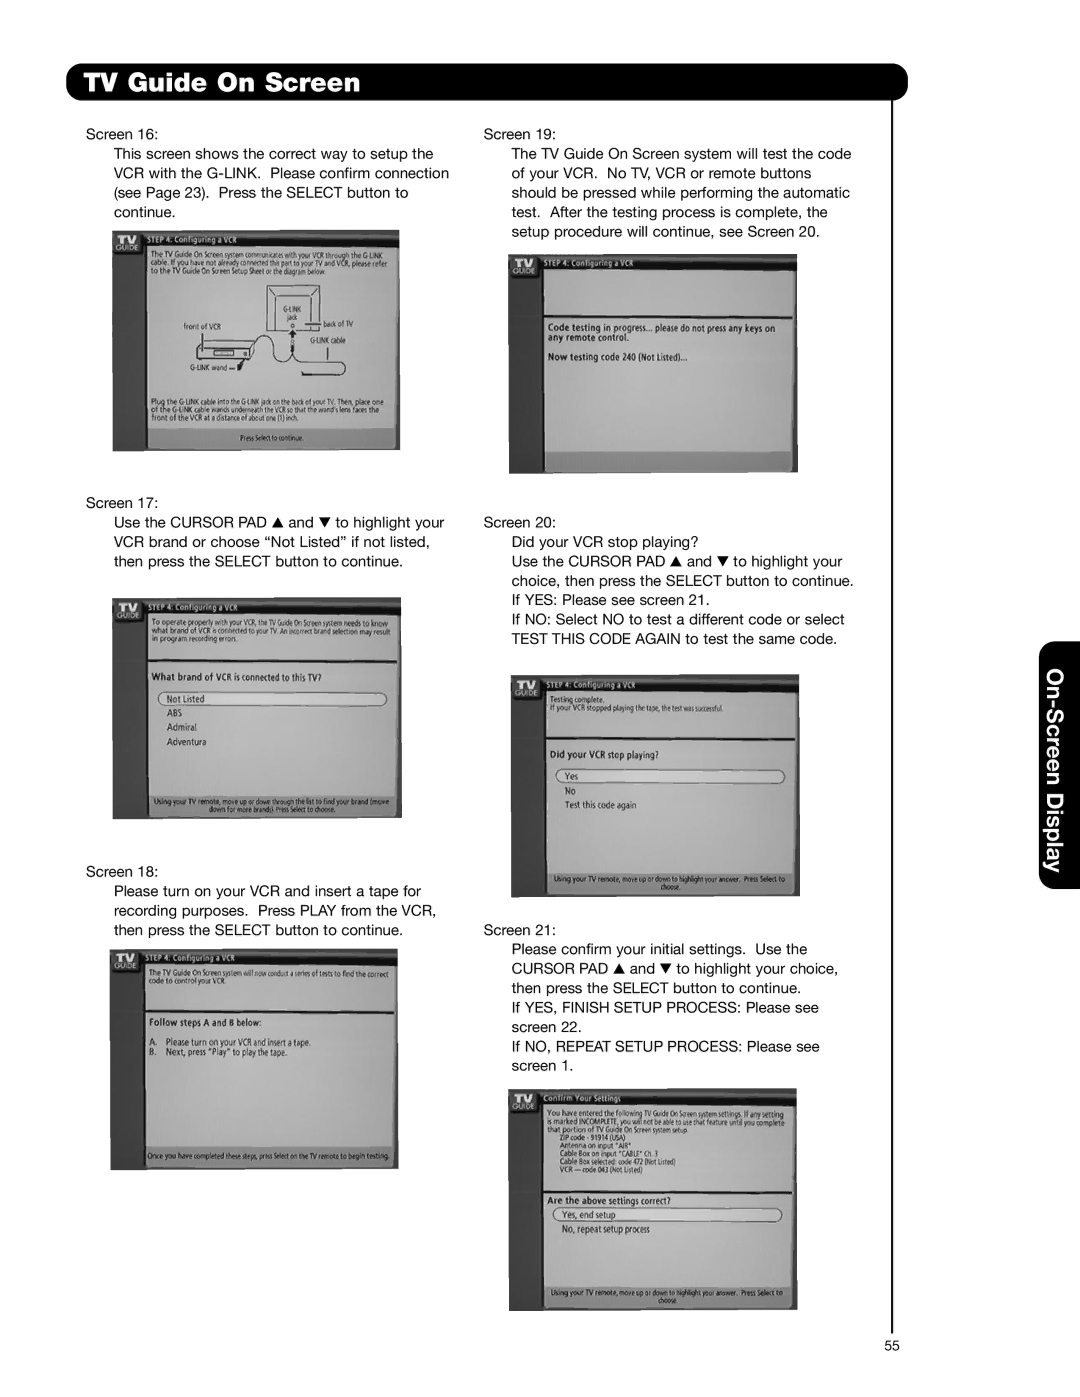
Screen 16:
This screen shows the correct way to setup the VCR with the
Screen 17:
Use the CURSOR PAD and to highlight your VCR brand or choose “Not Listed” if not listed, then press the SELECT button to continue.
Screen 18:
Please turn on your VCR and insert a tape for recording purposes. Press PLAY from the VCR, then press the SELECT button to continue.
Screen 19:
The TV Guide On Screen system will test the code of your VCR. No TV, VCR or remote buttons should be pressed while performing the automatic test. After the testing process is complete, the setup procedure will continue, see Screen 20.
Screen 20:
Did your VCR stop playing?
Use the CURSOR PAD and to highlight your choice, then press the SELECT button to continue. If YES: Please see screen 21.
If NO: Select NO to test a different code or select TEST THIS CODE AGAIN to test the same code.
Screen 21:
Please confirm your initial settings. Use the CURSOR PAD and to highlight your choice, then press the SELECT button to continue.
If YES, FINISH SETUP PROCESS: Please see screen 22.
If NO, REPEAT SETUP PROCESS: Please see screen 1.
55
