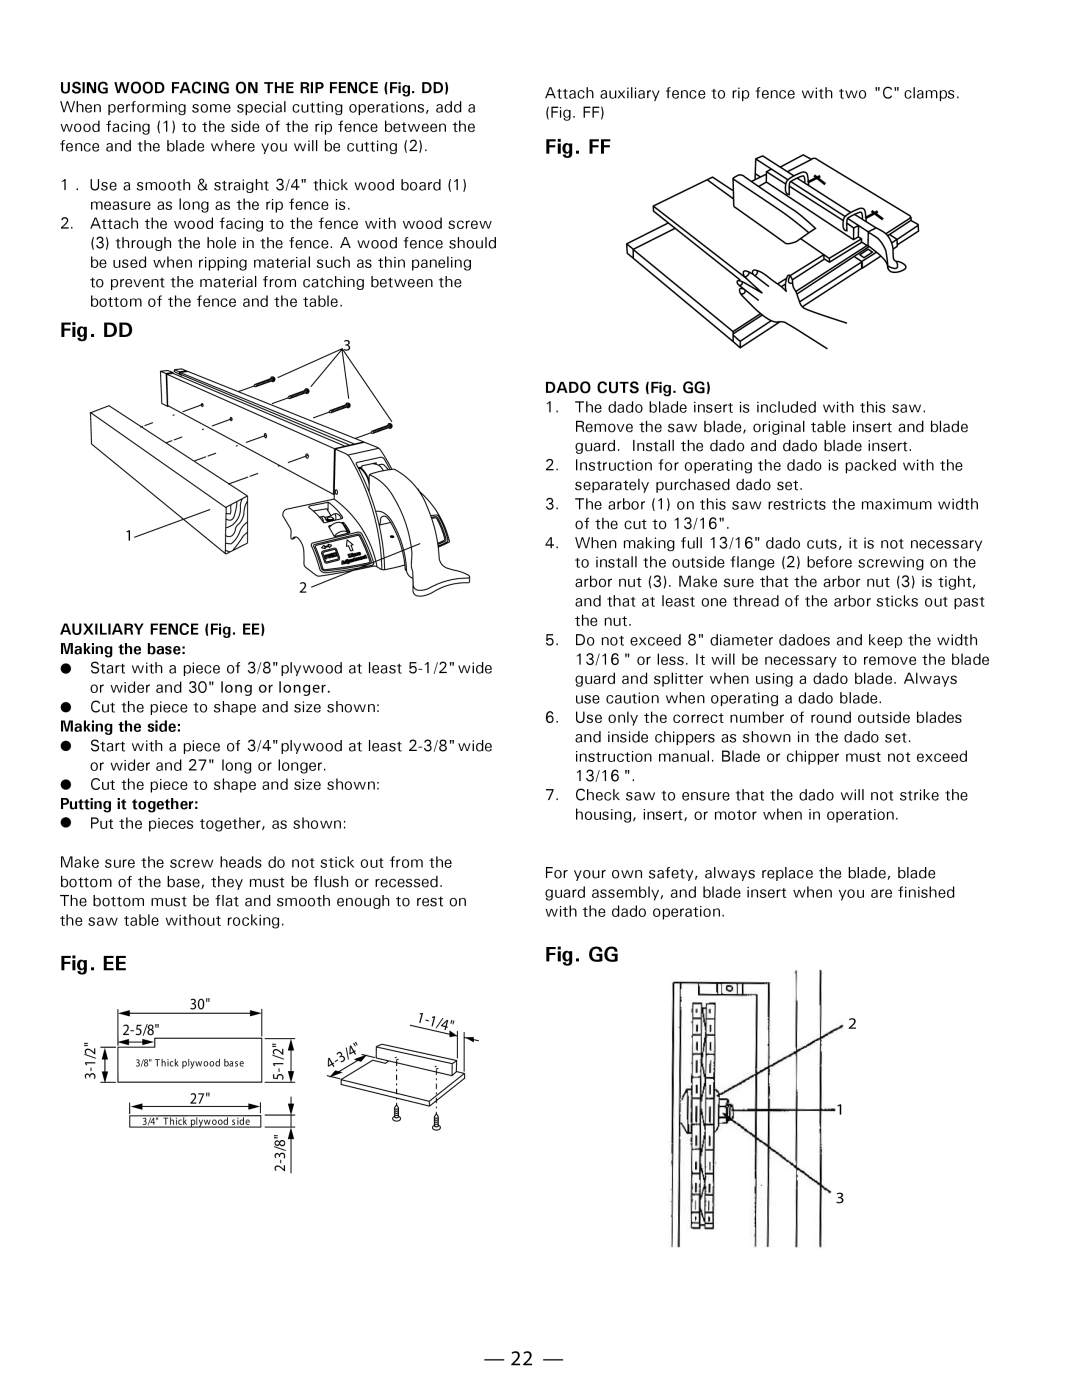
USING WOOD FACING ON THE RIP FENCE (Fig. DD) When performing some special cutting operations, add a wood facing (1) to the side of the rip fence between the fence and the blade where you will be cutting (2).
1 . Use a smooth & straight 3/4" thick wood board (1) measure as long as the rip fence is.
2.Attach the wood facing to the fence with wood screw
(3) through the hole in the fence. A wood fence should be used when ripping material such as thin paneling to prevent the material from catching between the bottom of the fence and the table.
Fig. DD
3
1
2
AUXILIARY FENCE (Fig. EE)
Making the base:
Start with a piece of 3/8"plywood at least
Cut the piece to shape and size shown:
Making the side:
Start with a piece of 3/4"plywood at least
Cut the piece to shape and size shown:
Putting it together:
Put the pieces together, as shown:
Make sure the screw heads do not stick out from the bottom of the base, they must be flush or recessed. The bottom must be flat and smooth enough to rest on the saw table without rocking.
Attach auxiliary fence to rip fence with two "C" clamps. (Fig. FF)
Fig. FF
DADO CUTS (Fig. GG)
1.The dado blade insert is included with this saw. Remove the saw blade, original table insert and blade guard. Install the dado and dado blade insert.
2.Instruction for operating the dado is packed with the separately purchased dado set.
3.The arbor (1) on this saw restricts the maximum width of the cut to 13/16".
4.When making full 13/16" dado cuts, it is not necessary to install the outside flange (2) before screwing on the arbor nut (3). Make sure that the arbor nut (3) is tight, and that at least one thread of the arbor sticks out past the nut.
5.Do not exceed 8" diameter dadoes and keep the width 13/16 " or less. It will be necessary to remove the blade guard and splitter when using a dado blade. Always use caution when operating a dado blade.
6.Use only the correct number of round outside blades and inside chippers as shown in the dado set. instruction manual. Blade or chipper must not exceed 13/16 ".
7.Check saw to ensure that the dado will not strike the housing, insert, or motor when in operation.
For your own safety, always replace the blade, blade guard assembly, and blade insert when you are finished with the dado operation.
Fig. EE
|
|
| 30" | |||
1/2" |
| |||||
|
|
|
|
| ||
|
|
| 3/8" Thick plywood base | |||
|
|
| ||||
|
| |||||
3- |
|
|
|
|
|
|
|
|
|
|
| ||
|
|
|
| |||
|
|
| 27" | |||
3/4" Thick plywood side
![]()
|
| " |
| 4 | |
| / | |
3 |
| |
- |
|
|
4 |
|
|
Fig. GG
2
1
3
— 22 —