Trademark acknowledgment
About this manual
Thank you for purchasing this projector
Projector
Typical Symbols
Use special caution for children and pets
Never use the projector if a problem should occur
Do not insert liquids or foreign object
Never disassemble and modify
Never look through the lens or openings when the lamp is on
Be cautious of High temperatures of the projector
Be cautious of the power cord connection
Be sure to connect with ground wire
Be careful in handling the light source lamp
Be careful in handling the battery of the remote control
Be careful in moving the projector
Avoid a high temperature environment
Do not put anything on top of the projector
Avoid a smoky, humid or dusty place
Do not give the remote control any physical impact
Remove the power cord for complete separation
Take care of the cabinet and the remote control
Take care of the lens
Turn the power on/off in right order
About displaying characteristic
Connecting with notebook computer
About consumables
Lamp
For the Customers in Canada
FCC Statement Warning
Contents
Checking the contents of package
Projector
Part names
HOT
HOT
Rear panel
Control panel
STANDBY/ON button
Video port Audio IN1 port Audio IN2 port Audio OUT port
Down button Volume + button
Remote control
Computer button
Magnify on button Magnify OFF button
On a horizontal surface Suspended from the ceiling
Setting up
Arrangement
Arrangement
Monitor
Connecting your devices
VCR/DVD/Blu-ray Disc player
Speakers
About Plug-and-Play capability
Connecting your devices
Using the security bar and slot
Connecting power supply
Installing the batteries
Remote control
About the remote control signal
Hitachi MAXELL, Part No.LR6 or R6P
Using as a simple PC mouse & keyboard
Turning on the power
Power on/off
Turning off the power
STANDBY/ON button Power indicator
Precaution for lens cover attachment and removal
Selecting an input signal
Adjusting the volume
Operating
Temporarily muting the sound
Computer button
Press the MY Source / DOC. Camera button on
Video button
MY Source
€ For no signal 43 fi xed
Searching an input signal
Selecting an aspect ratio
Search button
Adjusting the zoom and focus
Adjusting the projectors elevator
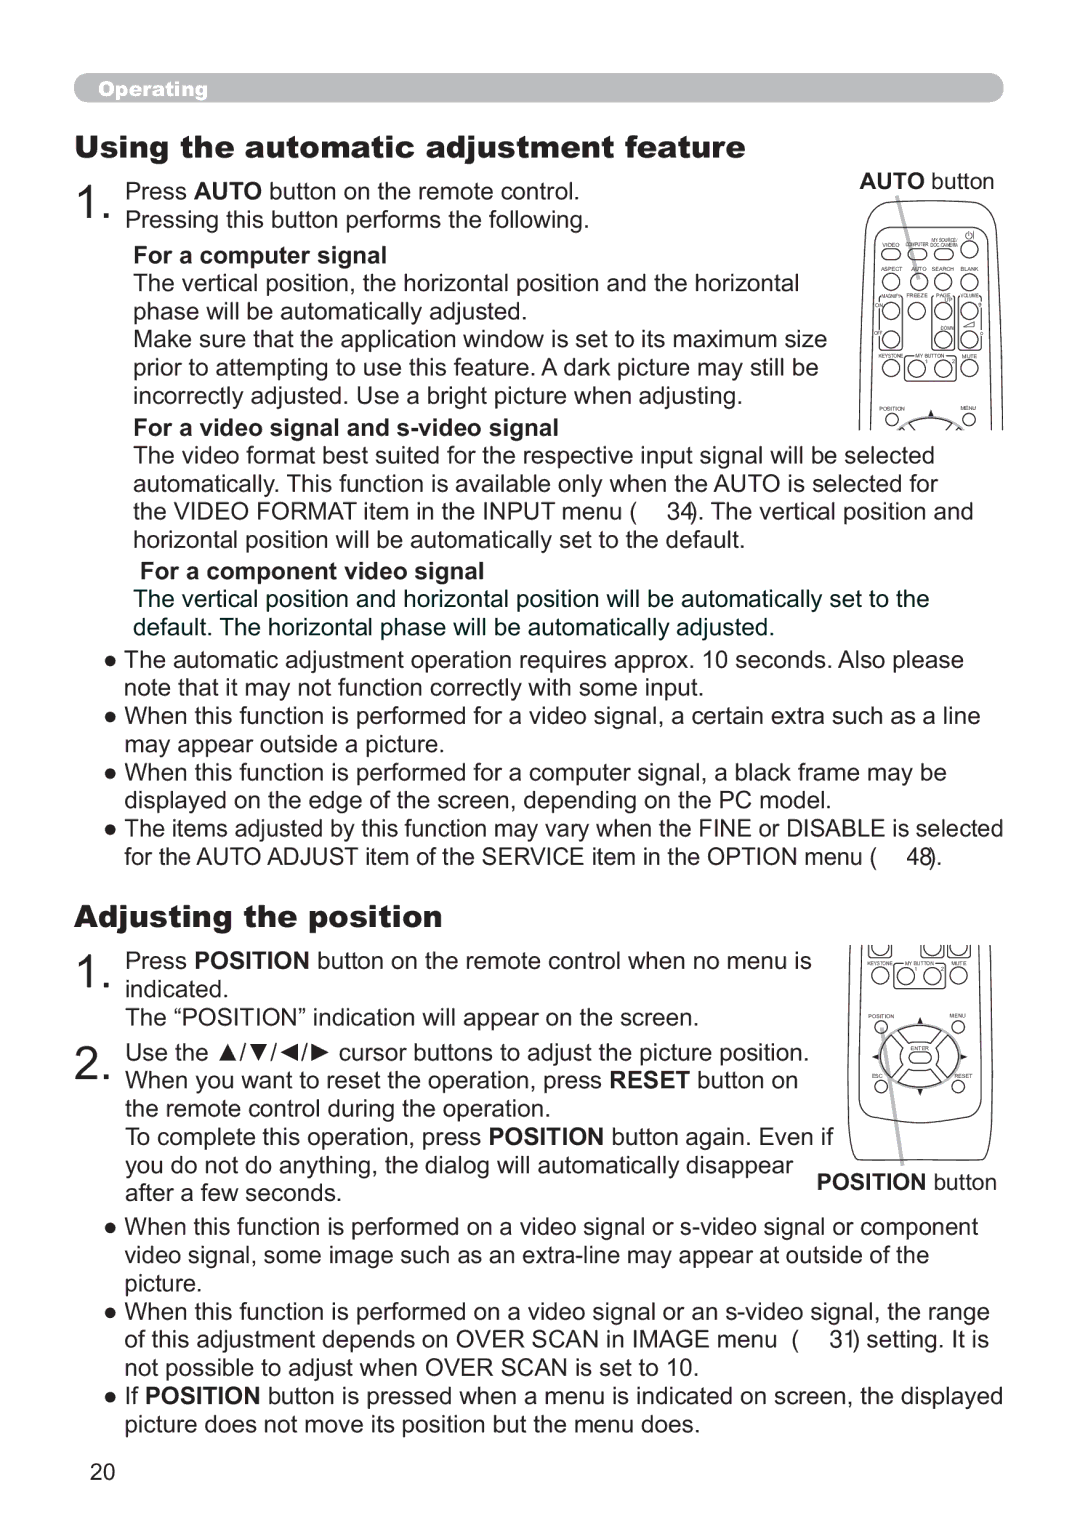
Adjusting the position
Using the automatic adjustment feature
€ For a computer signal
After a few seconds
Keystone button
Correcting the keystone distortions
Magnify ON/OFF button
Using the magnify feature
Temporarily blanking the screen
Temporarily freezing the screen
Freeze button
Blank button
ESC button Reset button
Using the menu function
Advanced Menu
Input button Enter button
Indication Meaning
Indication in OSD On Screen Display
Description
Picture Mode
Aspect
Auto Keystone
Reset
ECO Mode
Mirror
Filter Time
Brightness
Picture menu
Contrast
Gamma
Color
Color Temp
Tint
Sharpness
MY Memory LOAD-1,LOAD-2,LOAD-3,LOAD-4
For no signal
For a computer signal
Image menu
Over Scan
Auto Adjust
Phase
Size
Execute
Video NR
Input menu
Frame Lock
Video Format
Computer
Resolution
Due to the forward/backward setup angle by itself
Setup menu
Monitor OUT
Bright Ù Normal
Speaker
Volume
Audio menu
Menu Position
Screen menu
Blank
Start UP
MyScreen registration is finished
Capturing error has occurred. Please try again
Description MyScreen
Message
MyScreen Lock
Source Name
MAP2 Ù MAP1 Ù CIRCLE2 Ù CIRCLE1 Ù DOT-LINE4
Template
Display
Description Closed Caption
Mode
Channel
Auto
Option menu
Auto Search
Lamp Time
Auto Power
OFF
MY Button
FAN Speed
Service
Ghost
Filter Message
Information
Factory Reset
KEY Lock
Security menu
Password
Enter the Security menu
Security
MyScreen
Turning on the MyScreen Password
Turning off the MyScreen Password
Turning on the PIN Lock
PIN Lock
Turning off the PIN Lock
If you have forgotten your PIN Code
Turning off the Transition Detector
Transition Detector
Turning on the Transition Detector
Turning off the MY Text Password
MY Text Password
Turning on the MY Text Password
Writing
MY Text
Replacing the lamp
Maintenance
Type number DT01141
Replacing the lamp
Lamp warning
High Voltage High Temperature
Type number UX36761 Filter set
Cleaning and replacing the air filter
Cleaning and replacing the air filter
Other care
Caring for the cabinet and remote control
Inside of the projector
Caring for the lens
Message Description There is no input signal
Troubleshooting
An improper signal is input
Internal temperature is rising
Regarding the indicator lamps
It is time to clean the air filter
Resetting all settings
There is a possibility that the interior portion
Has become heated
Signal cables are not correctly connected
Electrical power cord is not plugged
Signal source does not correctly work
Input changeover settings are mismatched
Color settings are not correctly adjusted
Volume is adjusted to an extremely low level
Color Space setting is not suitable
Mute function is working
Not properly adjusted
ECO Mode function is working
Frame Lock function cannot work on Current input signal
Lamp is approaching the end of its product Lifetime
Specification
Specifications
Specifications
221 306
ED-X50/ED-X52
Contents
First of all
Entries and graphical symbols explanation
Important safety instruction
About Electro-Magnetic Interference Canada
Regulatory notices
Contents of package
Preparations
Loading batteries into the remote control
Holding the hook part of the battery Cover, remove it
Arrangement
Connecting your devices
Turning on the power
Connecting power supply
Adjusting the projectors elevator
Input button
Displaying the picture
STANDBY/ON button
Turning off the power
Replacing the lamp
Shorten the life of this product
Cleaning and replacing the air filter
Using the CD manual
Filter set UX36761
Specifications
Troubleshooting Warranty and after-service
Page
ED-X50/ED-X52
Example of PC signal
Initial set signals
Computer IN1, B Computer IN2, C Monitor OUT
Connection to the ports
Video
Audio IN1, G Audio IN2
USB
To input component video signal to Computer in ports
Control port
Connection
RS-232C Communication
Type, Setting code
Communication settings
Header code, Packet, Data size
CRC flag
RS-232C Communication command table
Gamma
Be EF 1A FF
Color
Size
Frame Lock
Be EF FD CD Computer IN2
Not all of the languages in the table are supported On next
OFF Be EF FB D8
Be EF Lamp Time
Computer IN1 Be EF Computer IN2 Video Information
Hitachi Europe GmbH
Hitachi Europe S.A.S., Digital Media Group
Hitachi Europe S.A
Hitachi Europe S.r.l