CONNECTION (continued)
3.Attach Cushion, Secure with Clamps and Fit Terminal Cover (continued)
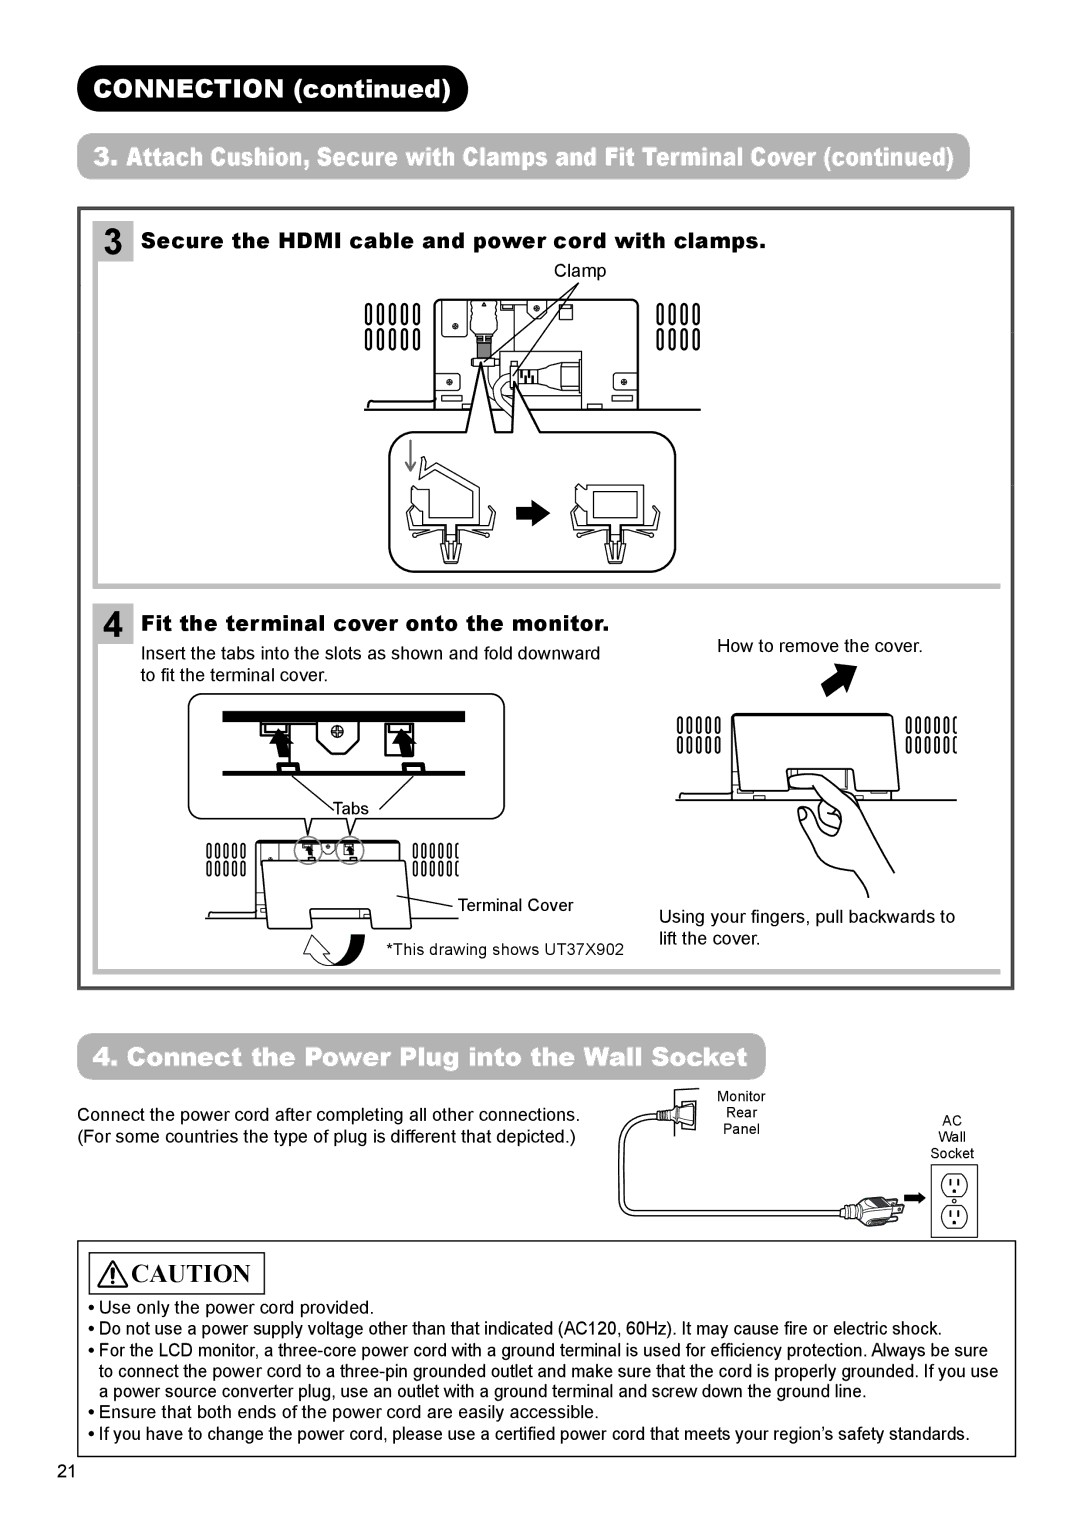
3 Secure the HDMI cable and power cord with clamps.
Clamp
4 Fit the terminal cover onto the monitor.
Insert the tabs into the slots as shown and fold downward to fit the terminal cover.
![]() Tabs
Tabs
![]()
![]() Terminal Cover
Terminal Cover
*This drawing shows UT37X902
How to remove the cover.
Using your fingers, pull backwards to lift the cover.
4. Connect the Power Plug into the Wall Socket
Connect the power cord after completing all other connections. | Monitor |
|
Rear | AC | |
(For some countries the type of plug is different that depicted.) | Panel | Wall |
|
| Socket |
![]()
![]() CAUTION
CAUTION
![]() Use only the power cord provided.
Use only the power cord provided.
![]() Do not use a power supply voltage other than that indicated (AC120, 60Hz). It may cause fire or electric shock.
Do not use a power supply voltage other than that indicated (AC120, 60Hz). It may cause fire or electric shock.
![]() For the LCD monitor, a
For the LCD monitor, a
![]() Ensure that both ends of the power cord are easily accessible.
Ensure that both ends of the power cord are easily accessible.
![]() If you have to change the power cord, please use a certified power cord that meets your region’s safety standards.
If you have to change the power cord, please use a certified power cord that meets your region’s safety standards.
21