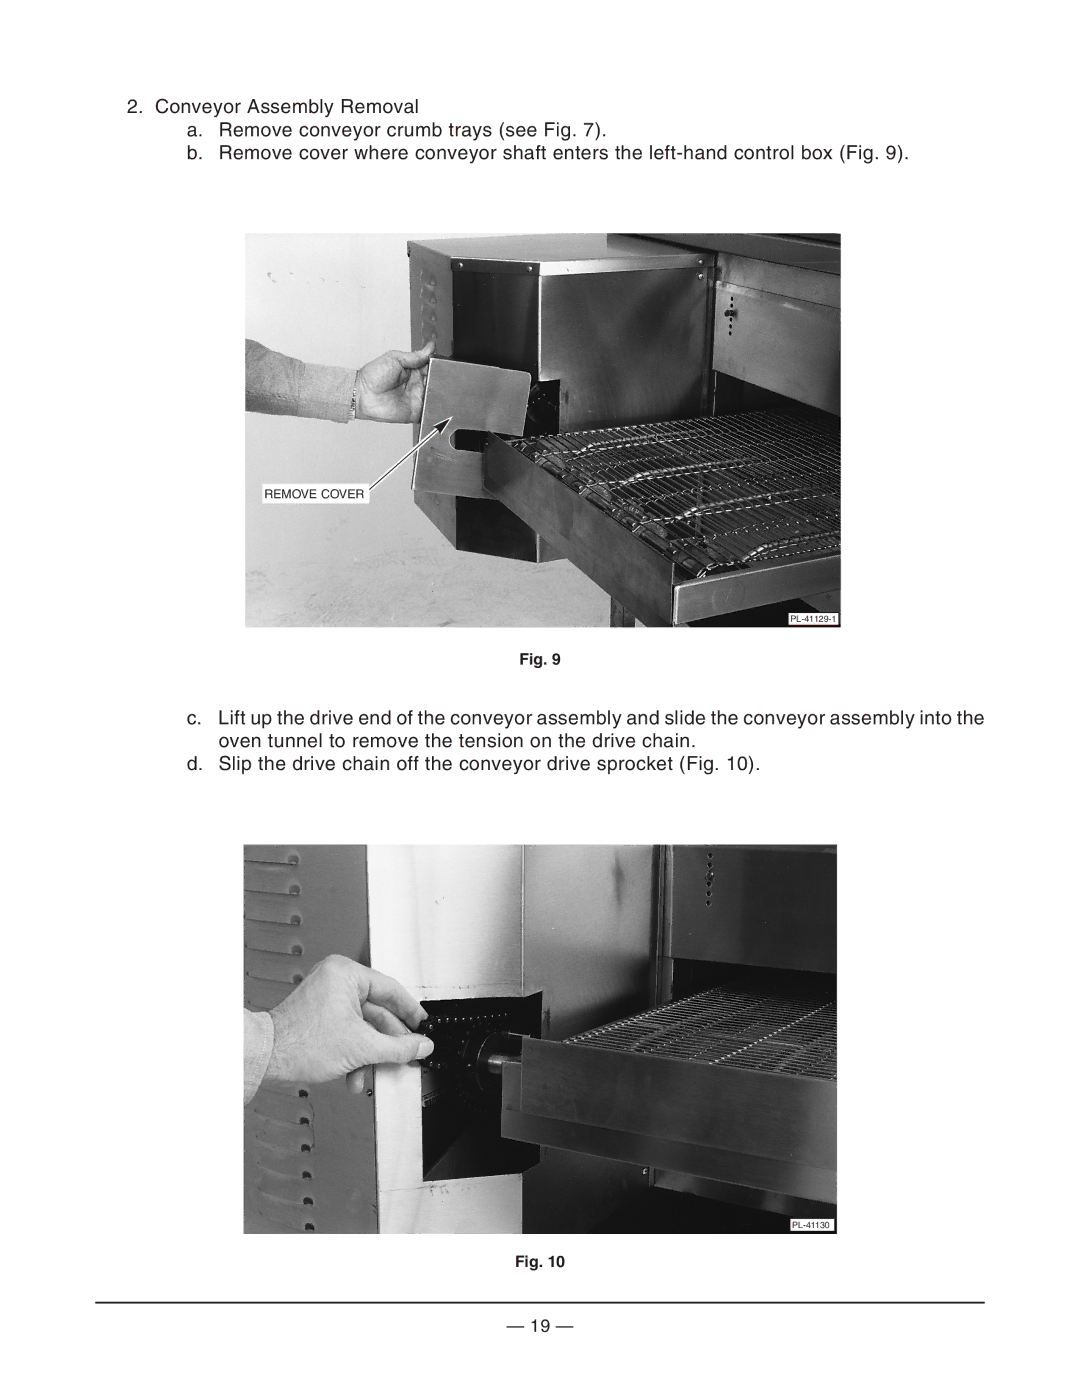
2.Conveyor Assembly Removal
a.Remove conveyor crumb trays (see Fig. 7).
b.Remove cover where conveyor shaft enters the
REMOVE COVER
Fig. 9
c.Lift up the drive end of the conveyor assembly and slide the conveyor assembly into the oven tunnel to remove the tension on the drive chain.
d.Slip the drive chain off the conveyor drive sprocket (Fig. 10).
Fig. 10
— 19 —
