4-14. Threading Welding Wire Through Gun
Refer to Section
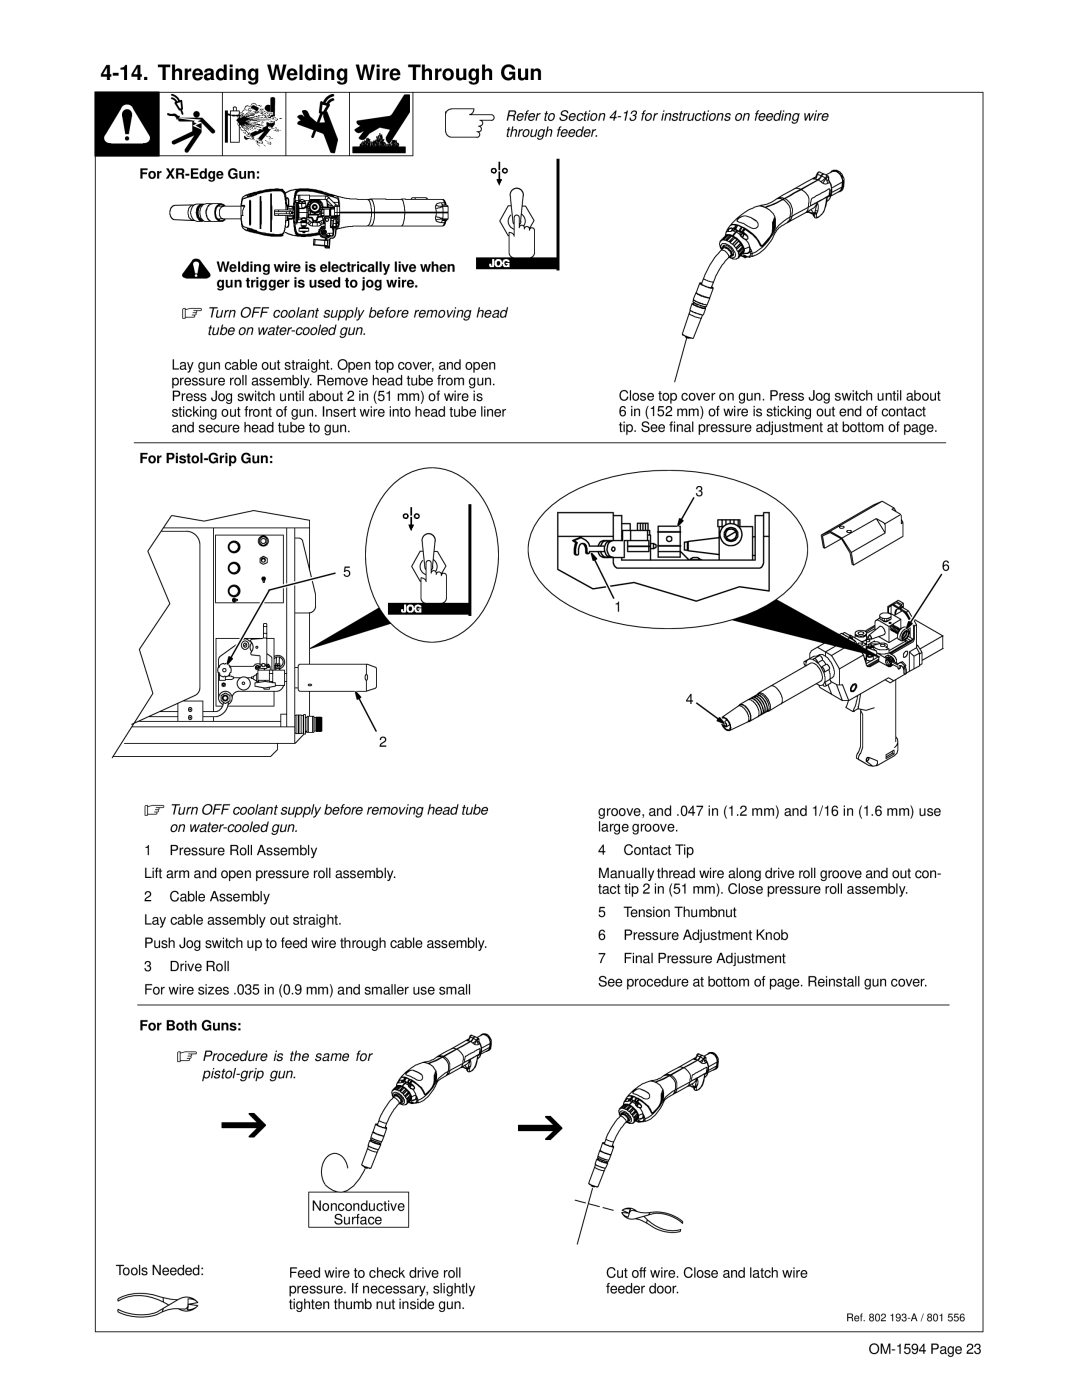
For XR-Edge Gun:
![]() Welding wire is electrically live when gun trigger is used to jog wire.
Welding wire is electrically live when gun trigger is used to jog wire.
.Turn OFF coolant supply before removing head tube on
Lay gun cable out straight. Open top cover, and open pressure roll assembly. Remove head tube from gun. Press Jog switch until about 2 in (51 mm) of wire is sticking out front of gun. Insert wire into head tube liner and secure head tube to gun.
Close top cover on gun. Press Jog switch until about 6 in (152 mm) of wire is sticking out end of contact tip. See final pressure adjustment at bottom of page.
For Pistol-Grip Gun:
5
2
.Turn OFF coolant supply before removing head tube on
1 Pressure Roll Assembly
Lift arm and open pressure roll assembly.
2 Cable Assembly
Lay cable assembly out straight.
Push Jog switch up to feed wire through cable assembly.
3 Drive Roll
For wire sizes .035 in (0.9 mm) and smaller use small
3
6
1
4
groove, and .047 in (1.2 mm) and 1/16 in (1.6 mm) use large groove.
4 Contact Tip
Manually thread wire along drive roll groove and out con- tact tip 2 in (51 mm). Close pressure roll assembly.
5Tension Thumbnut
6Pressure Adjustment Knob
7Final Pressure Adjustment
See procedure at bottom of page. Reinstall gun cover.
For Both Guns:
.Procedure
Tools Needed:
is the same for gun.
Nonconductive
Surface
Feed wire to check drive roll | Cut off wire. Close and latch wire |
pressure. If necessary, slightly | feeder door. |
tighten thumb nut inside gun. |
|
Ref. 802