7-5. Adjusting Engine Speed
Engine Speed
(No Load)
Weld/Power
Idle
7 | 2 |
| |
| 1 |
6 |
|
8 | 3 | 5 | 4 |
Tools Needed:
5/16, 7/16 in
| Engine speeds have been factory | |
| set and should not require | |
RPM | adjustment. | |
|
| |
| Start engine and check engine | |
1850 | speeds with a tachometer. See | |
table for proper no load speeds. If | ||
1250 | necessary, adjust speeds as | |
follows: | ||
| Weld/Power Speed Adjustment | |
| Place engine control switch in Run | |
| position. | |
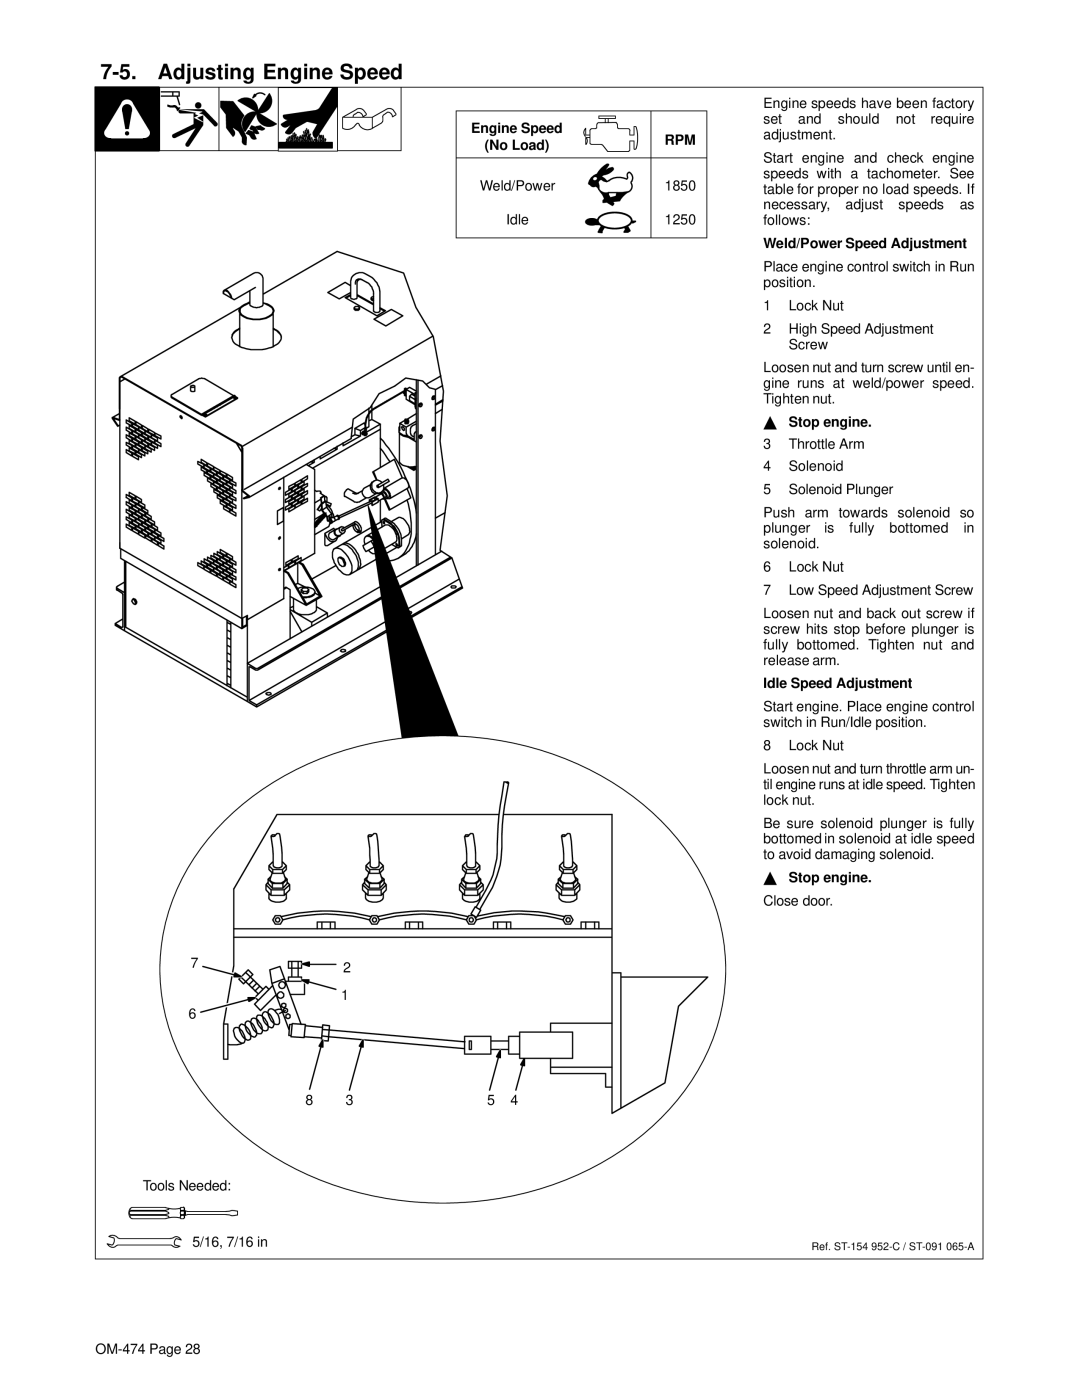
| 1 | Lock Nut |
| 2 | High Speed Adjustment |
|
| Screw |
| Loosen nut and turn screw until en- | |
| gine runs at weld/power speed. | |
| Tighten nut. | |
| Y Stop engine. | |
| 3 | Throttle Arm |
| 4 | Solenoid |
| 5 | Solenoid Plunger |
| Push arm towards solenoid so | |
| plunger is fully bottomed in | |
| solenoid. | |
| 6 | Lock Nut |
| 7 | Low Speed Adjustment Screw |
| Loosen nut and back out screw if | |
| screw hits stop before plunger is | |
| fully bottomed. Tighten nut and | |
| release arm. | |
| Idle Speed Adjustment | |
| Start engine. Place engine control | |
| switch in Run/Idle position. | |
| 8 | Lock Nut |
| Loosen nut and turn throttle arm un- | |
| til engine runs at idle speed. Tighten | |
| lock nut. | |
Be sure solenoid plunger is fully bottomed in solenoid at idle speed to avoid damaging solenoid.
Y Stop engine.
Close door.
Ref.
