9. RUDDERS
9.1 Identify the left and the right rudder assemblies.
Red Dot = LEFT Green Dot =RIGHT
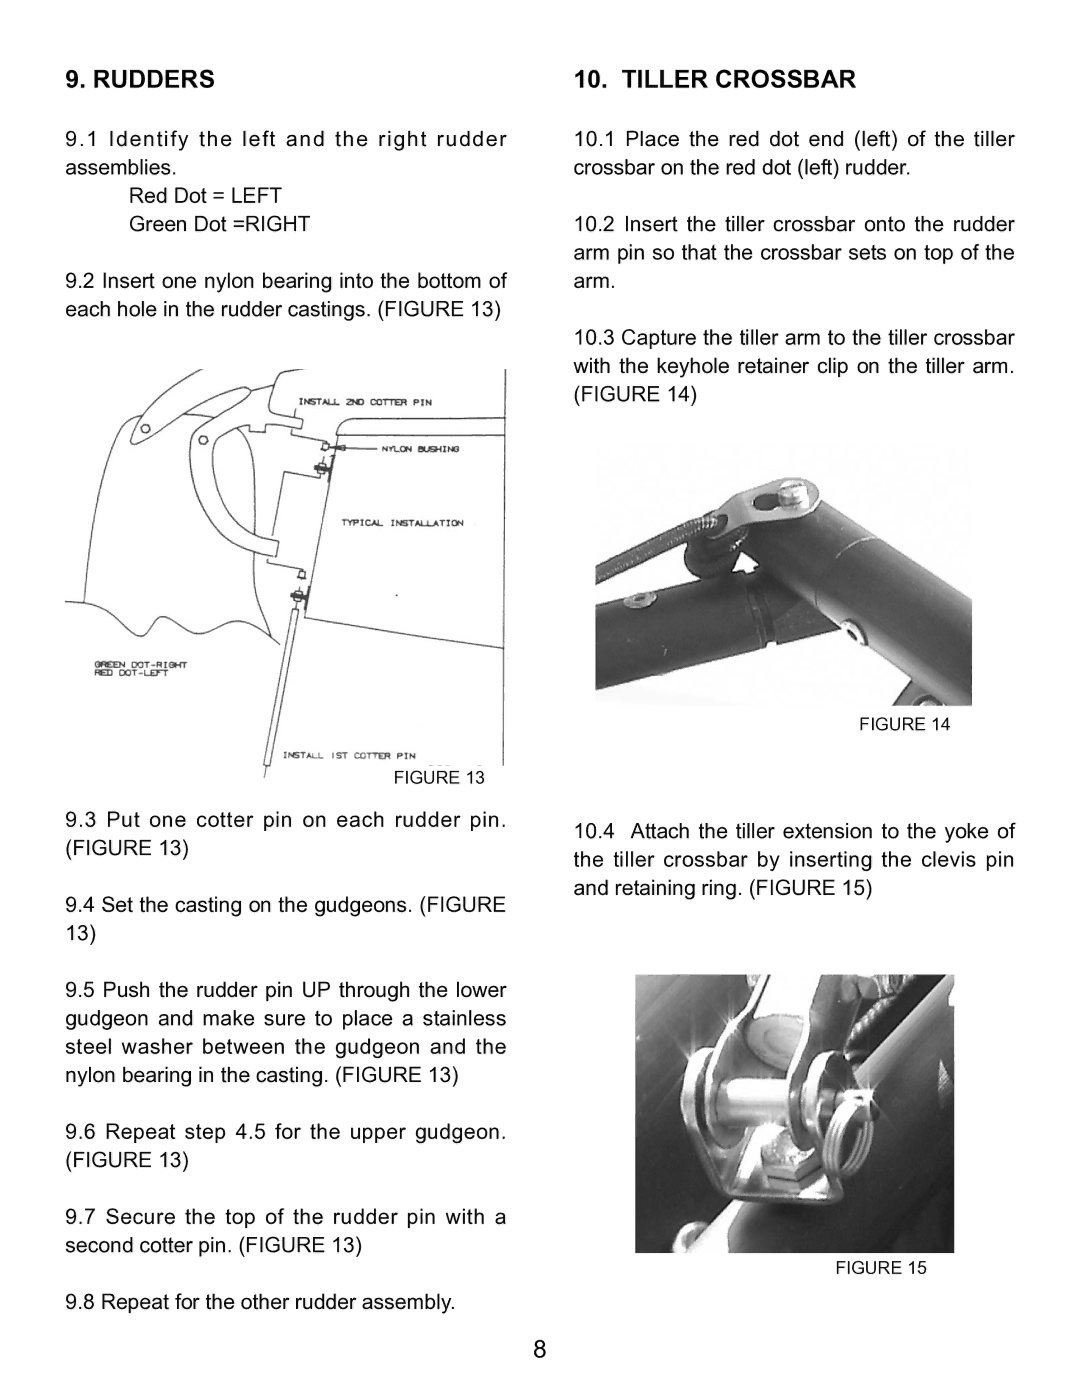
9.2Insert one nylon bearing into the bottom of each hole in the rudder castings. (FIGURE 13)
FIGURE 13
9.3Put one cotter pin on each rudder pin. (FIGURE 13)
9.4Set the casting on the gudgeons. (FIGURE
13)
9.5Push the rudder pin UP through the lower gudgeon and make sure to place a stainless steel washer between the gudgeon and the nylon bearing in the casting. (FIGURE 13)
9.6Repeat step 4.5 for the upper gudgeon. (FIGURE 13)
9.7Secure the top of the rudder pin with a second cotter pin. (FIGURE 13)
9.8Repeat for the other rudder assembly.
10. TILLER CROSSBAR
10.1Place the red dot end (left) of the tiller crossbar on the red dot (left) rudder.
10.2Insert the tiller crossbar onto the rudder arm pin so that the crossbar sets on top of the arm.
10.3Capture the tiller arm to the tiller crossbar with the keyhole retainer clip on the tiller arm. (FIGURE 14)
FIGURE 14
10.4Attach the tiller extension to the yoke of the tiller crossbar by inserting the clevis pin and retaining ring. (FIGURE 15)
FIGURE 15
8
