Honda Power Equipment CD Changer Reconnect the negative cable to the battery

Models: CD Changer

1 10
Download 10 pages 63.52 Kb
Page 10
Image 10
51.Reconnect the negative cable to the battery.

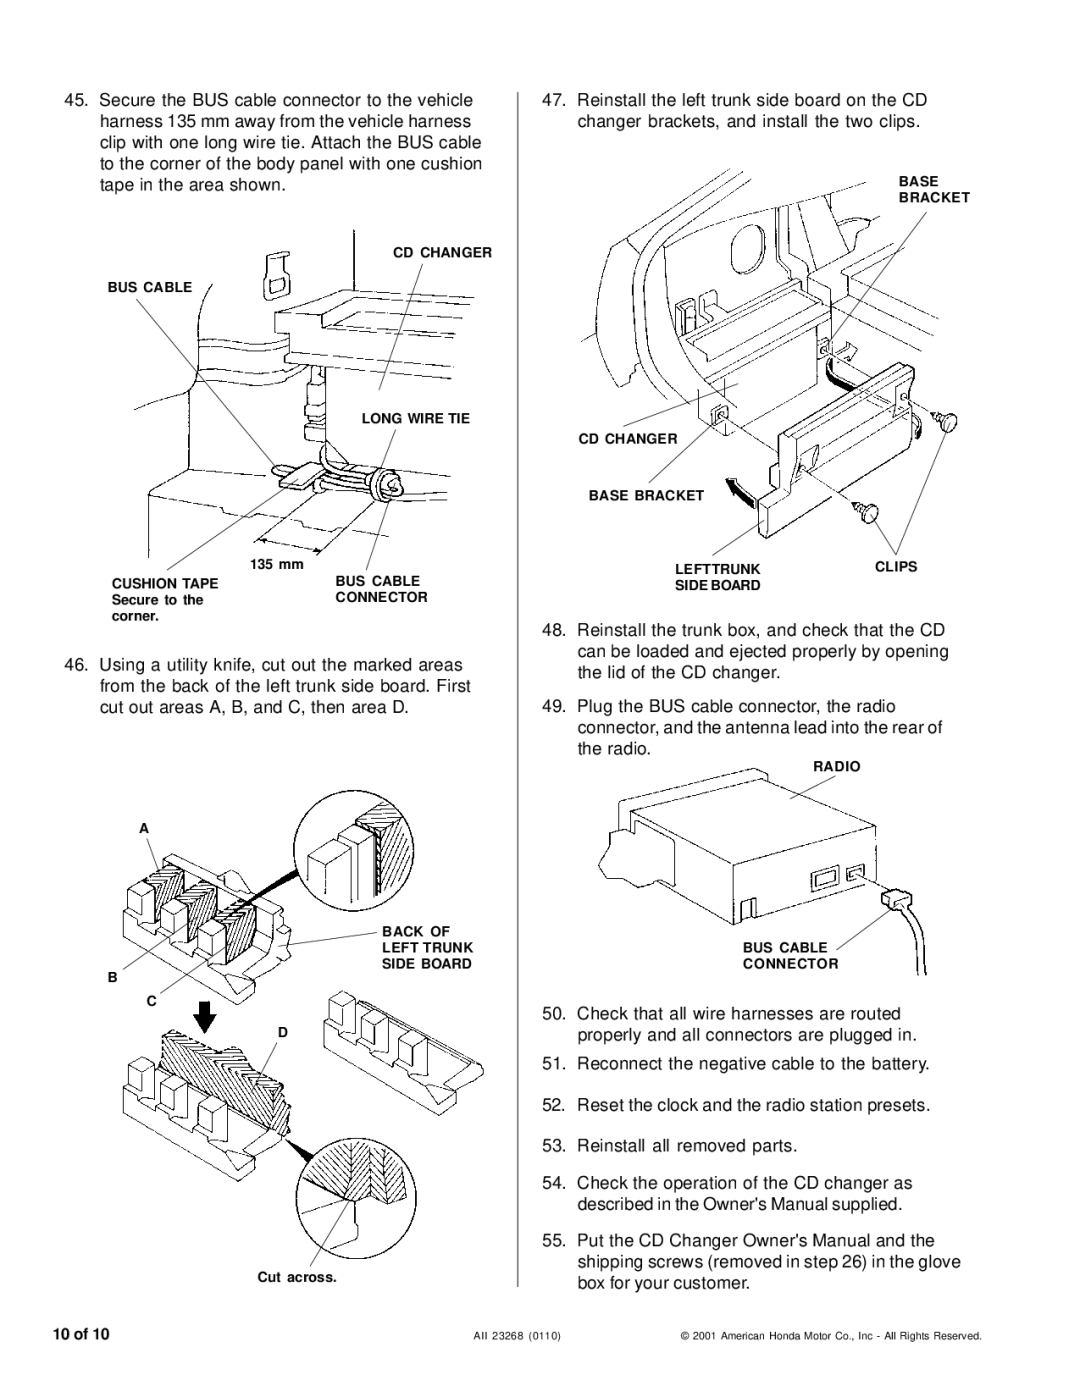
45.Secure the BUS cable connector to the vehicle harness 135 mm away from the vehicle harness clip with one long wire tie. Attach the BUS cable to the corner of the body panel with one cushion tape in the area shown.

CD CHANGER

BUS CABLE

LONG WIRE TIE


135 mm

CUSHION TAPE

BUS CABLE

Secure to the

CONNECTOR

corner.


46.Using a utility knife, cut out the marked areas from the back of the left trunk side board. First cut out areas A, B, and C, then area D.

A

BACK OF LEFT TRUNK

SIDE BOARD

B

C

D

Cut across.

47.Reinstall the left trunk side board on the CD changer brackets, and install the two clips.

BASE

BRACKET

CD CHANGER

BASE BRACKET

LEFTTRUNK

CLIPS

SIDE BOARD


48.Reinstall the trunk box, and check that the CD can be loaded and ejected properly by opening the lid of the CD changer.

49.Plug the BUS cable connector, the radio connector, and the antenna lead into the rear of the radio.

RADIO

BUS CABLE

CONNECTOR

50.Check that all wire harnesses are routed properly and all connectors are plugged in.

51.Reconnect the negative cable to the battery.

52.Reset the clock and the radio station presets.

53.Reinstall all removed parts.

54.Check the operation of the CD changer as described in the Owner's Manual supplied.

55.Put the CD Changer Owner's Manual and the shipping screws (removed in step 26) in the glove box for your customer.

10 of 10

AII 23268 (0110)

© 2001 American Honda Motor Co., Inc - All Rights Reserved.

Page 10
Image 10
Honda Power Equipment CD Changer installation instructions Reconnect the negative cable to the battery

FAQ

How do I secure the BUS cable connector?

To secure the BUS cable connector, use one long wire tie and attach it to the vehicle harness 135 mm away from the vehicle harness clip.

What should I do after reinstalling the trunk box?

After reinstalling the trunk box, check that the CD can be loaded and ejected properly by opening the lid of the CD changer.

Where should I put the CD Changer Owners Manual?

Put the CD Changer Owners Manual and the shipping screws removed in the glove box for your customer.

Where can I find the CD Changer operation instructions?

Check the operation of the CD changer as described in the Owners Manual supplied.

How do I reset the clock and radio station presets?

To reset the clock and radio station presets, reconnect the negative cable to the battery and follow the instructions in the Owners Manual.

How do I troubleshoot the CD changer?

For troubleshooting the CD changer, refer to the troubleshooting section in the Owners Manual.

What tools do I need for installing the CD changer?

You will need a utility knife, wire ties, cushion tape, and the necessary connectors.

What are the recommended maintenance procedures for the CD changer?

The recommended maintenance procedures for the CD changer are outlined in the Owners Manual.

What should I check before reinstalling all removed parts?

Before reinstalling all removed parts, check that all wire harnesses are routed properly and all connectors are plugged in.

Where can I find the CD Changer Owners Manual?

The CD Changer Owners Manual can be found in the glove box for your customer.