Honda Power Equipment CD Changer Self-Tapping Screw Antenna Lead Vehicle Harness, Connector, Clip

Models: CD Changer

1 10
Download 10 pages 63.52 Kb
Page 3
Image 3
SELF-TAPPING

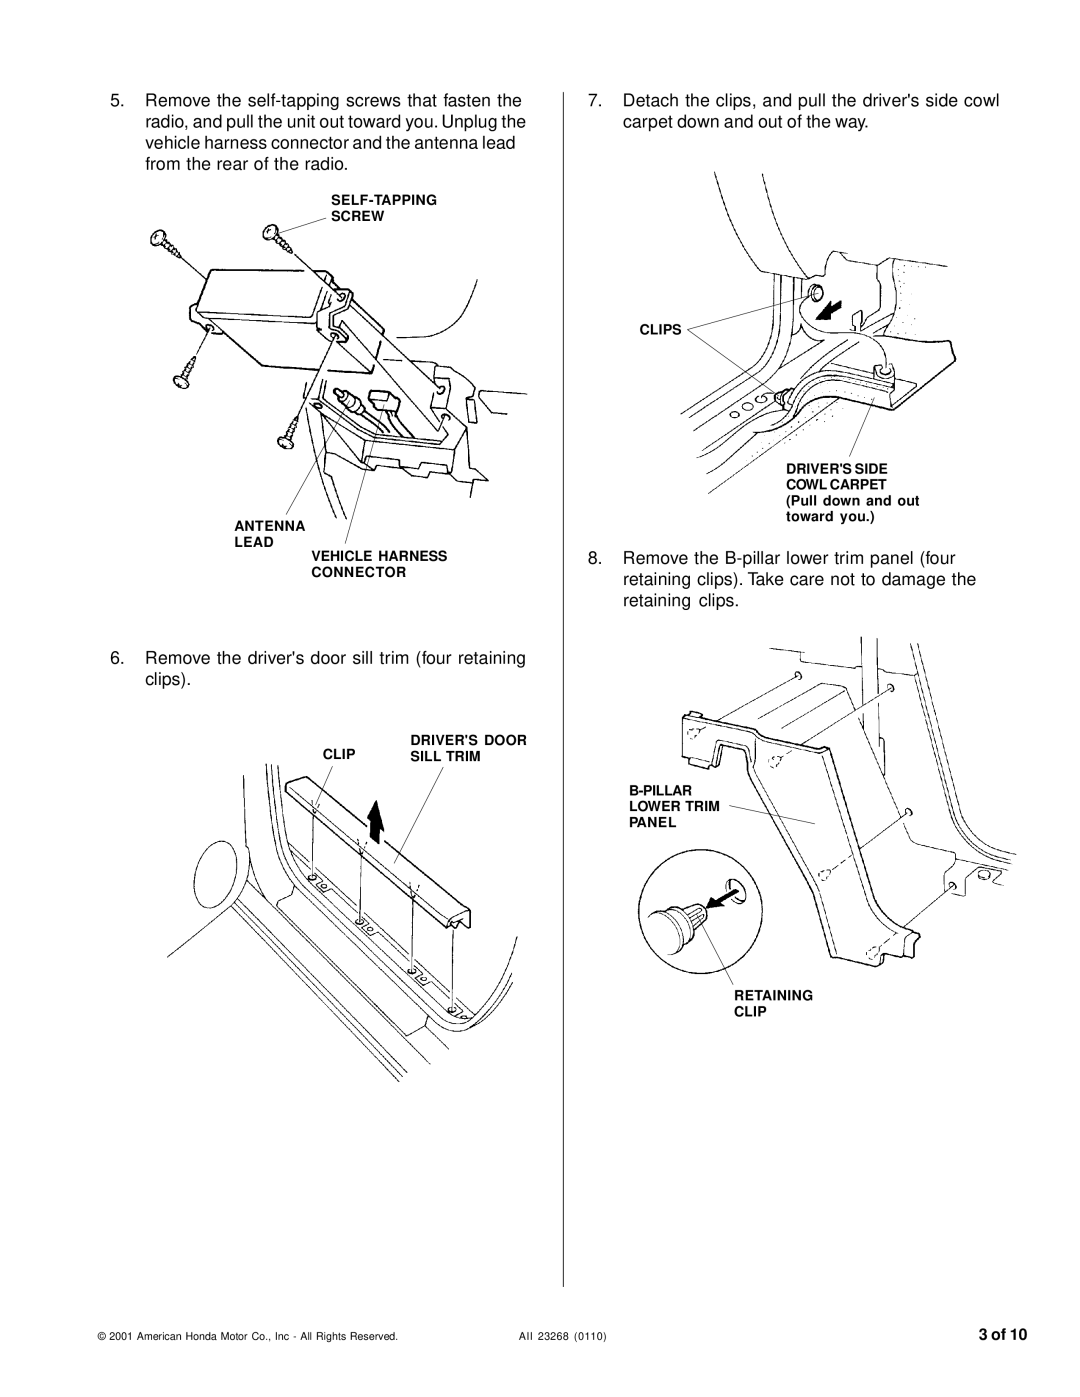
5.Remove the self-tapping screws that fasten the radio, and pull the unit out toward you. Unplug the vehicle harness connector and the antenna lead from the rear of the radio.

SELF-TAPPING

SCREW

ANTENNA

LEAD

VEHICLE HARNESS

CONNECTOR

6.Remove the driver's door sill trim (four retaining clips).

CLIP

DRIVER'S DOOR

SILL TRIM

7.Detach the clips, and pull the driver's side cowl carpet down and out of the way.

CLIPS

DRIVER'S SIDE COWL CARPET (Pull down and out toward you.)

8.Remove the B-pillar lower trim panel (four retaining clips). Take care not to damage the retaining clips.

B-PILLAR

LOWER TRIM

PANEL

RETAINING

CLIP

© 2001 American Honda Motor Co., Inc - All Rights Reserved.

AII 23268 (0110)

3 of 10

Page 3
Image 3
Honda Power Equipment CD Changer Self-Tapping Screw Antenna Lead Vehicle Harness, Connector, Clip, Drivers Door, Sill Trim

FAQ

How do I remove the radio from my Honda Power Equipment CD Changer?

To remove the radio, first remove the self-tapping screws that fasten the radio, and then pull the unit out towards you. Unplug the vehicle harness connector and the antenna lead from the rear of the radio.

What tools do I need to remove the drivers door sill trim?

You'll need to remove four retaining clips to detach the drivers door sill trim.

How can I prevent damaging the retaining clips when removing the B-pillar lower trim panel?

Take care not to damage the retaining clips when removing the B-pillar lower trim panel.