TOOLS AND SUPPLIES REQUIRED
#2 Phillips screwdriver
10 mm Socket Diagonal cutters Utility knife Tape measure Gloves
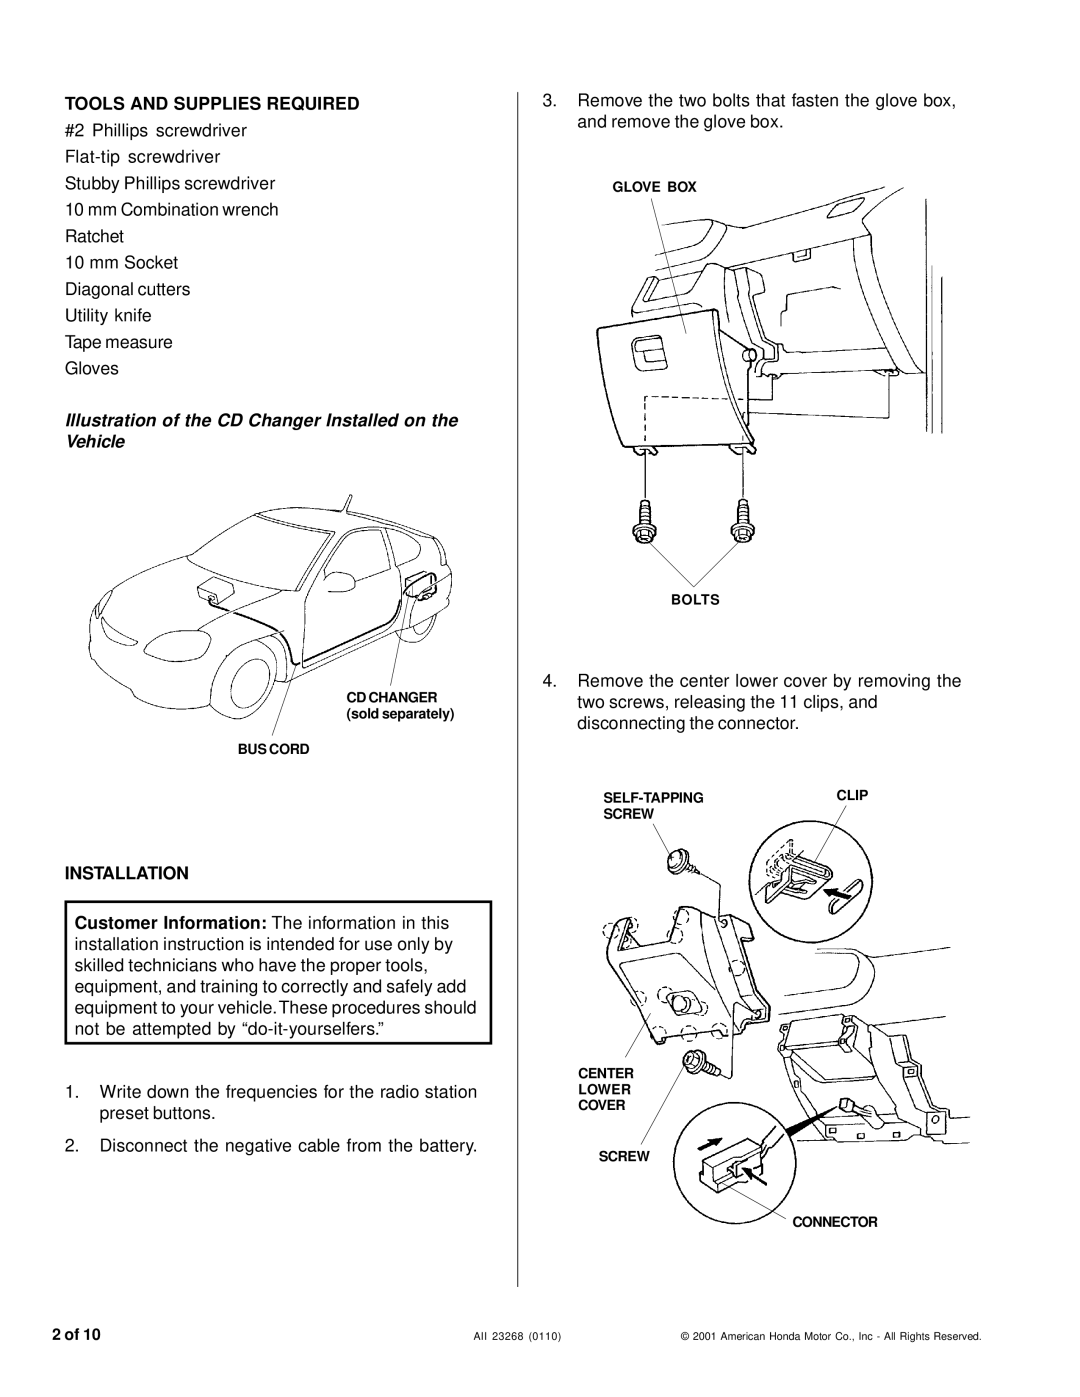
Illustration of the CD Changer Installed on the Vehicle
CD CHANGER (sold separately)
BUS CORD
INSTALLATION
Customer Information: The information in this installation instruction is intended for use only by skilled technicians who have the proper tools, equipment, and training to correctly and safely add equipment to your vehicle.These procedures should not be attempted by
1.Write down the frequencies for the radio station preset buttons.
2.Disconnect the negative cable from the battery.
3.Remove the two bolts that fasten the glove box, and remove the glove box.
GLOVE BOX
BOLTS
4.Remove the center lower cover by removing the two screws, releasing the 11 clips, and disconnecting the connector.
CLIP | |
SCREW |
|
CENTER
LOWER
COVER
SCREW
CONNECTOR
2 of 10
AII 23268 (0110) | © 2001 American Honda Motor Co., Inc - All Rights Reserved. |