9.Remove the four expansion clips that fasten the floor carpet, and fold the carpet down and out of the way.
EXPANSION
CLIP
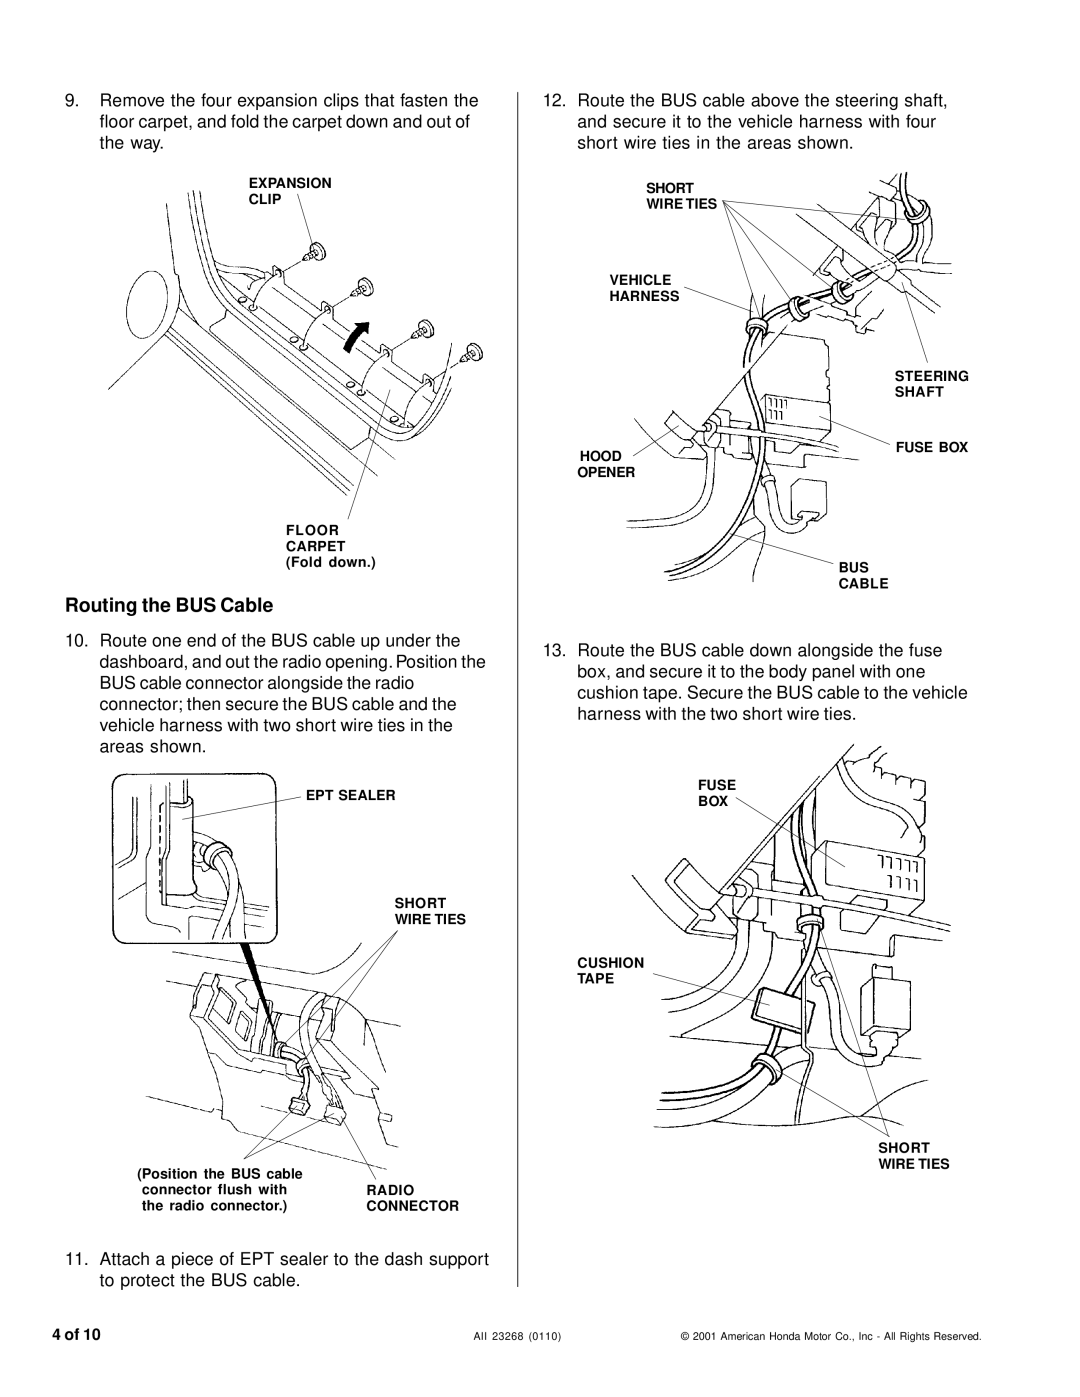
12.Route the BUS cable above the steering shaft, and secure it to the vehicle harness with four short wire ties in the areas shown.
SHORT
WIRE TIES
VEHICLE
HARNESS
STEERING
SHAFT
HOOD
FUSE BOX
FLOOR
CARPET (Fold down.)
Routing the BUS Cable
10.Route one end of the BUS cable up under the dashboard, and out the radio opening. Position the BUS cable connector alongside the radio connector; then secure the BUS cable and the vehicle harness with two short wire ties in the areas shown.
EPT SEALER
SHORT
WIRE TIES
(Position the BUS cable |
|
connector flush with | RADIO |
the radio connector.) | CONNECTOR |
11.Attach a piece of EPT sealer to the dash support to protect the BUS cable.
OPENER
BUS
CABLE
13.Route the BUS cable down alongside the fuse box, and secure it to the body panel with one cushion tape. Secure the BUS cable to the vehicle harness with the two short wire ties.
FUSE
BOX
CUSHION
TAPE
SHORT
WIRE TIES
4 of 10
AII 23268 (0110) | © 2001 American Honda Motor Co., Inc - All Rights Reserved. |