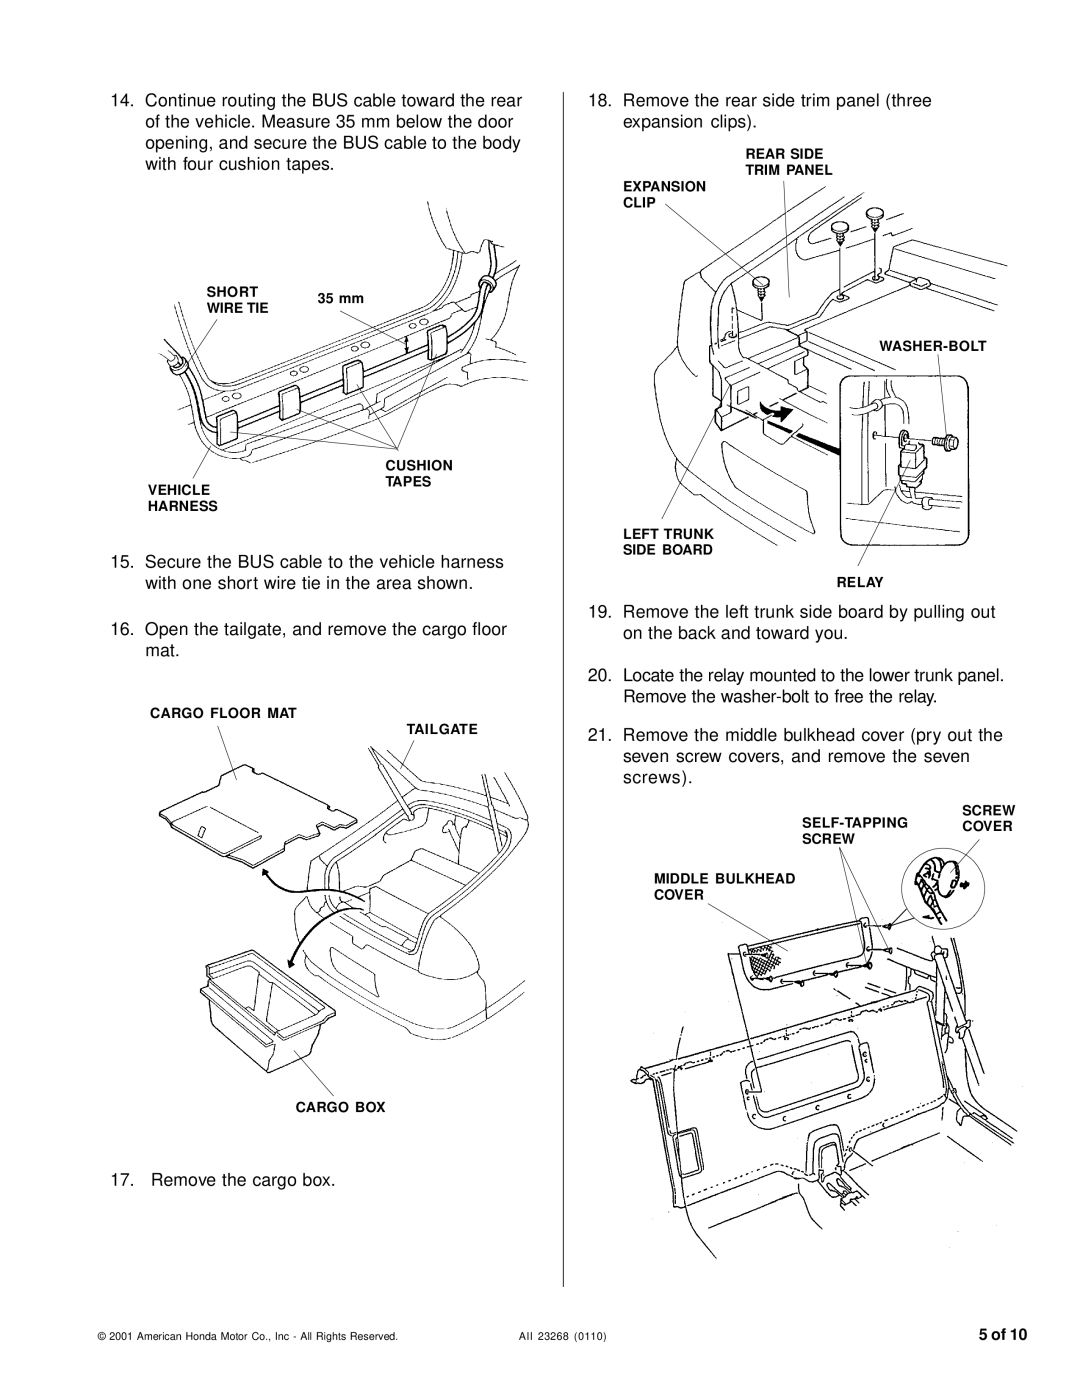
14.Continue routing the BUS cable toward the rear of the vehicle. Measure 35 mm below the door opening, and secure the BUS cable to the body with four cushion tapes.
SHORT | 35 mm | |
WIRE TIE | ||
|
18.Remove the rear side trim panel (three expansion clips).
REAR SIDE
TRIM PANEL
EXPANSION
CLIP
VEHICLE HARNESS
CUSHION TAPES
LEFT TRUNK SIDE BOARD
15.Secure the BUS cable to the vehicle harness with one short wire tie in the area shown.
16.Open the tailgate, and remove the cargo floor mat.
CARGO FLOOR MAT
TAILGATE
CARGO BOX
17. Remove the cargo box.
RELAY
19.Remove the left trunk side board by pulling out on the back and toward you.
20.Locate the relay mounted to the lower trunk panel. Remove the
21.Remove the middle bulkhead cover (pry out the seven screw covers, and remove the seven screws).
SCREW
SCREW
MIDDLE BULKHEAD
COVER
© 2001 American Honda Motor Co., Inc - All Rights Reserved. | AII 23268 (0110) | 5 of 10 |