Disassembly
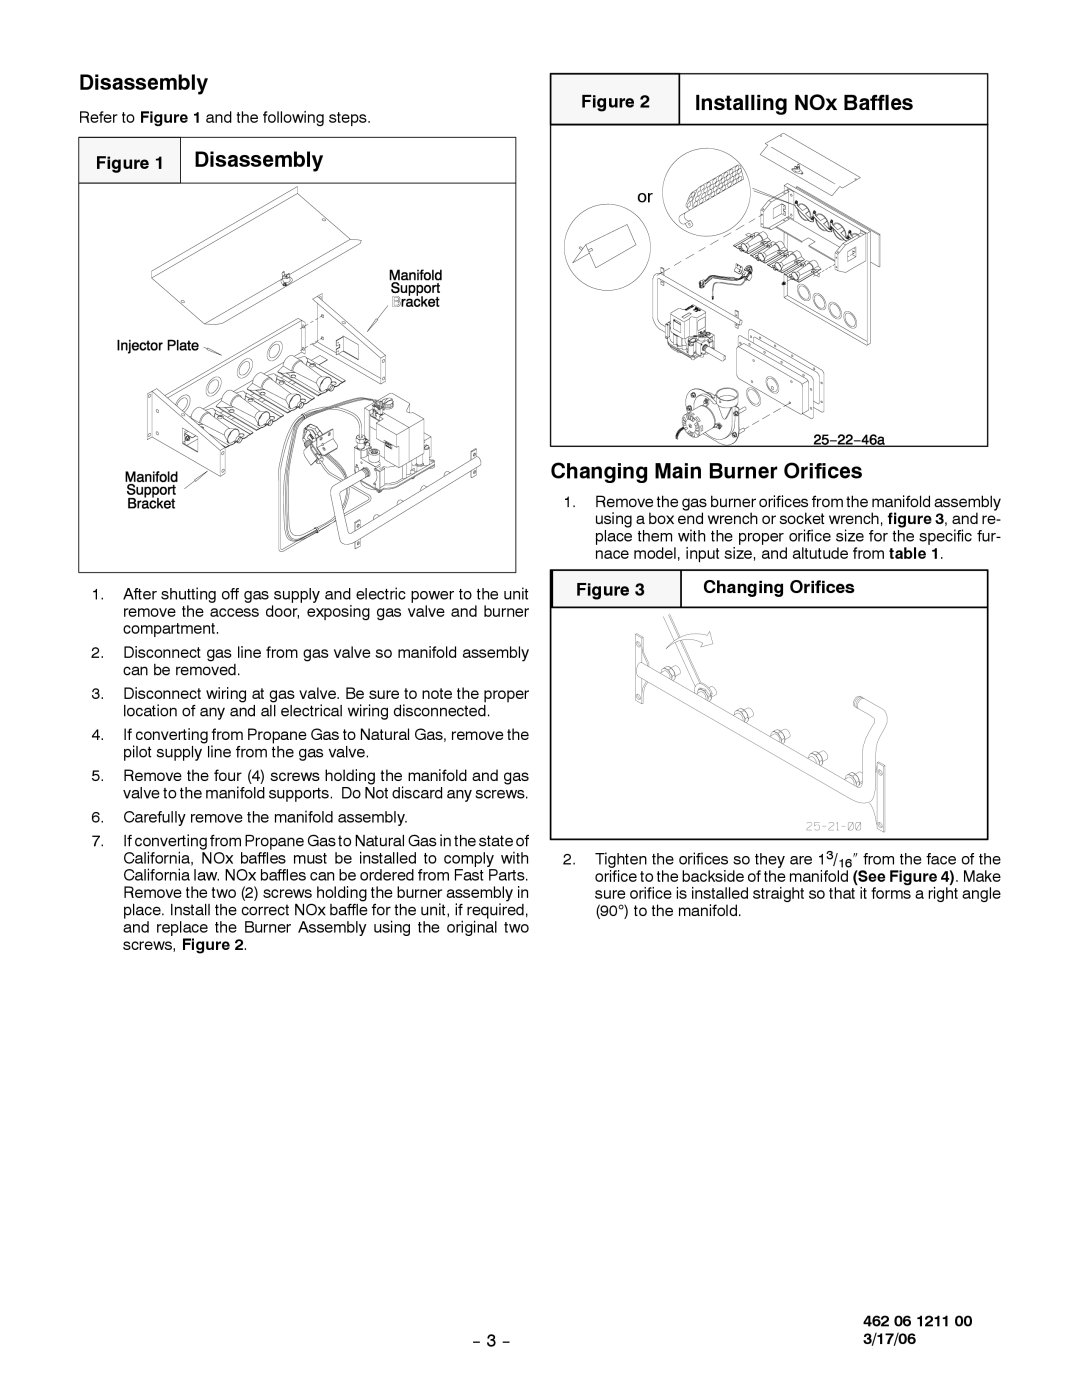
Refer to Figure 1 and the following steps.
Figure 1 | Disassembly |
1.After shutting off gas supply and electric power to the unit remove the access door, exposing gas valve and burner compartment.
2.Disconnect gas line from gas valve so manifold assembly can be removed.
3.Disconnect wiring at gas valve. Be sure to note the proper location of any and all electrical wiring disconnected.
4.If converting from Propane Gas to Natural Gas, remove the pilot supply line from the gas valve.
5.Remove the four (4) screws holding the manifold and gas valve to the manifold supports. Do Not discard any screws.
6.Carefully remove the manifold assembly.
7.If converting from Propane Gas to Natural Gas in the state of California, NOx baffles must be installed to comply with California law. NOx baffles can be ordered from Fast Parts. Remove the two (2) screws holding the burner assembly in place. Install the correct NOx baffle for the unit, if required, and replace the Burner Assembly using the original two screws, Figure 2.
Figure 2 | Installing NOx Baffles |
or |
|
Changing Main Burner Orifices
1.Remove the gas burner orifices from the manifold assembly using a box end wrench or socket wrench, figure 3, and re- place them with the proper orifice size for the specific fur- nace model, input size, and altutude from table 1.
Figure 3 | Changing Orifices |
|
|
|
|
2.Tighten the orifices so they are 13/16″ from the face of the orifice to the backside of the manifold (See Figure 4). Make sure orifice is installed straight so that it forms a right angle (90°) to the manifold.
| 462 06 1211 00 |
3/17/06 |
